provided. Make sure that light lenses are in the correct position in relation to direction of equipment travel: amber lenses on the outside, red lenses on the inside facing rear of shredder.
3.Install light bracket on end of shredder using 1/2 NC x
4.Plug ends of wiring harness into corresponding plugs of the light units (Note: left side of wishbone harness is labeled “Left”).
5.Run wiring harness along top of shredder and secure with enclosed
6.Connect
5.Dual lamp,
6.Dual lamp,
8.Clamp,
9.1/4 NC x 1" Hex bolt
10.1/4 NC Hex nut
11.1/4" Lock washer
12.1/4" Flat washer
20.Wiring harness
21.Dual light bracket
Figure 49. Safety Light Kit Diagram (Non-End Tow)
Figure 50. Safety Light Installed - Rear View
Figure 51. Safety Light Installed - Front View
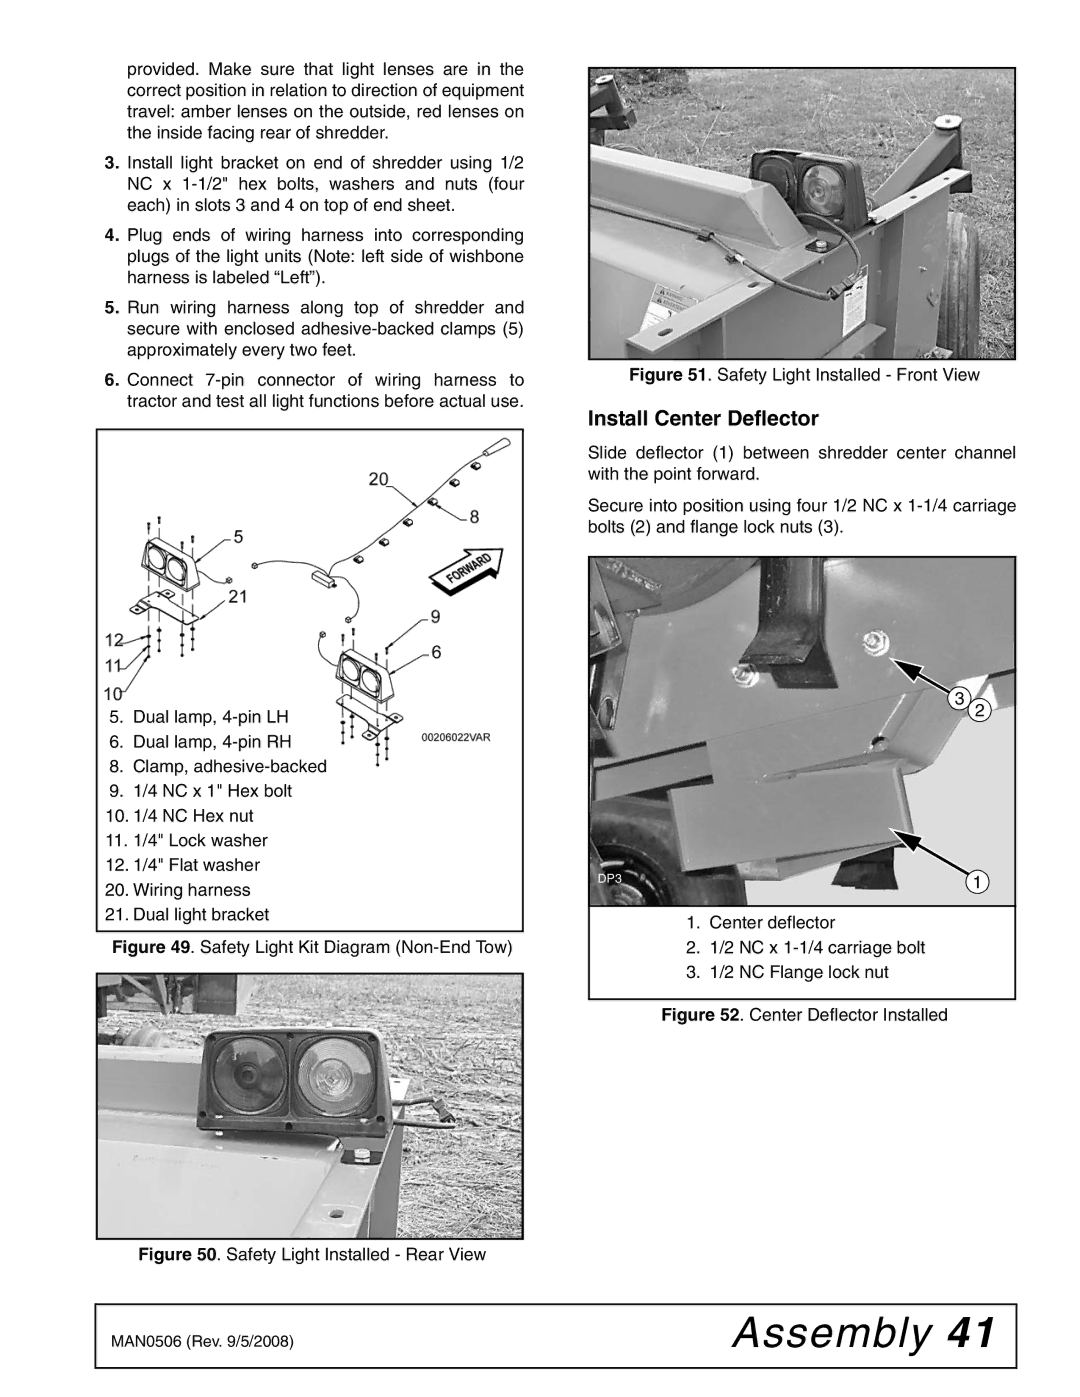
Install Center Deflector
Slide deflector (1) between shredder center channel with the point forward.
Secure into position using four 1/2 NC x
3 2
DP3 | 1 |
1.Center deflector
2.1/2 NC x
3.1/2 NC Flange lock nut
Figure 52. Center Deflector Installed
MAN0506 (Rev. 9/5/2008) | Assembly 41 |
|
|