.
Figure 14. Optional Flail Contour
Figure 15. “L” Flails
Figure 16. Cup Flails
Setting Flail Height
1.Be sure wheels are set to follow in the center of furrow row. Set flails 3 to 6 inches (75 to 150 mm) above the ground. (See Balance Statement, page 5.)
2.Align the unit with the working area on or between rows on flat farming.
3.
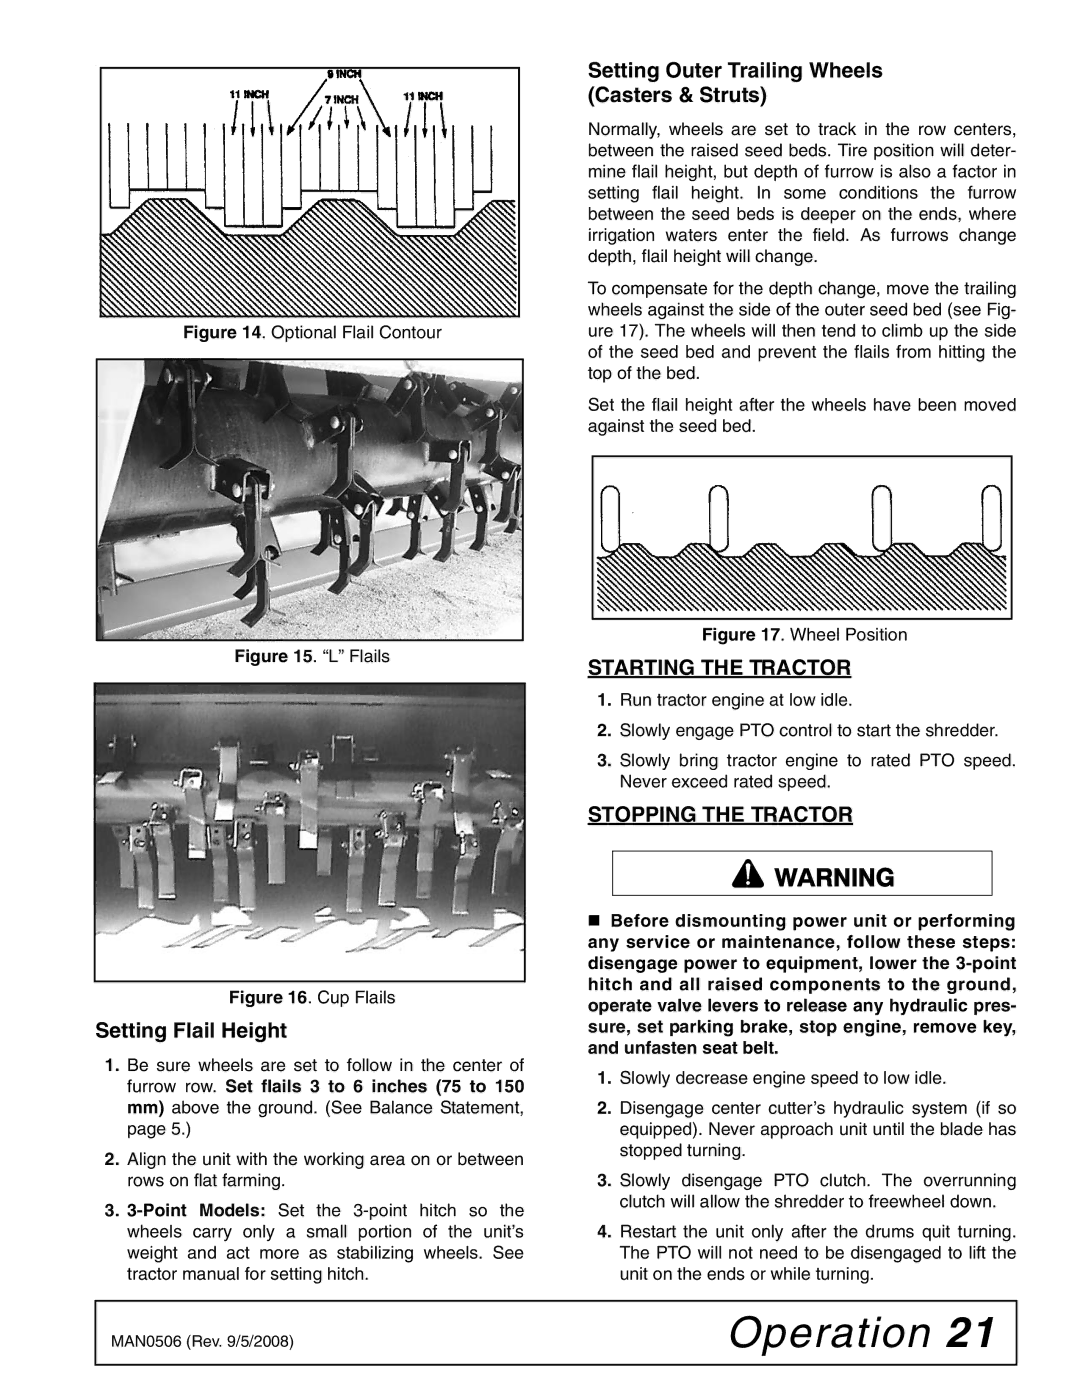
Setting Outer Trailing Wheels (Casters & Struts)
Normally, wheels are set to track in the row centers, between the raised seed beds. Tire position will deter- mine flail height, but depth of furrow is also a factor in setting flail height. In some conditions the furrow between the seed beds is deeper on the ends, where irrigation waters enter the field. As furrows change depth, flail height will change.
To compensate for the depth change, move the trailing wheels against the side of the outer seed bed (see Fig- ure 17). The wheels will then tend to climb up the side of the seed bed and prevent the flails from hitting the top of the bed.
Set the flail height after the wheels have been moved against the seed bed.
Figure 17. Wheel Position
STARTING THE TRACTOR
1.Run tractor engine at low idle.
2.Slowly engage PTO control to start the shredder.
3.Slowly bring tractor engine to rated PTO speed. Never exceed rated speed.
STOPPING THE TRACTOR
Before dismounting power unit or performing any service or maintenance, follow these steps: disengage power to equipment, lower the
1.Slowly decrease engine speed to low idle.
2.Disengage center cutter’s hydraulic system (if so equipped). Never approach unit until the blade has stopped turning.
3.Slowly disengage PTO clutch. The overrunning clutch will allow the shredder to freewheel down.
4.Restart the unit only after the drums quit turning. The PTO will not need to be disengaged to lift the unit on the ends or while turning.
MAN0506 (Rev. 9/5/2008) | Operation 21 |
|
|