HTR-5940
AV Receiver
OWNER’S MANUAL
•Explanation of Graphical Symbols
IMPORTANT SAFETY INSTRUCTIONS
Note to CATV system installer
FCC INFORMATION for US customers
We Want You Listening For A Lifetime
CAUTION: READ THIS BEFORE OPERATING YOUR UNIT
CONTENTS
Built-in 6-channelpower amplifier
FEATURES
Sound field features
Other features
Installing batteries in the remote control
Supplied accessories
GETTING STARTED
13 2
Front panel
CONTROLS AND FUNCTIONS
Notes
8Front panel display
Controlling this unit
Remote control
Notes
8Cursor buttons u / d / j / i, ENTER
Controlling the TUNER functions
Using the remote control
8A–ECAT. j / i, PRESET/CH u / d
4Numeric buttons
1 2 3
Front panel display
9 0 A
D E F G
FHeadphones indicator
VOLTAGE SELECTOR Asia and General models only
Rear panel
Placing speakers
CONNECTIONS
Front speakers FL and FR
Center speaker C
Notes
Connecting speakers
CENTER terminals
FRONT terminals
SURROUND terminals
SURROUND BACK terminals
Connecting the speaker cable
Connecting the banana plug
except U.K., Europe and Asia models
Audio jacks
Information on jacks and cable plugs
Video jacks
Notes
Audio signal flow for AUDIO OUT REC
Audio and video signal flow
Video signal flow for MONITOR OUT
AUDIO
CONNECTIONS
Connecting a TV
Y PB PR
COMPONENT VIDEO Y PBPR
Notes
Connecting a DVD player
U.S.A. model
DVD Player
Connecting an STB
Connecting a DVD recorder or a VCR
CONNECTIONS
Y PB
U.S.A. model
CD Player
MD recorder or tape deck
Audio in
Connecting a game console
a video camera or a portable audio player
Notes
Connecting the FM and AM antennas
Connecting the AM loop antenna
Notes
AC OUTLETS SWITCHED
Connecting the power cable
VOLTAGE SELECTOR Asia and General models only
Memory back-up
2,5 2,4
Setting the speaker impedance
SP IMP.-8MIN
SP IMP.-6MIN
Setting this unit to the standby mode
Turning on the power
POWER
CONNECTIONS
BASIC SETUP
BASIC SETUP
ROOM: S >M L
2,12
SUBWOOFER..YES
CANCEL
>SET
SPEAKERS..6spk
FR ----||
CHECK OK? ..YES
9Press j / i to select the desired setting
12Press SET MENU to exit from “BASIC SETUP”
AUTO
PLAYBACK
0dB L R
TREBLE
TV Sports
Notes
Using SILENT CINEMA
USING OTHER FEATURES
Muting the audio output
Selecting the night listening mode
AUTO
Selecting the input mode
Notes
Notes
SLEEP 120minL R
Using the sleep timer
STRAIGHT L R
SLEEP OFF
Adjusting the speaker level
Selecting the Compressed Music Enhancer mode
ENHANCER 2CH L R
Notes
Enjoying unprocessed input sources
Selecting the MULTI CH INPUT component
Enjoying multi-channelsources in 2-channelstereo
MULTI CH INPUT
Enjoying pure hi-fistereo sound
Displaying the input source information
DIRECT STEREO
STRAIGHT
Signal format
Playing video sources in the background
Channel in
Sampling frequency fs
ENJOYING SURROUND SOUND
Enjoying multi-channelsources in surround
Notes
Notes
Enjoying 2-channelsources in surround
Using Virtual CINEMA DSP
the remote control to select the source
RECORDING
Notes
1 Turn on all the connected components
Automatic tuning
FM/AM TUNING
1440
A AM 1530 kHz L R
Manual tuning
1440 kHz
FM or AM
Automatic preset tuning
A1:FM 87.5 MHz L R
Automatic preset tuning options
Manual preset tuning
A AM 630 kHz
630 kHz
C3 AM 630 kHz
Selecting preset stations
C3:AM 630 kHz L R
Notes
E1:FM 87.5 MHz L R
Exchanging preset stations
1,3 1,3
E1:FM 87.5 MHz L R
EDIT E1-A5 L R
A5:FM 90.6 MHz
XM SATELLITE RADIO TUNING
Information from XM Satellite Radio Inc
Notes
XM Satellite Radio controls and functions
Remote control functions
Front panel functions
1 2 3 4
Activating XM Satellite Radio
XM RADIO
Notes
XM SATELLITE RADIO TUNING
Basic XM Satellite Radio operations
VOLUME
AMP SOURCE TV
SEARCH
Selecting the XM Satellite Radio search mode
2 3 4
All Channel Search mode
Category Search mode
SEARCH
2 3 4
PRESET SEARCH L R
Preset Search mode
2 3
CH SEARCH
Direct Number Access mode
<XM>123
<XM>
Setting the XM Satellite Radio
preset channels
040 Deep Tra L R
C 040 Deep
C5 040 Deep L R
C5:040 Deep L R
Displaying the XM Satellite Radio information
<CAT>Rock
Coldplay / Clo L R
040 Deep Tra L R
SOUND FIELD PROGRAMS
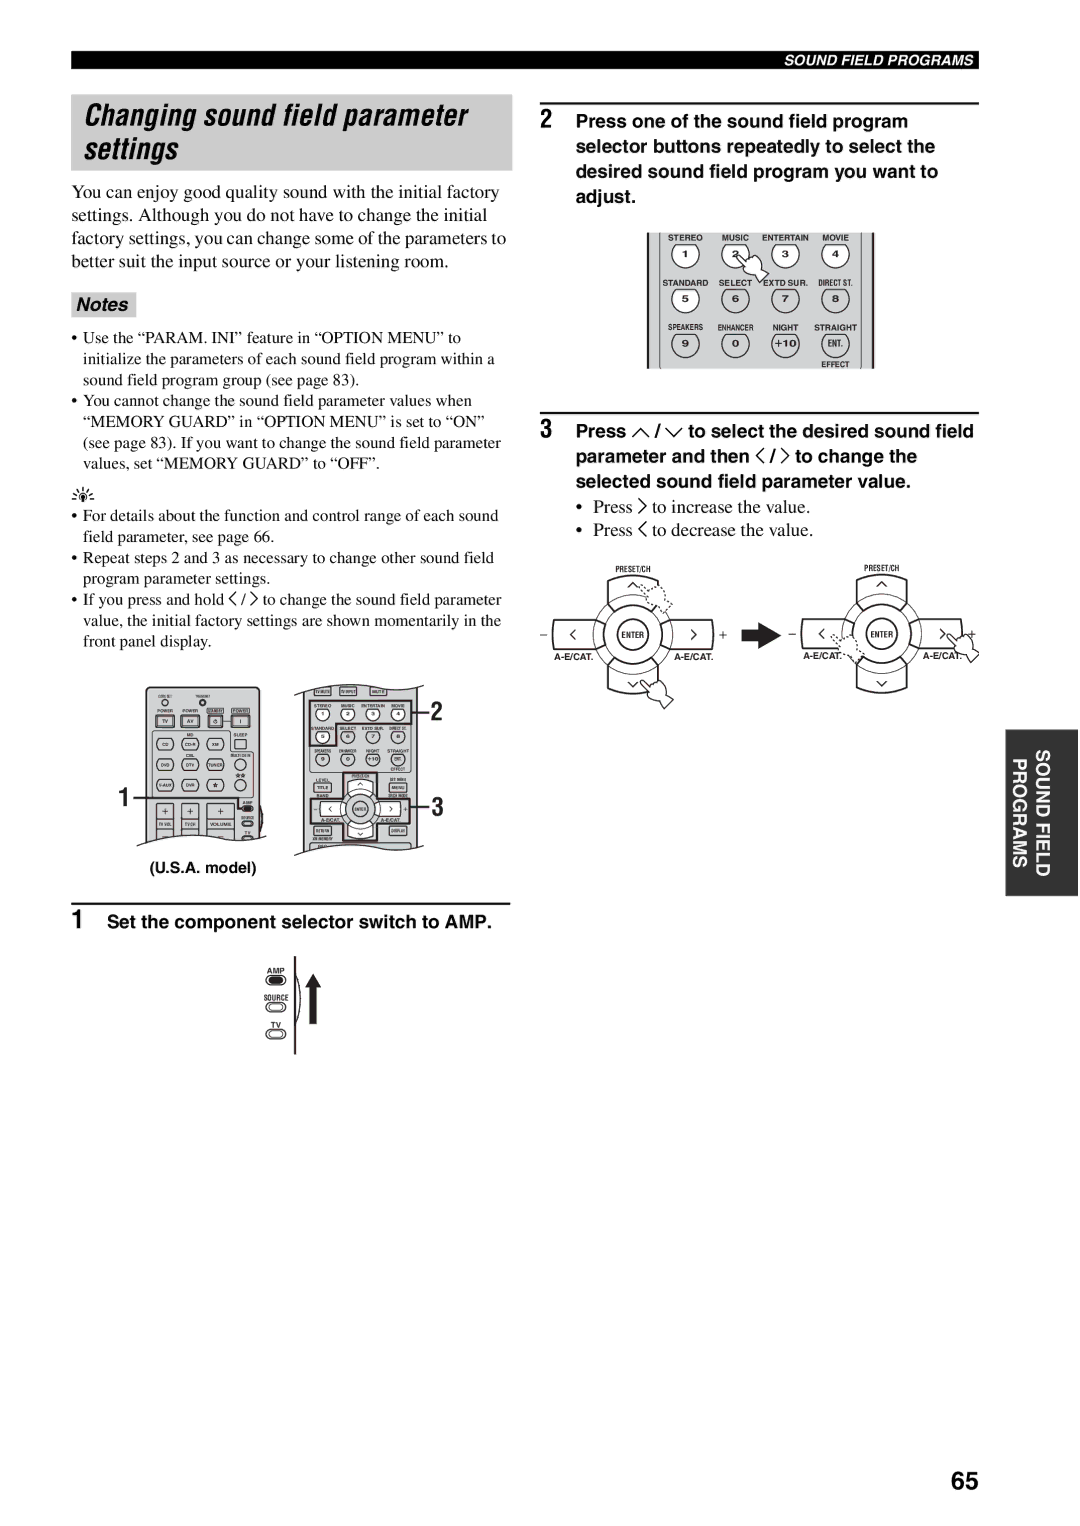
Remote control operations
Selecting sound field programs
Elements of a sound field
Sound field program descriptions
For movie/video sources
Notes
For music sources
Notes
Changing sound field parameter settings
DSP LEVEL
Sound field parameter descriptions
INIT. DLY
P.INIT.DLY
LIVENESS S.LIVENESS SB LIVENESS
ROOM SIZE P.ROOM SIZE S.ROOM SIZE SB RM SIZE
Control range: 0.1 to
Control range 0 to
REV.TIME
REV.DELAY
Control range: 1.0 to 5.0 s
Control range: 0 to 250 ms
2ch Stereo
REV.LEVEL
DIRECT
6ch Stereo
PRO LOGIC IIx Music PRO LOGIC II Music PANORAMA
PRO LOGIC IIx Music PRO LOGIC II Music DIMENSION
PRO LOGIC IIx Music PRO LOGIC II Music CT WIDTH
DTS Neo 6 Music C. IMAGE
Sound field program speaker layouts
MOVIE THEATER Spectacle Sci-Fi Adventure General
SUR. ENHANCED
BASIC SETUP BASIC SETUP
MANUAL SETUP MANUAL SETUP
SET MENU
ADISPLAY SET
Option menu 3 OPTION MENU
BMEMORY GUARD
CPARAM. INI
BASIC SETUP
MANUAL SETUP
Using SET MENU
1 SOUND MENU
ENTER to select and enter the desired submenu
5Press u / d repeatedly and then press
7Press SET MENU to exit from “SET MENU”
Memory back-up
1 SOUND MENU
Speaker settings ASPEAKER SET
Speaker level B SP LEVEL
FL ----||
Speaker distance CSP DISTANCE
100Hz--||--0 dB
Center graphic equalizer DCENTER GEQ
Low-frequencyeffect level ELFE LEVEL
2 INPUT MENU
Audio settings GAUDIO SET
Dynamic range FD. RANGE
Input assignment
Notes
DVD My DVD
XM Radio setting EXM RADIO SET U.S.A model only
Display settings ADISPLAY SET
3 OPTION MENU
Parameter initialization CPARAM. INI
1,2,5 2,4
ADVANCED SETUP
SP IMP.-8MIN
Notes
Remote control AMP ID REMOTE AMP
Factory presets PRESET
Remote control TUNER ID REMOTE TUN
Remote control XM ID REMOTE XM U.S.A. model only
Controlling this unit, a TV, or other components
REMOTE CONTROL FEATURES
Controlling a TV
Controlling this unit
Notes
Controlling other components
Remote Control Code Default Settings
Setting remote control codes
to select the component you want to set up
1Press one of the input selector buttons or
Setting remote control AMP ID library codes
Setting library codes
Setting remote control TUNER ID library codes
Notes
Setting remote control XM ID library
Resetting all remote control codes
codes U.S.A. model only
Notes
PRESET-RESET
RESETTING THE SYSTEM
1-2,5
PRESET-CANCEL
General
TROUBLESHOOTING
Page
page
NO SIGNAL
Tuner
XM Satellite Radio U.S.A. model only
CHECK ANTENNA
The remote control
Remote control
page
does not work nor
Audio information
GLOSSARY
Dolby Digital
Dolby Digital EX
Composite video signal
Component video signal
S-videosignal
Video information
CINEMA DSP
Sound field program information
SILENT CINEMA
Virtual CINEMA DSP
AUDIO SECTION
SPECIFICATIONS
VIDEO SECTION
FM SECTION
APPENDIX-i
LIST OF REMOTE CONTROL CODES
OTHER VIDEO ACCESSORIES
CABLE TV RECEIVER
APPENDIX-ii
APPENDIX-iii
LD PLAYER
APPENDIX-iv
DVD PLAYER
DVD RECORDER
TAPE DECK
APPENDIX-v
CD PLAYER
TUNER
APPENDIX-vi
2006 All rights reserved
WG73630
NS-P430/ NS-P436
OWNER’S MANUAL
NS-P430/NS-P436 NX-430P+ NX-C430 +YST-SW015
IMPORTANT SAFETY INSTRUCTIONS
FCC INFORMATION for US customers only
We Want You Listening For A Lifetime
UNPACKING
For YST-SW015
CAUTION: Read this before operating your unit
IMPORTANT SAFETY INSTRUCTIONS
CONTENTS
USING THE SUBWOOFER YST-SW015
COMPONENTS OF THE PACKAGE
SETTING UP THE SPEAKERS
Speaker configuration
Placing speakers
Placing the center speaker
Placing the subwoofer
Main/rear/rear center for NS-P436
Center
Center
Main/rear/rear center for NS-P436 Center
Removing the front cover
An example of basic connections
CONNECTIONS
Page
speakers
Before connecting
Controls and their functions
USING THE SUBWOOFER YST-SW015
E-11
Automatic power-switchingfunction
3 8 5 1,
Adjusting the subwoofer before use
Frequency characteristics of this subwoofer
Frequency characteristics
When combined with NX-430P
YST-SW015
E-14
For YST-SW015
TROUBLESHOOTING
SPECIFICATIONS
NX-430P, NX-C430
YST-SW015