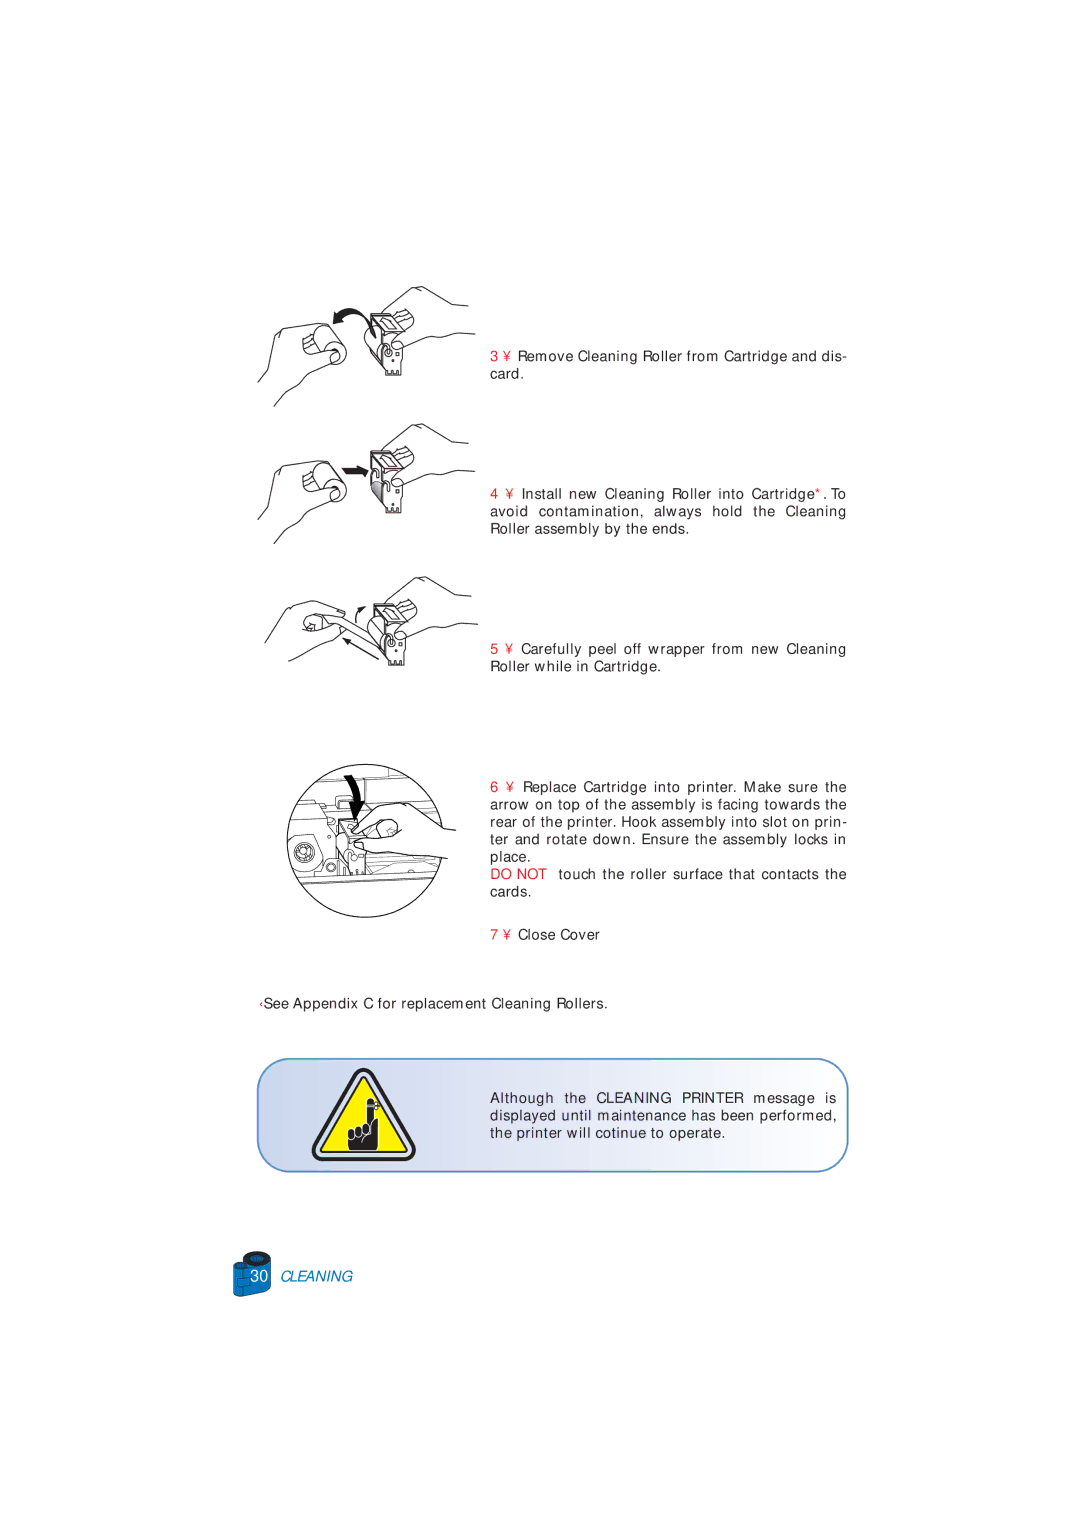
3 • Remove Cleaning Roller from Cartridge and dis- card.
4 • Install new Cleaning Roller into Cartridge*. To avoid contamination, always hold the Cleaning Roller assembly by the ends.
5 • Carefully peel off wrapper from new Cleaning Roller while in Cartridge.
6 • Replace Cartridge into printer. Make sure the arrow on top of the assembly is facing towards the rear of the printer. Hook assembly into slot on prin- ter and rotate down. Ensure the assembly locks in place.
DO NOT touch the roller surface that contacts the cards.
7 • Close Cover
¨See Appendix C for replacement Cleaning Rollers.
Although the CLEANING PRINTER message is displayed until maintenance has been performed, the printer will cotinue to operate.
