Life Fitness T9i operation manual Message Center

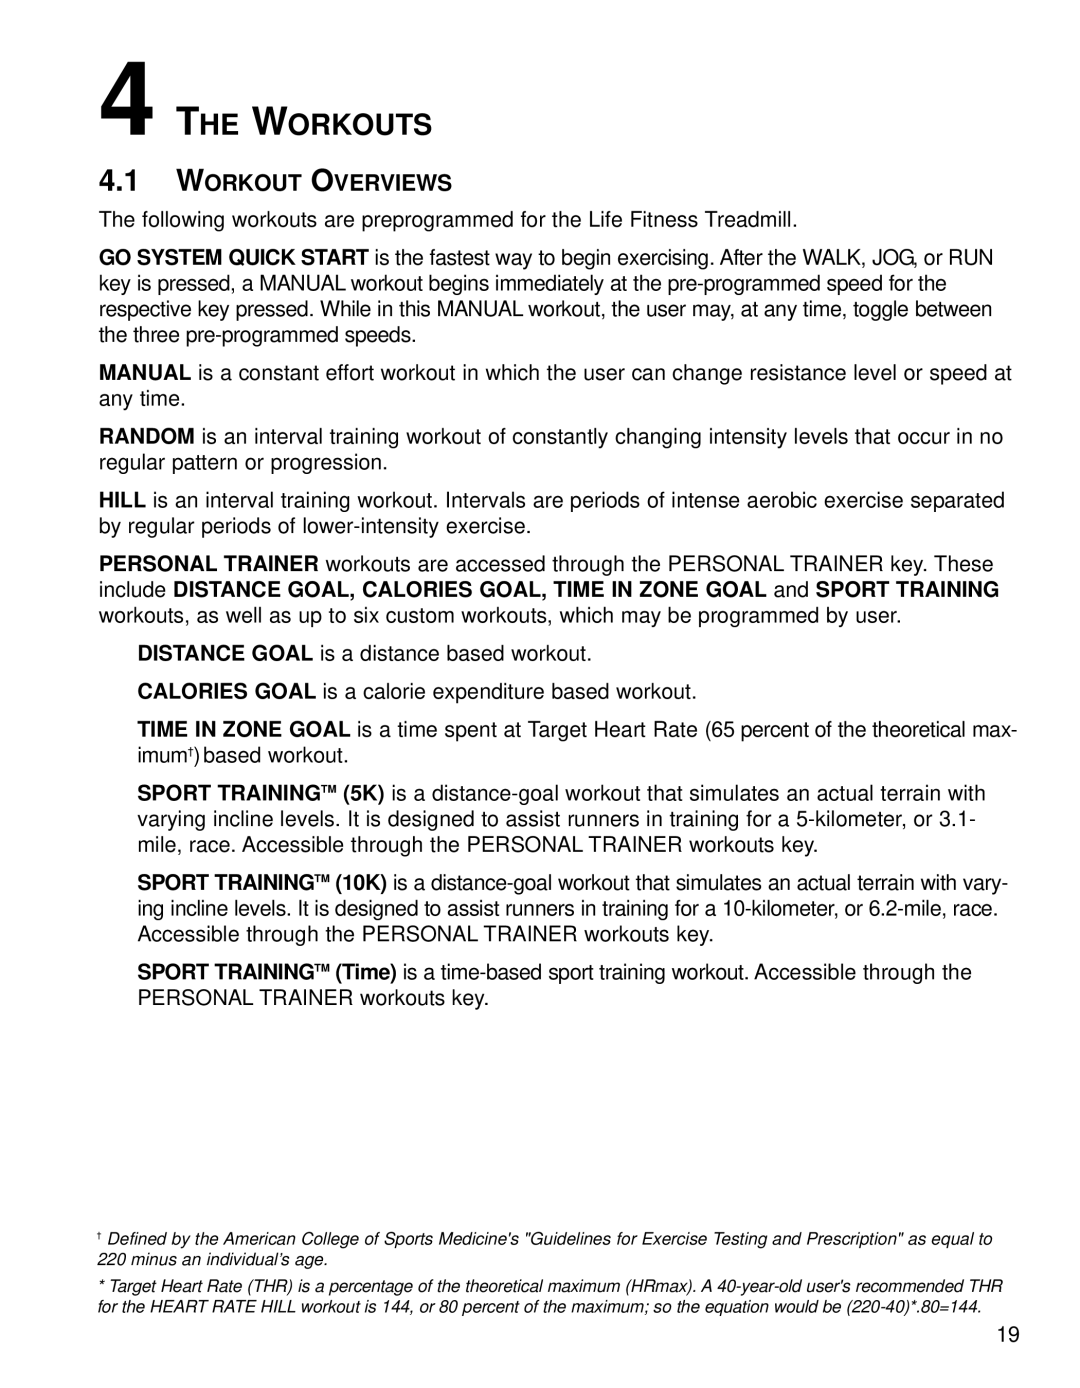
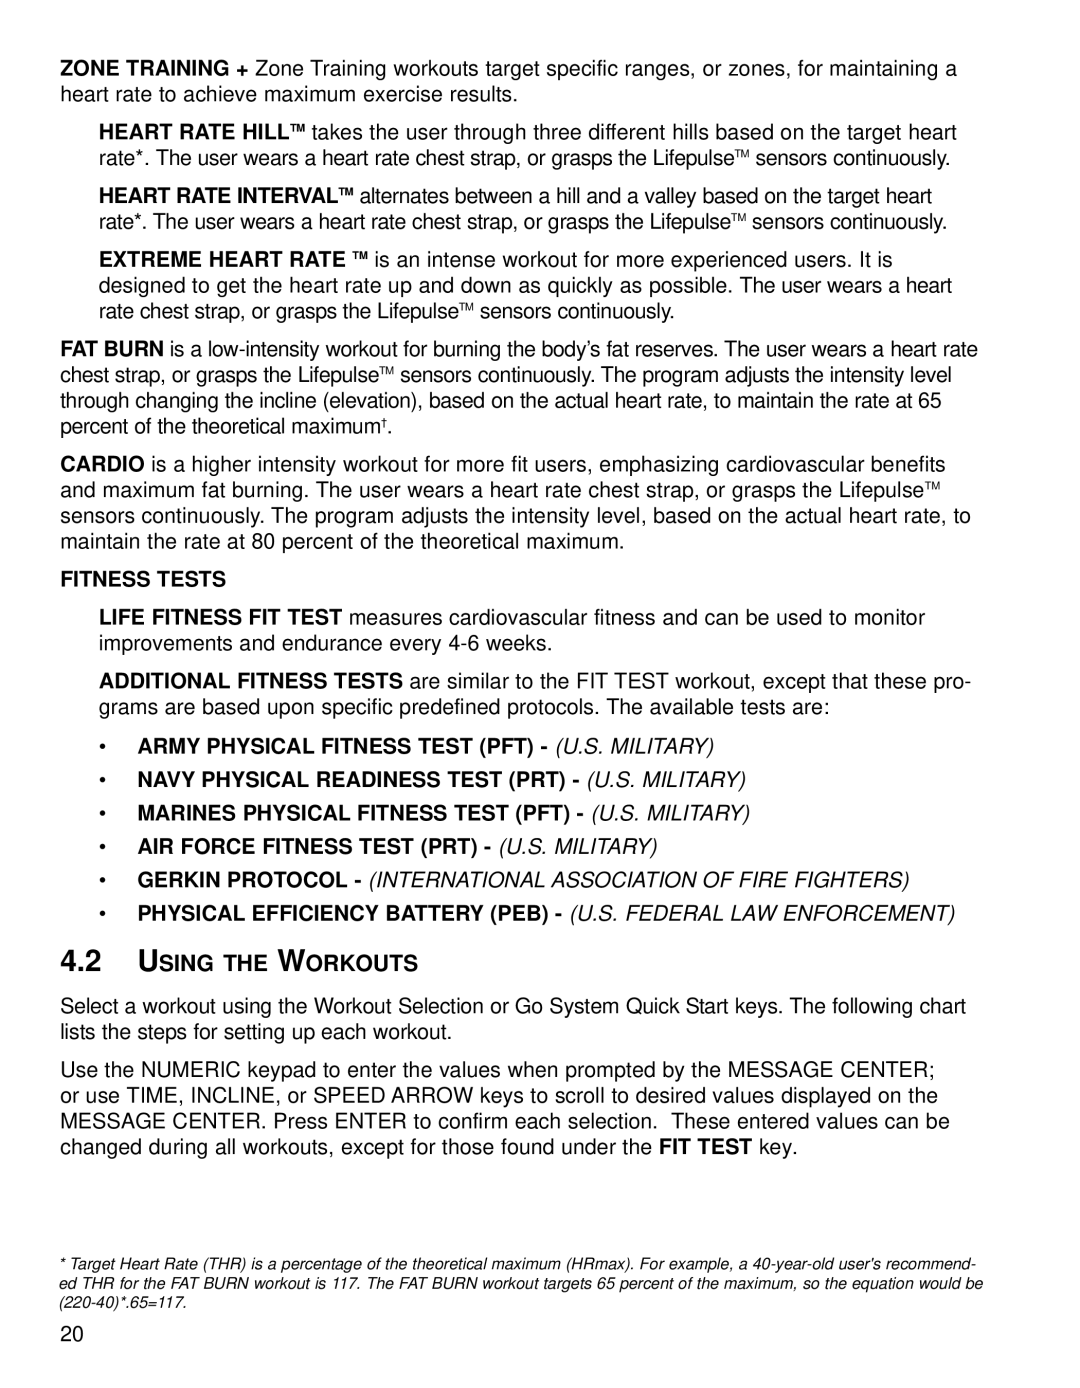
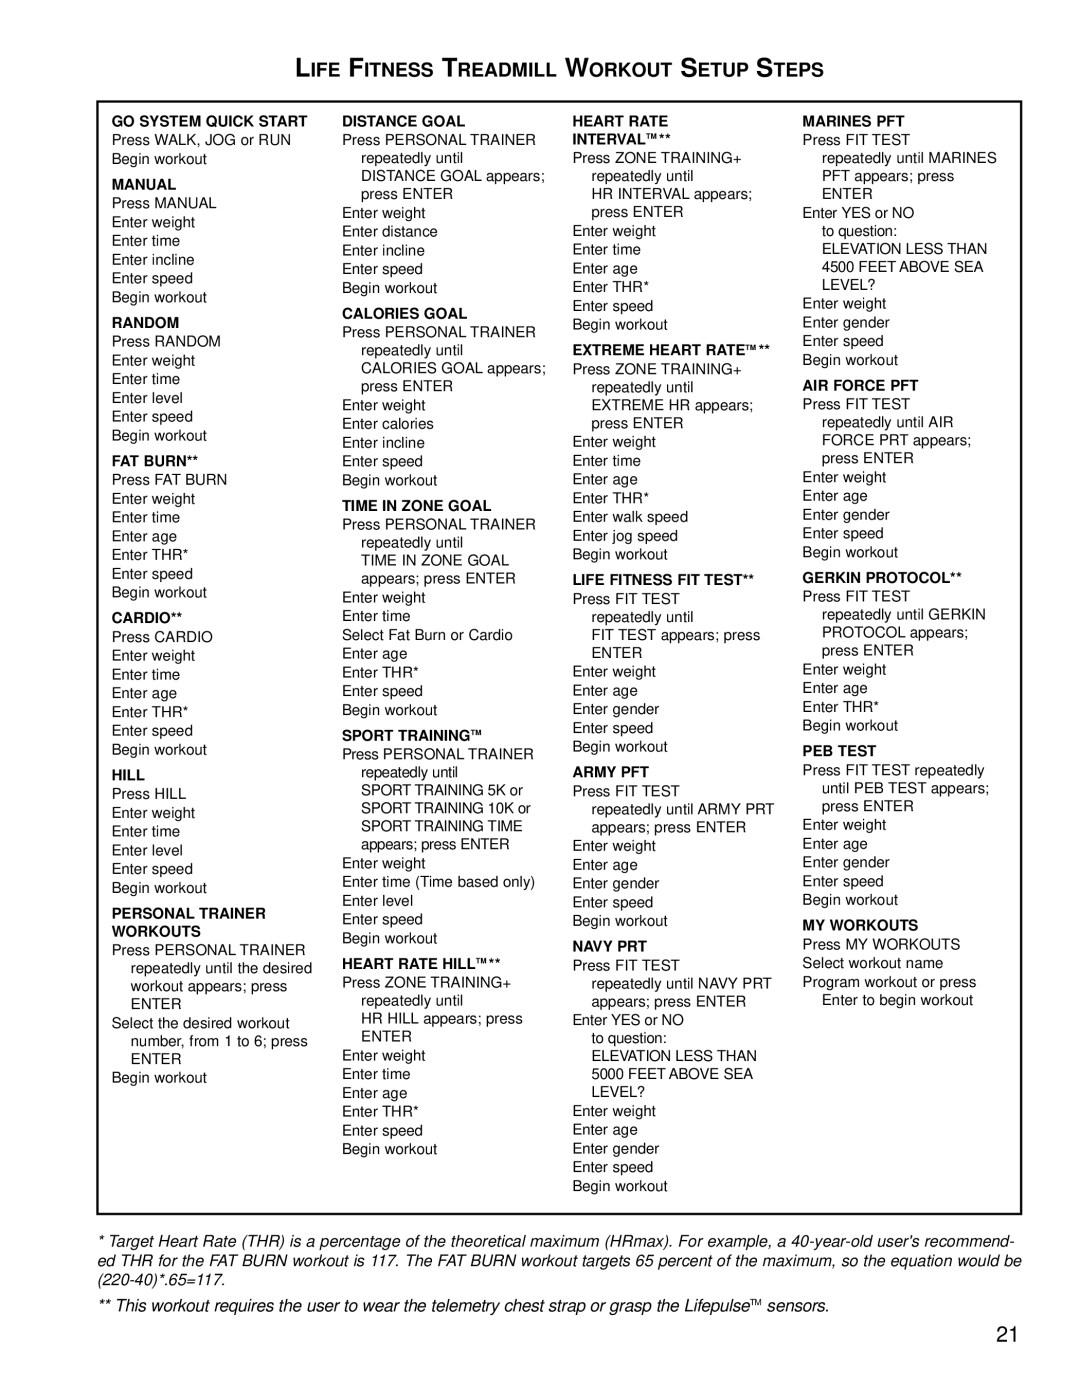
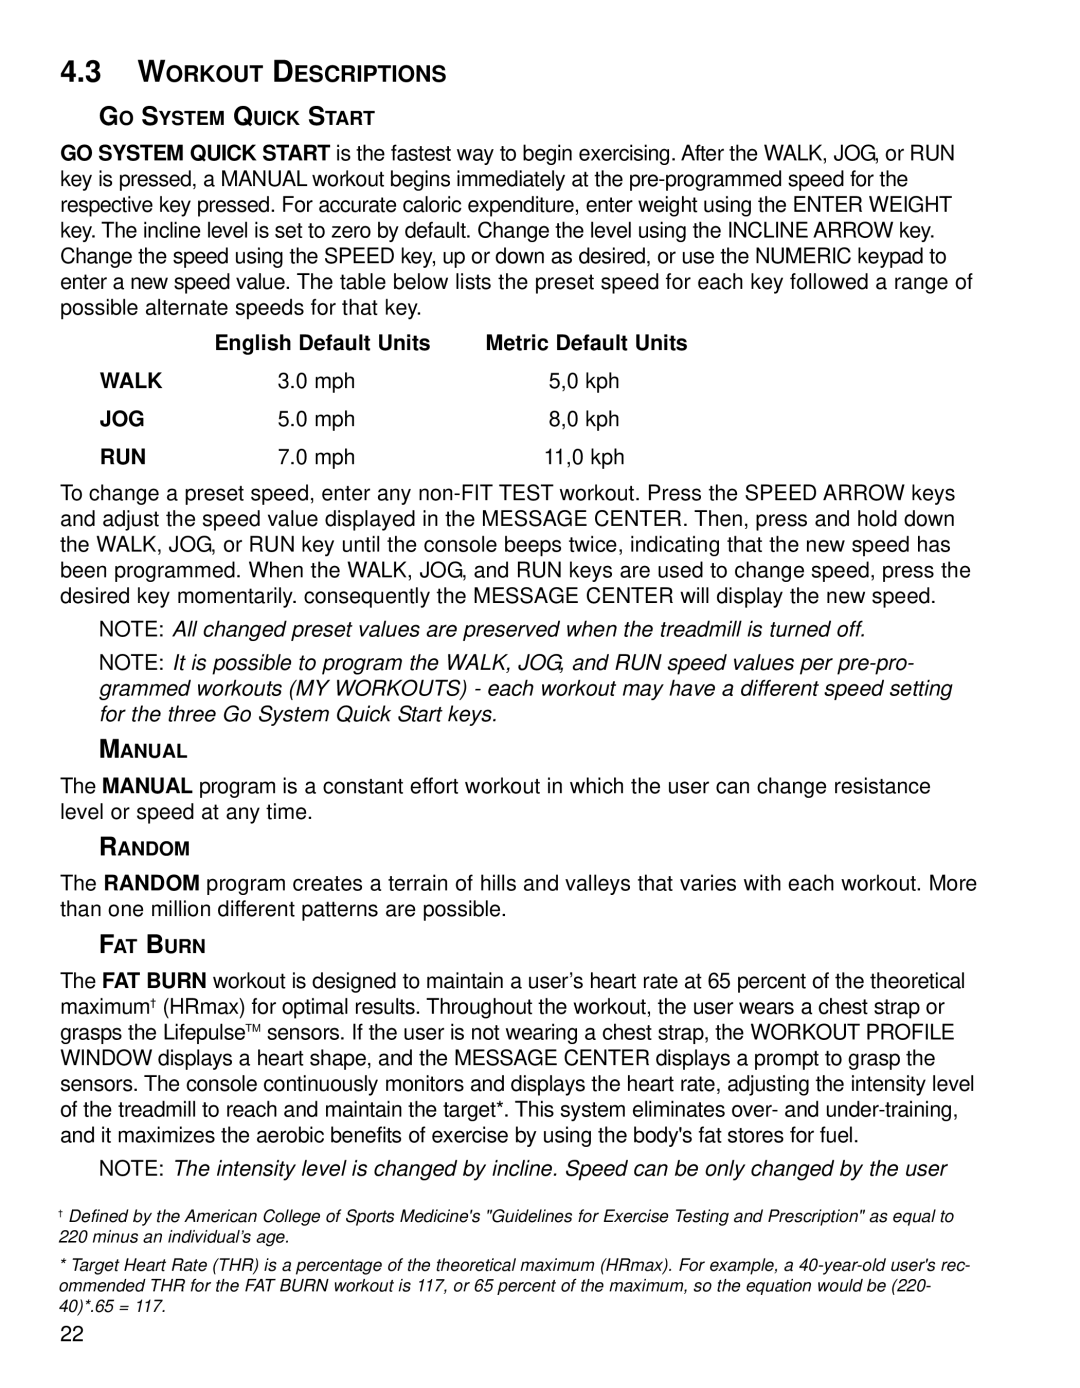
Page 16

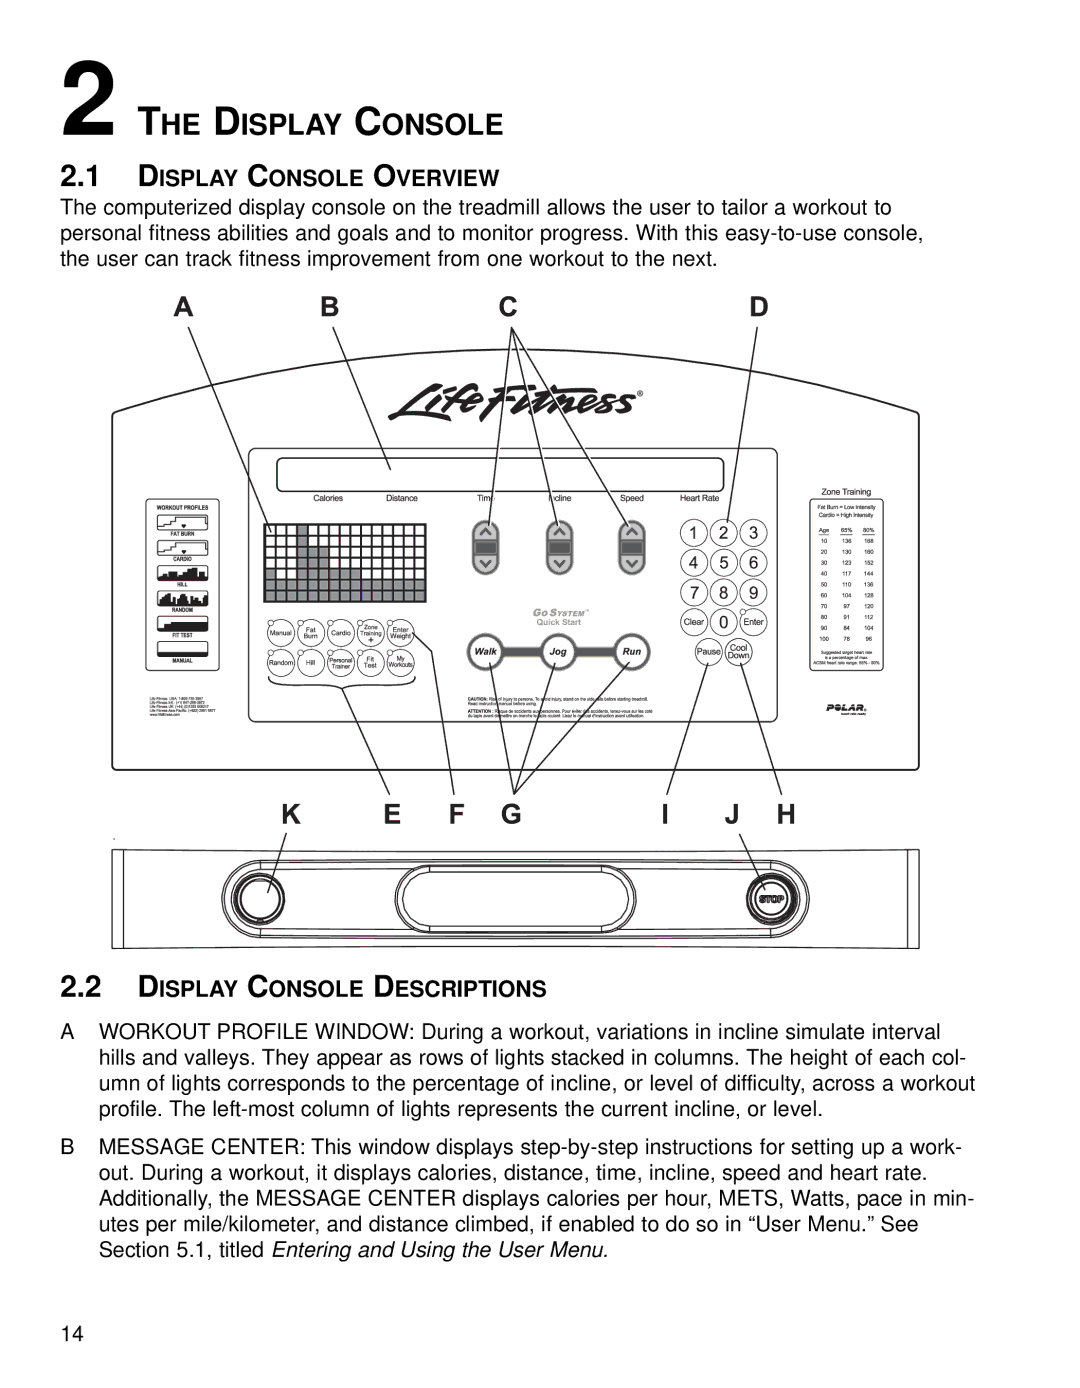
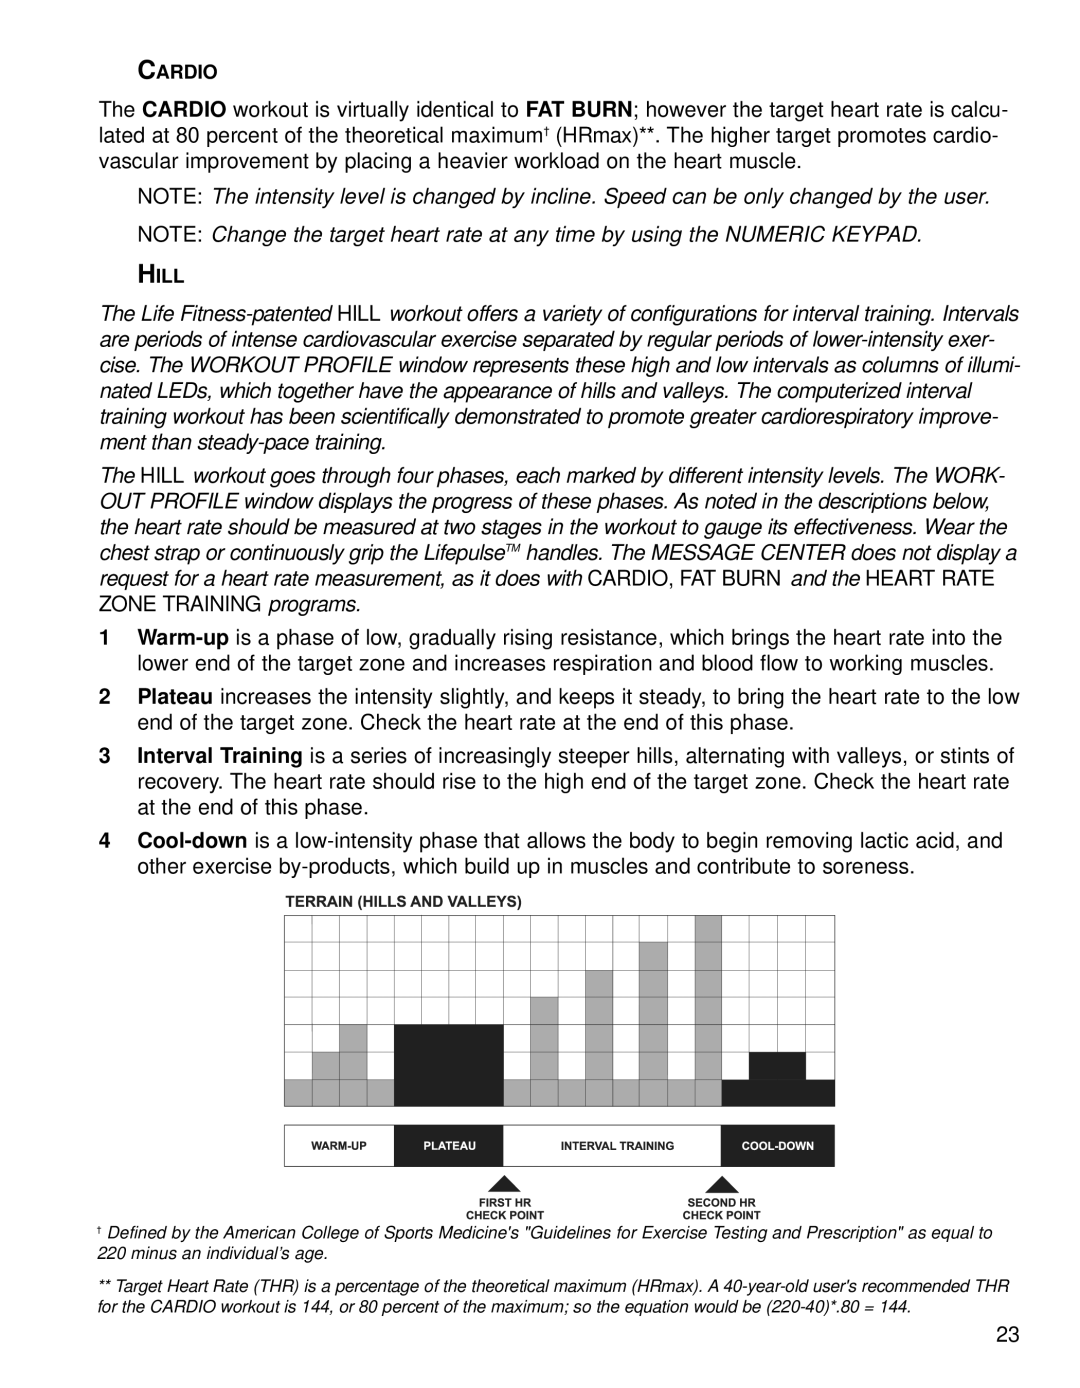
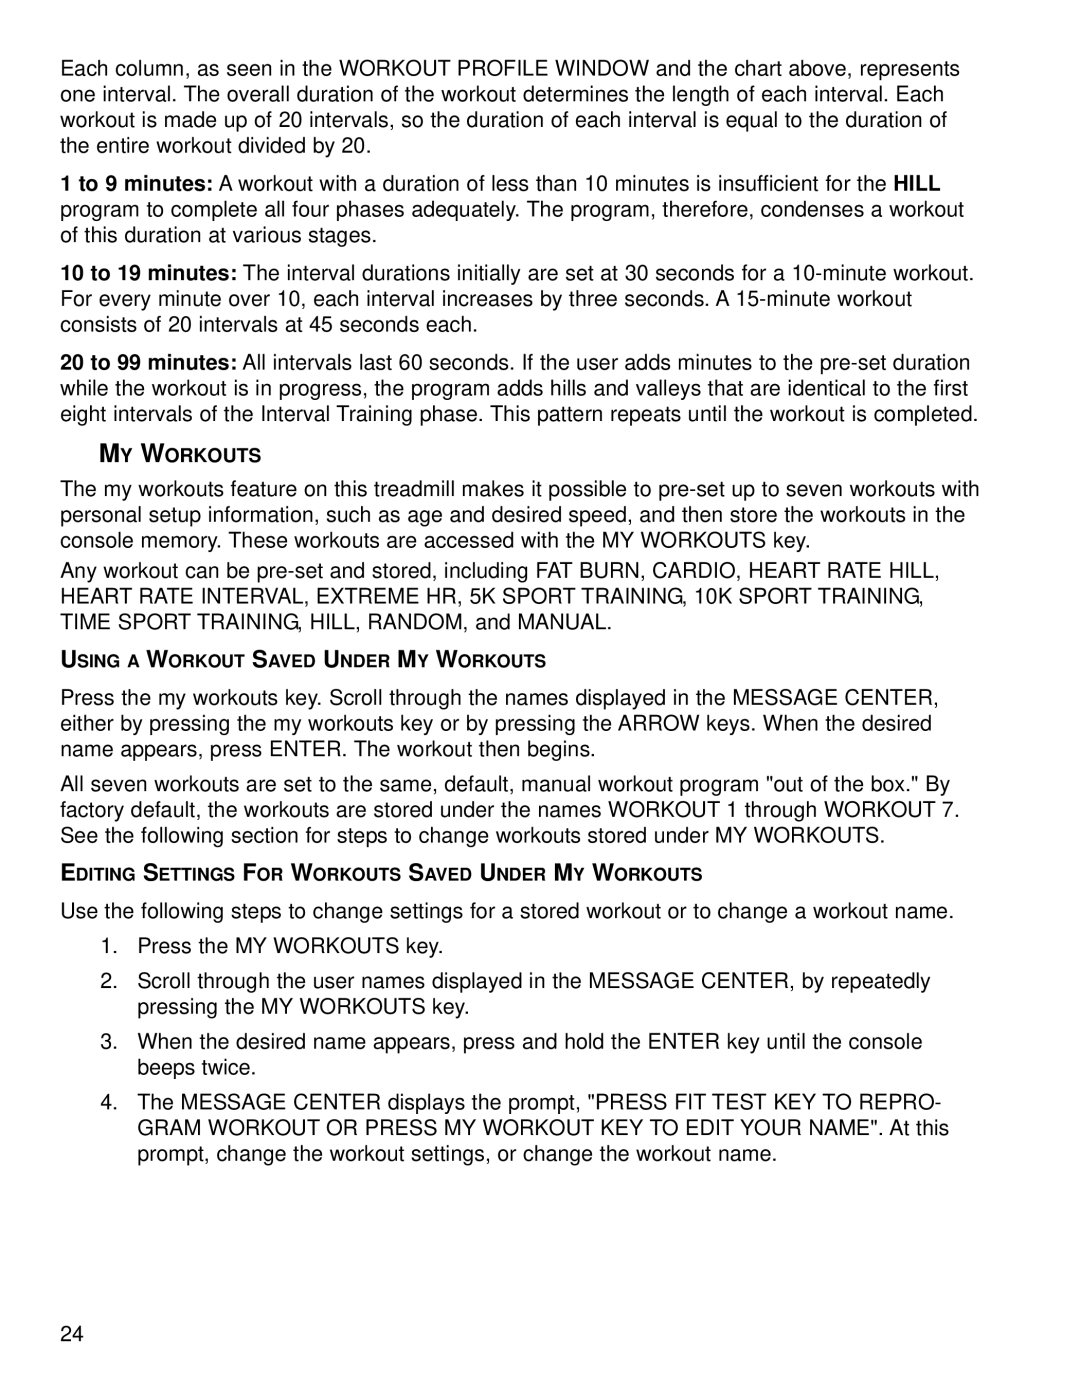
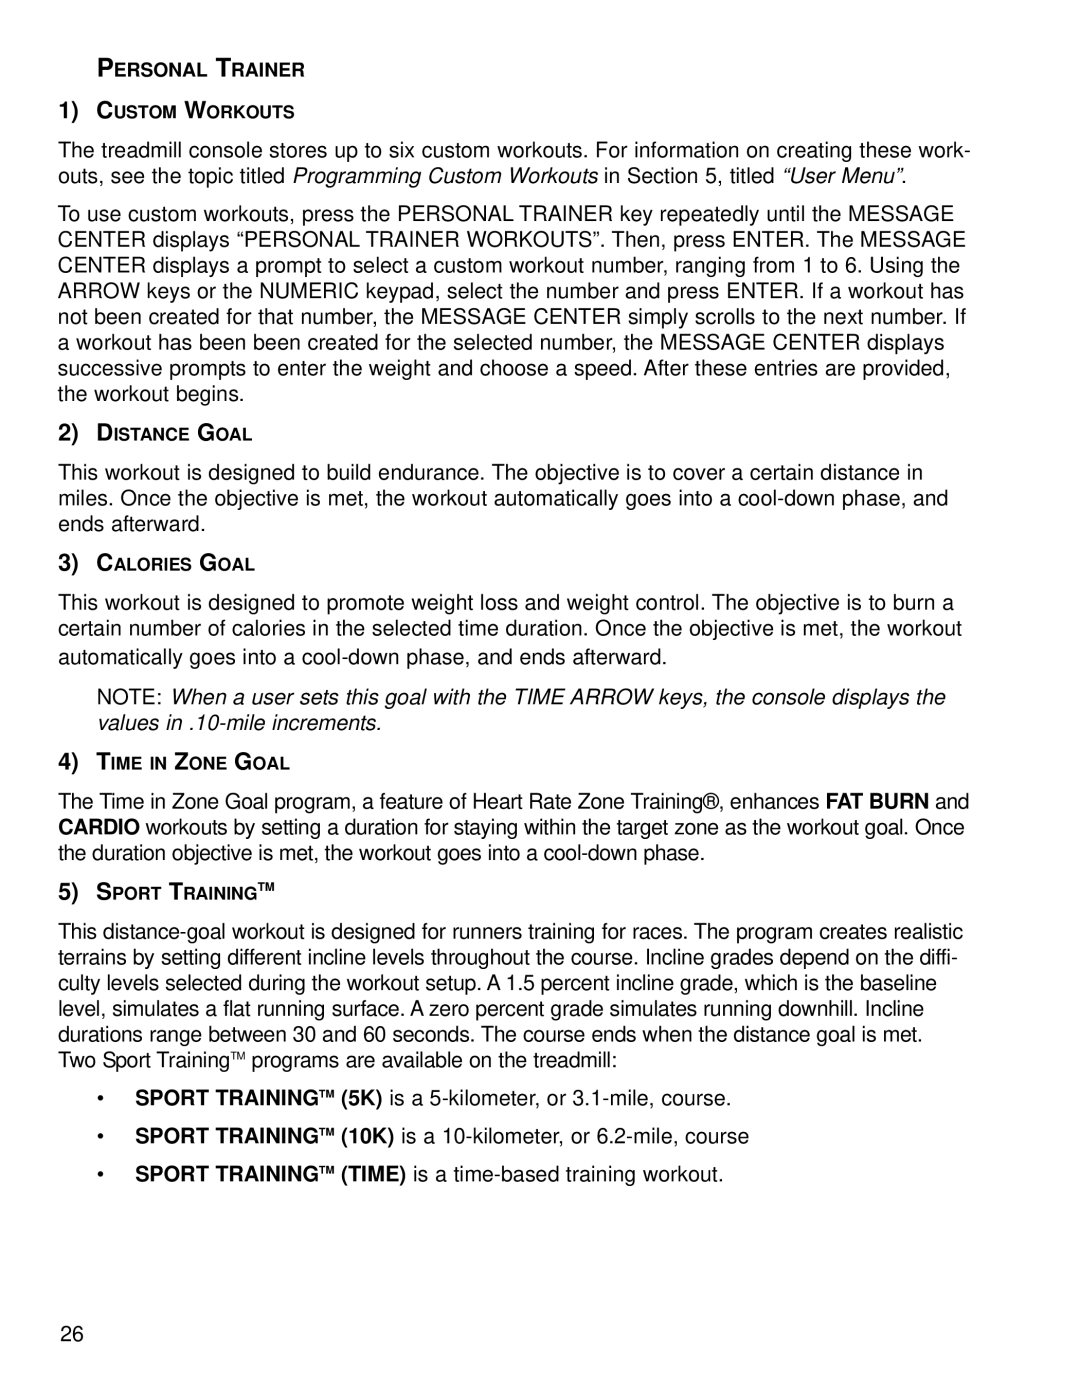
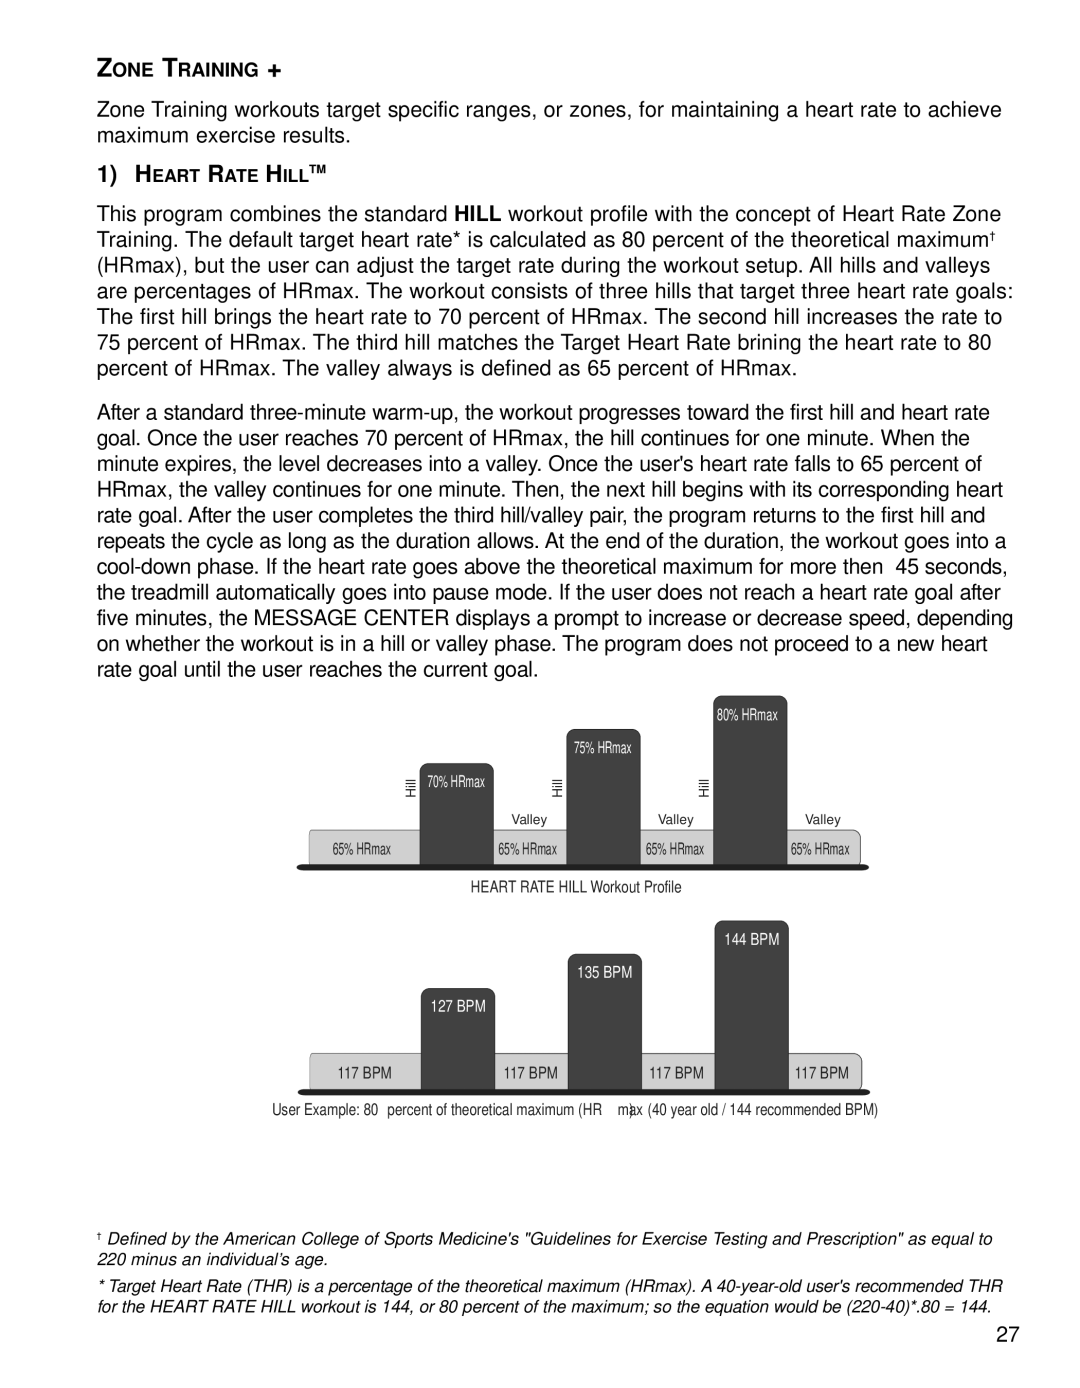
CTIME, INCLINE, and SPEED ARROW keys: Press these keys to increase or decrease the workout time, the incline of the treadmill deck, or the striding belt speed respectively. The MES- SAGE CENTER displays the input data in sections located just above the keys. Additionally, any of these keys may be pressed to set up a workout or to change “User Menu” settings.

DNUMERIC keypad: Use NUMERIC keys to enter exercise time, difficulty level, belt speed, weight, distance, goal selection, gender, and target heart rate.

CLEAR key: Press this key once to clear data not yet entered. Press it twice in succession, while programming, to reset the treadmill and restart the programming sequence.

ENTER key: Press this key to confirm entries of workout setup values, as displayed in the

MESSAGE CENTER.

EWORKOUT SELECTION keys: Press any of these keys to select the program identified on

the given key’s label. These programs include: FAT BURN, CARDIO, HILL, RANDOM, MANUAL, ZONE TRAINING +, FITNESS TESTS, PERSONAL TRAINER, and MY WORK- OUTS.

F.ENTER WEIGHT key: Press this key to enter a user weight during a QUICK START work- out. Use the TIME ARROW keys or the NUMERIC keypad to enter a weight value.

GGO SYSTEM QUICK START keys: Press any of the Walk, Jog, or Run keys to begin a manual workout immediately, without having to select a workout program. Once the workout is in progress, use the ARROW keys or the NUMERIC keypad to change the intensity level or workout duration as desired.

HCOOL DOWN key: Press this key to begin an automatically customized workout cool-down.

IPAUSE key: Press this key to stop the belt and hold the current workout. Continue the work- out by pressing the PAUSE key a second time or by pressing the ENTER key.

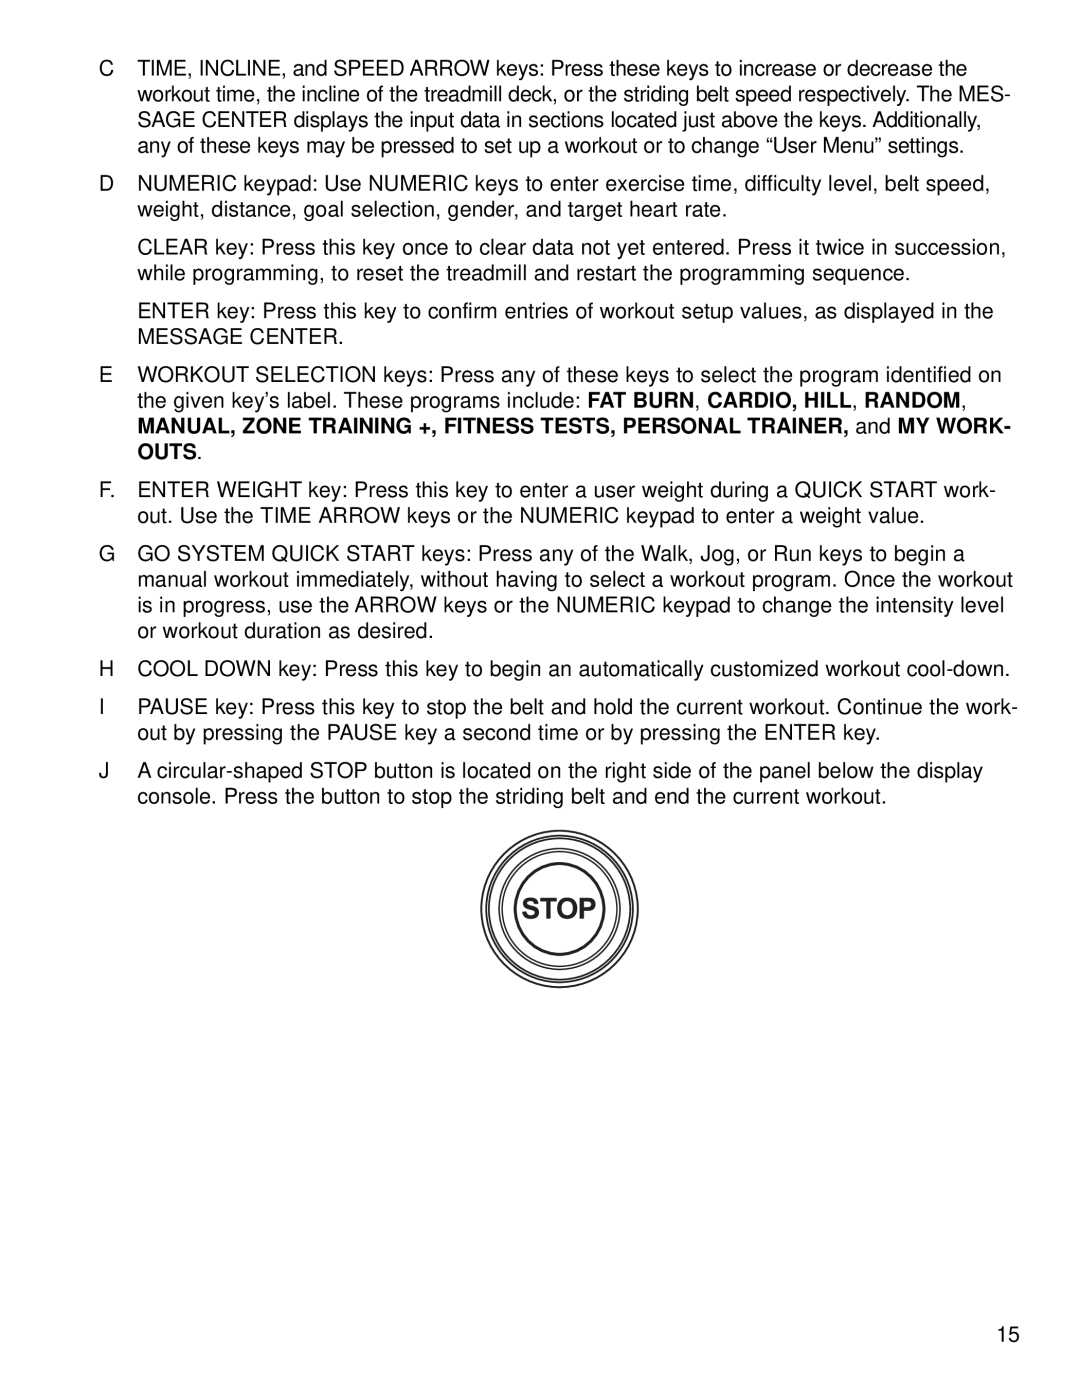
JA circular-shaped STOP button is located on the right side of the panel below the display console. Press the button to stop the striding belt and end the current workout.

15

Image 16
Contents T9i Treadmill Corporate Headquarters International OfficesPage Table of Contents Page Page Important Safety Instructions For Future Reference Consignes DE Sécurité Importantes Conserver CES Instructions Pour Tout Usage Ultérieur Electrical Power Requirements SetupGrounding Instructions Power Switch HOW to Position and Stabilize the Life Fitness TreadmillCentering the Belt Service Access Port Power Cord RoutingPage Display Console Overview Display Console DescriptionsMessage Center Reading Rack and Accessory Trays WHY Heart Rate Zone Training EXERCISE? Heart Rate Zone Training ExerciseLifepulsetm System Heart Rate MonitoringHeart Rate Chest Strap Workouts Workout OverviewsUsing the Workouts Fitness TestsLife Fitness Treadmill Workout Setup Steps Personal Trainer WorkoutsWorkout Descriptions GO System Quick StartManual RandomCardio HillMY Workouts To Change Settings for a Stored Workout Personal Trainer Zone Training + 127 BPMHeart Rate Intervaltm Warm-up Fitness Tests Inactive Active Very ActiveLower Half of Range Upper Half of Range Rating 20-29 30-39 40-49 50-59 60+ Marines PFT 3.0 miles Using Instapacetm Feedback Using Zerouttm Speed ControlMaximizing Workouts on a Life Fitness Treadmill Selecting a LevelCOOL-DOWN DimmingEntering and Using the User Menu MY ConfigurationUser Menu Items User StatisticsUsing the Start Message Setup Programming Custom WorkoutsCREATING/CHANGING a Start Message User Menu Settings Setting Default Range Description Value User StatisticsXXXX.XX XxxxxxxService and Technical Data Preventive Maintenance TipsPreventive Maintenance Schedule Troubleshooting the Treadmill Malfunction Probable Cause Corrective ActionMalfunction Probable Cause Corrective Action Troubleshooting the Treadmill Troubleshooting the Heart Rate Chest Strap Heart Rate Reading is Erratic or Absent EntirelyBelt Tensioning Bolts HOW to Adjust and Tension the Striding BeltTracking Centering a Striding Belt Tensioning AN Existing Striding Belt HOW to Obtain Product Service Specifications Life Fitness T9I Treadmill SpecificationsPage Life Fitness World Headquarters