Precor M9.57 manual Checking the Alignment and Adjusting the Running Belt

Page 92

Checking the Alignment and Adjusting the Running Belt

Proper belt alignment allows the belt to remain centered and ensures smooth operation. Realigning the belt takes a few simple adjustments. If you are unsure about this procedure, contact Precor Customer Support. Refer to Obtaining Service.

To check the alignment:

CAUTION: Special care must be taken when aligning the running belt. Turn Off the treadmill while adjusting or working near the rear roller. Remove any loose clothing and tie back your hair. Be very careful to keep your fingers and any other object clear of the belt and rollers, especially in front of the roller and behind the deck. The treadmill will not stop immediately if an object becomes caught in the belt or rollers.

1.Turn the unit On.

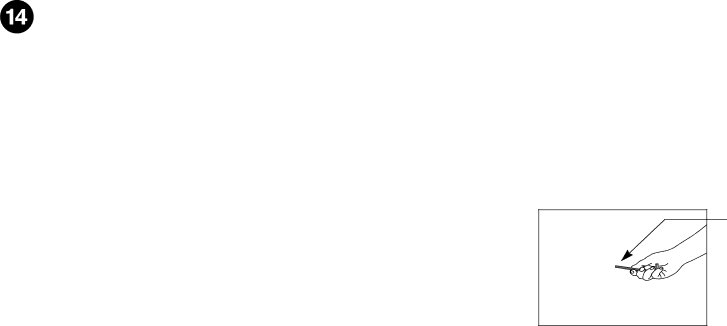
2.Stand beside the treadmill and press QUICKSTART.

3.If needed, enter the password. Refer to your owner’s manual.

The running belt starts automatically after a 3-second countdown appears on the display.

4.Press the SPEED ▲ key until the display shows a speed of 3 mph (5 kph).

CAUTION: If you hear any chafing or the running belt appears to be getting damaged, stop the running belt immediately by pressing the red STOP button. Contact Precor Customer Support.

5.Walk around to the rear of the unit and observe the belt for a few minutes. The belt should run centered along the running bed. If the belt drifts off center, you must make adjustments. Refer to the next section.

Important: If the belt needs alignment, make the adjustments at once. Failure to align the belt may cause the belt to tear or fray, which is not covered by the Precor Limited Warranty.

6.To stop the running belt, press the red STOP button.

7.Turn the treadmill Off.

To adjust the running belt:

If you are unsure about adjusting the running belt, contact Precor Customer Support (refer to Obtaining Service).

CAUTION: For your safety, use the power switch to turn Off the treadmill before making any adjustments. Do not adjust the running belt when someone is standing on the unit.

1. Locate the right belt adjustment bolt in the rear end cap of the treadmill.

Adjustment bolt location

To determine left and right, stand at the rear of the treadmill and face the display. Make all belt adjustments on the right rear corner bolt using the hex key provided.

If the belt is off center to the LEFT, turn the adjusting bolt ¼ turn counterclockwise, which moves the running belt to the right.

If the belt is off center to the RIGHT, turn the bolt ¼ turn clockwise, which moves the belt to the left.

Important: Do not turn the adjusting bolt more than ¼ turn at a time. Overtightening the bolt can damage the treadmill.

2. Recheck the alignment of the running belt.

M9.57 Low-Impact Treadmill Assembly Guide

8

Image 92
Contents M9.57 Page Important Safety Instructions Grounding Instructions Safety Code Safety ApprovalGrounding Instructions Units Designated for U.S. MarketsRadio Frequency Interference RFI Federal Communications Commission, PartCanadian Department of Communications Débranchez avant de réparerObtaining Service Page Table of Contents Precor Residential Equipment Treadmill Safety Features Using the Safety ClipTurning the Unit On and Off Entering the Safety CodeUsing the Handrails Weight Limit LocationHeart Rate Features Important Use and Safety InformationHeart Rate Target Zones Using the Heart Rate Touch-Sensitive Handrail Grips Using SmartRate Heart rate target zones and SmartRate LEDsExercise to Your Target Heart Rate Heart Rate Analysis Display Console Heart Rate displays provide an area toMore Information about Lower Display More Information about the Upper DisplayMore Information about Center Display Column 1 Time Elapsed and Time Remaining Column 2 InclineColumn 3 Speed Column 4 DISTANCE, Pace and Average SpeedKeypads Lower Display Keypad and the Selection KeysPage User ID Keys Navigational KeypadPage Programs Keypad Available programsNumber Keypad User Identification Adding a User Answer the prompts for weight, age, and gender Updating User InformationChanging the User Name and Clearing Workout Statistics Workout Options QuickstartChoosing Quickstart Selecting a Program Selecting a User ID Setting Display Preferences Before Exercising Cooling Down After a WorkoutPausing During a Workout or the Cool-Down Period QuickstartEnding a Workout Programs Choosing a ProgramProgram Tips Manual ProgramInterval Programs IntervalRandom Program Walk in the Park ProgramDistance Goal Program Custom ProgramsClearing the Settings in a Custom Program Heart Rate ProgramsHeart Rate Program Tips HRC Weight Loss Programs Weight Loss5K Program 10K ProgramTrack Program One Mile ProgramTwo Mile Program Fitness Test ProgramFitness Test Tips Fitness Test Scores Cardio respiratory Fitness Score Category-FemalesExercise Session Changing Programs in Mid-sessionRecording Your Personal Best Time Changing the Workout Time Adjusting Program Goals Changing Your Workout Metrics Display OptionsWorkout statistics available in the Metrics menu Adjusting Your Target Heart Rate Changing the Units of MeasureChanging Safety Code Protection EnabledAdvanced Programming and Troubleshooting Advanced Programming TipsChanging Treadmill Settings Setting a Pause Time LimitSetting a Cool-Down Time Limit Setting the Speed LimitInformational Displays Viewing the OdometerViewing the Hour Meter Viewing the Software Part NumbersViewing the Serial Number Viewing the Usage LogViewing the Error Log Troubleshooting Error Codes Troubleshooting Heart RateInspection MaintenanceCleaning the Equipment Storing the Chest Strap Checking the Alignment Running BeltAdjusting the Running Belt Contact Precor Customer SupportLong-Term Storage Precor Residential Equipment Limited Warranty Limited WarrantyThis limited warranty shall not apply to Exclusion of Consequential and Incidental Damages Thank You and Welcome to Precor Tell US about Your NEW Precor Product Page Product Specifications M9.57 Low Impact TreadmillCopyright 2006 Precor Incorporated Use the Safety Clip QuickstartChoose a Program Assembly Guide Page Required Tools Hardware Kit Power cord clip F ¼-inch hex key G ³⁄₁₆-inch hex key H Assembly Steps Important Do not wrench tighten the screws until the unit Replace the hood and secure it Attach the power cord clips F Checking the Alignment and Adjusting the Running Belt Page Precor Incorporated