XM Satellite Radio R-672 manual About the speaker size, When selecting the Speaker Distance

Page 45

R-672(A) 2007.6.15 10:17 AM 페이지 45

Continued

4. Repeat the above steps 2 and 3 until the speakers are all set to the desired mode.

About the speaker size

Select “L” (Large) or “S” (Small) not according to the actual size of the speaker but according to the speaker's capacity for playing low frequency (bass sound below frequency set on the SPEAKER CROSSOVER menu) signals.

If you do not know, try comparing the sound at both settings (setting the volume to a level low enough so as not to damage the speakers) to determine the proper setting.

When setting the speaker size by performing the auto setup, depending on whether the measured crossover frequency of each speaker is lower or higher than 80 Hz, its size is automatically set to “L" (Large) or “S" (Small). (For details, refer to "When selecting the SPEAKER CROSSOVER" on page 46.)

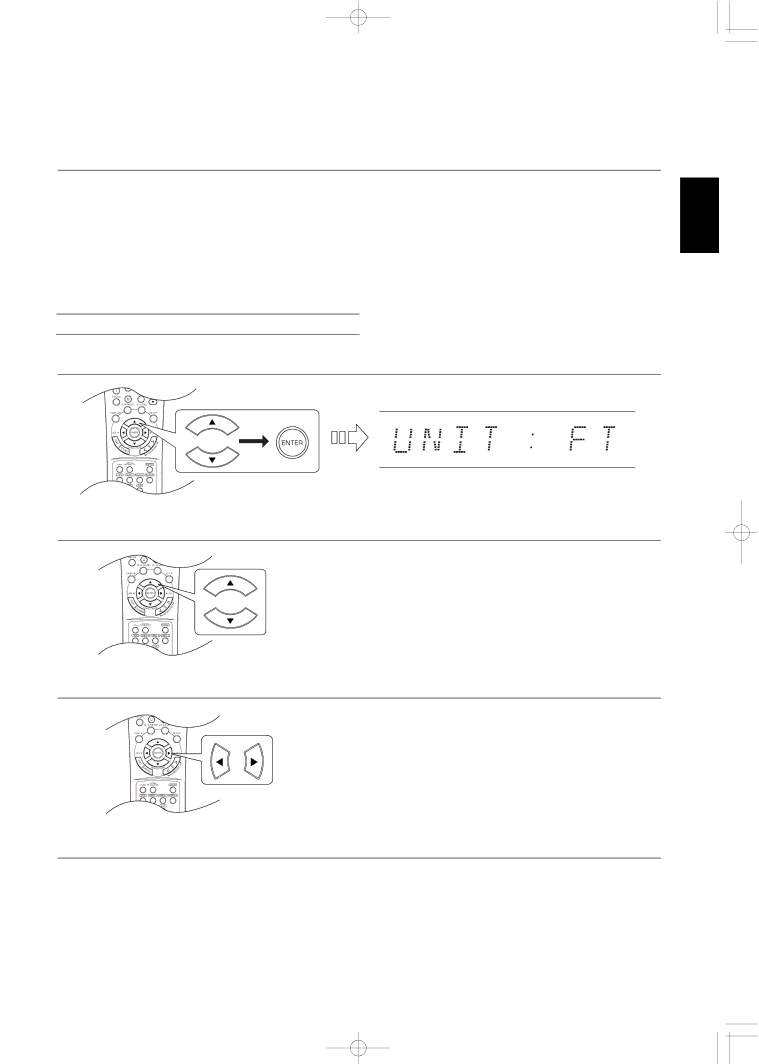
When selecting the SPEAKER DISTANCE

1. Press the CURSOR UP()/DOWN() buttons to select the “DISTANCE”, then press the ENTER button.

2. Press the CURSOR UP()/DOWN() buttons to select the desired item.

Note :

• You cannot select the subwoofer and the speakers set to "N" (None).

3. Press the CURSOR LEFT()/RIGHT() buttons to set the selected item as desired.

When selecting the desired unit

• You can select either “M” (Meter) or “FT” (Feet).

• Once a unit is selected, the distances are automatically changed in the selected unit.

When setting the distance

• You can set the distance within the range of 0.1 ~ 9.0 meters in 0.1 meter intervals (or 0 ~ 30 feet in 0.5 feet intervals).

4. Repeat the above steps 2 and 3 until the distances are all set as desired .

About the speaker distance

When enjoying multi-channel surround playback with Dolby Digital and DTS sources, etc., it is ideal that the center, surround and surround back speakers should be the same distance from the main listening position as the front speakers. By entering the distance between the listening position and each speaker, the delay times of center, surround and surround back speakers are automatically adjusted to create an ideal listening environment virtually as if the center, surround and surround back speakers were at their ideal locations respectively.

ENGLISH

45

Image 45
Contents CoverA2007.6.15957AM페이지 Safety Instructions Read this Before Operating Your Unit IntroductionContents System Connections Connecting AntennasHDMIHigh Definition Multimedia Interface connection Connecting Video ComponentsConnecting Audio Components Connecting External INS Connecting Digital INS and OUTDigital input default settings Connecting XM only for North America Connecting Subwoofer PRE OUTConnecting Speakers Surround back speakersAC Input Cord Switched AC OutletsFluorescent Display Front Panel ControlsSetup MIC Jack AUX in JackVideo 3 in Jacks Remote Controls Loading Batteries Remote Control Operation RangeWhen selecting the External in as desired OperationsBefore operation Operate the selected component for playback When CD, AUX, Video 1~2 is selected as an input sourceAdjusting the tone bass and treble Surround Sound Dolby Pro Logic II surround Dolby Pro Logic IIx surroundDolby Virtual Speaker Dolby Pro LogicEnjoying Surround Sound Signal format being input Selectable surround mode2CH downmix mode To cancel the surround mode for stereo operationDolby Virtual Speaker Parameters Dolby Pro Logic II/Dolby Pro Logic IIx Music ParametersDolby Headphone Parameters Adjusting each channel level with test toneAdjusting the current channel level Recalling the memorized channel levels Memorizing the adjusted channel levelsManual tuning Auto tuningAuto presetting Listening to Radio BroadcastsMemory Backup Function Manual presettingTuning to preset stations Scanning preset stations in sequenceSigning up for XM Satellite Radio XM Satellite Radio only for North AmericaChannel search Direct searchCategory search Signal strength display mode Presetting channels Preset searchError message and status Displaying XM informationRecording Dubbing the audio and video signals separately onto VideoRecording with Tape Dubbing from video components onto VideoOptical Digital OUT Digital Audio Recording with MD RecorderAdjusting the brightness of the fluorescent display Operating the sleep timerOther Functions Displaying the operation statusNavigating through the setup menu System SetupSetup menu flow English Setting the System When selecting the AMP AssignWhen selecting the Subwoofer mode When selecting the Cinema EQ When selecting the ToneWhen selecting the Digital Setting the InputWhen selecting the Auto Surround When selecting the Video ModeWhen selecting the Remaster When selecting the AV SyncWhen selecting the Auto Setup Setting the Speaker SetupPreparations About the first listening positionEnglish When setting the speaker size by performing the auto setup When selecting the Speaker ConfigurationWhen selecting the desired unit When selecting the Speaker DistanceWhen setting the distance About the speaker sizeAbout the crossover frequency When selecting the Speaker CrossoverWhen selecting the Room EQ Adjusting the current channel level Setting the CH LevelRecalling the memorized channel levels When selecting the Night Mode Setting the Sound ParameterWhen selecting the Pano Panorama mode When selecting the Dolby Plii MusicWhen selecting the C. Width Center width control When selecting the Dimen Dimension controlWhen selecting the Dolby Headphone When selecting the Dolby Virtual Speaker When selecting the REF Dolby Virtual Speaker Reference modeWhen selecting the Wide Dolby Virtual Speaker Wide mode Problem Possible Cause Remedy Troubleshooting GuideAmplifier Section SpecificationsCoverA2007.6.15957AM페이지