Before Setting Oven Controls
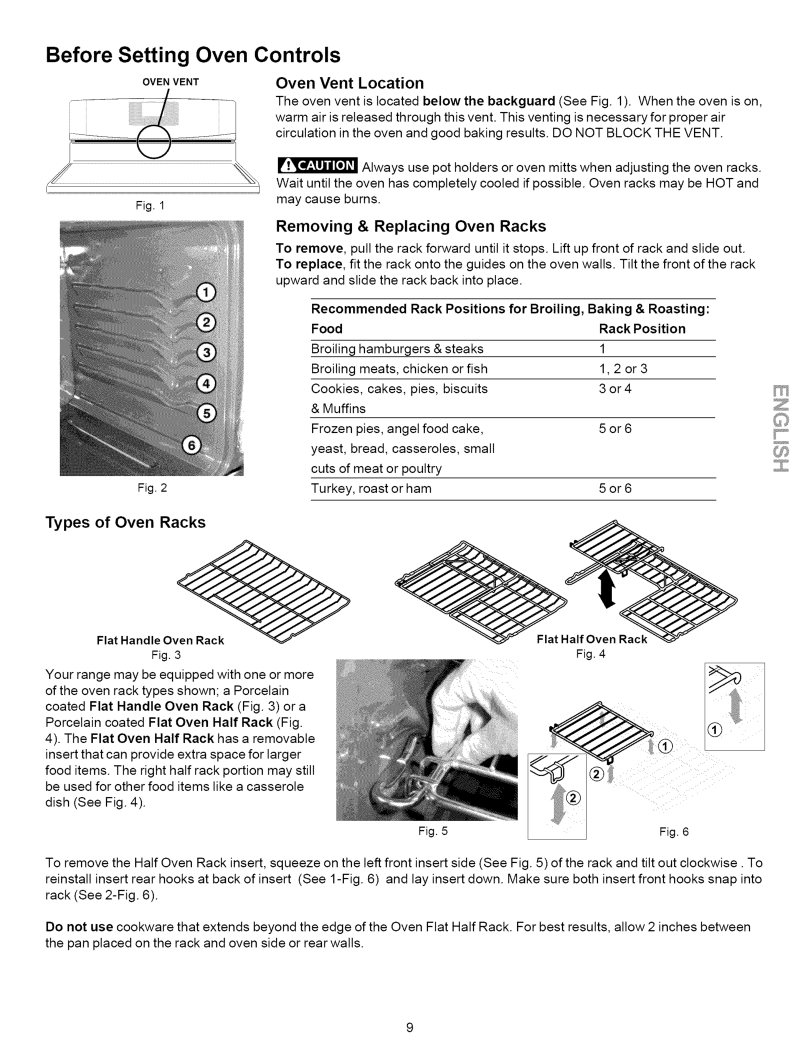
OVEN VENT
Fig. 1
Oven Vent Location
The oven vent is located below the backguard (See Fig. 1). When the oven is on, warm air is released through this vent. This venting is necessary for proper air circulation in the oven and good baking results. DO NOT BLOCK THE VENT.
Always use pot holders or oven mitts when adjusting the oven racks. Wait until the oven has completely cooled if possible. Oven racks may be HOT and may cause burns.
Removing & Replacing Oven Racks
To remove, pull the rack forward until it stops. Lift up front of rack and slide out. To replace, fit the rack onto the guides on the oven walls. Tilt the front of the rack upward and slide the rack back into place.
| Recommended Rack Positions for Broiling, Baking & Roasting: | |||
| Food |
|
| Rack Position |
| Broiling | hamburgers & steaks | 1 | |
| Broiling | meats, | chicken or fish | 1,2 or 3 |
| Cookies, | cakes, | pies, biscuits | 3 or 4 |
| & Muffins |
|
| |
| Frozen pies, angel food cake, | 5 or 6 | ||
| yeast, bread, casseroles, small |
| ||
| cuts of meat or poultry |
| ||
Fig. 2 | Turkey, | roast or ham | 5 or 6 | |
Types of Oven Racks
Flat Handle Oven Rack | Flat Half Oven Rac_ |
Fig. 3 | Fig. 4 |
Your range may be equipped with one or more |
|
of the oven rack types shown; a Porcelain |
|
coated Flat Handle Oven Rack (Fig. 3) or a |
|
Porcelain coated Flat Oven Half Rack (Fig. |
|
4). The Flat Oven Half Rack has a removable |
|
insert that can provide extra space for larger |
|
food items. The right half rack portion may still |
|
be used for other food items like a casserole |
|
dish (See Fig. 4). |
|
Fig. 5 | Fig. 6 |
To remove the Half Oven Rack insert, squeeze on the left front insert side (See Fig. 5) of the rack and tilt out clockwise. To reinstall insert rear hooks at back of insert (See
Do not use cookware that extends beyond the edge of the Oven Flat Half Rack. For best results, allow 2 inches between the pan placed on the rack and oven side or rear walls.