44CHAPTER 3: SETTING UP FOR MANAGEMENT
Viewing IP Information via the Console Port
You are now ready to view the automatically allocated IP information using the command line interface.
1Connect your Switch to the network using an Ethernet cable. As soon as a network connection is made the Switch begins the automatic IP configuration process.
The automatic IP configuration process usually completes within one minute.
If there is no response from a DHCP server within 30 seconds, the
2The command line interface login sequence begins as soon as the Switch detects a connection to its console port.
If the login prompt does not begin immediately, press Return a few times until it starts.
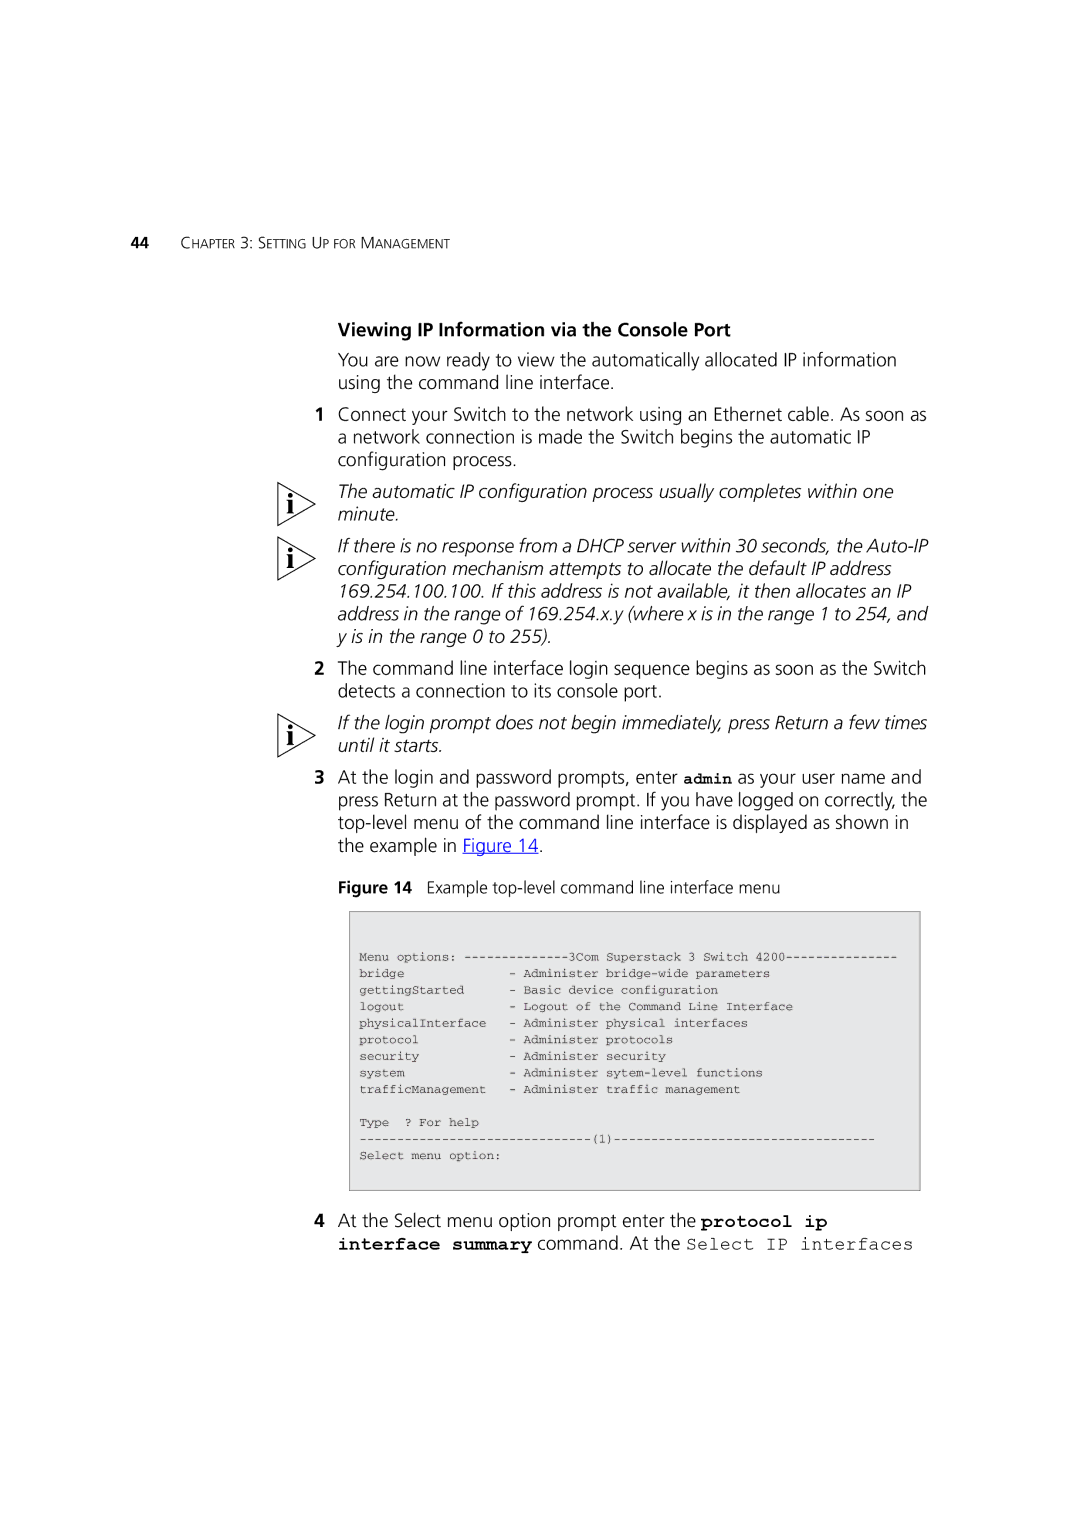
3At the login and password prompts, enter admin as your user name and press Return at the password prompt. If you have logged on correctly, the
Figure 14 Example top-level command line interface menu
Menu options: | 3Com | Superstack 3 Switch |
bridge | - Administer | |
gettingStarted | - Basic device configuration | |
logout | - Logout of the Command Line Interface | |
physicalInterface | - Administer | physical interfaces |
protocol | - Administer | protocols |
security | - Administer | security |
system | - Administer | |
trafficManagement | - Administer | traffic management |
Type ? For help |
|
|
Select menu option: |
|
|
|
|
|
4At the Select menu option prompt enter the protocol ip interface summary command. At the Select IP interfaces