Chapter 3
System Disassembly
This chapter provides
Disassembly Tools
In performing the disassembly process, you will need the following tools:
Philips screwdriver
Flat screwdriver
Hex screwdriver
Flat plastic screwdriver
Plastic tweezers
Stages of the Disassembly Process
The disassembly process is divided into three stages:
1.External modules disassembly
2.Main unit disassembly
a.Upper case disassembly
b.Lower case disassembly
3.LDC module disassembly
IMPORTANT: The disassembly procedure described in this chapter is a gradual process, as illustrated in the flowcharts preceding each disassembly stage section. This means that users need to observe the instructions in a
NOTE: To reinstall the system components and assemble the unit, perform the disassembly procedures in reverse.
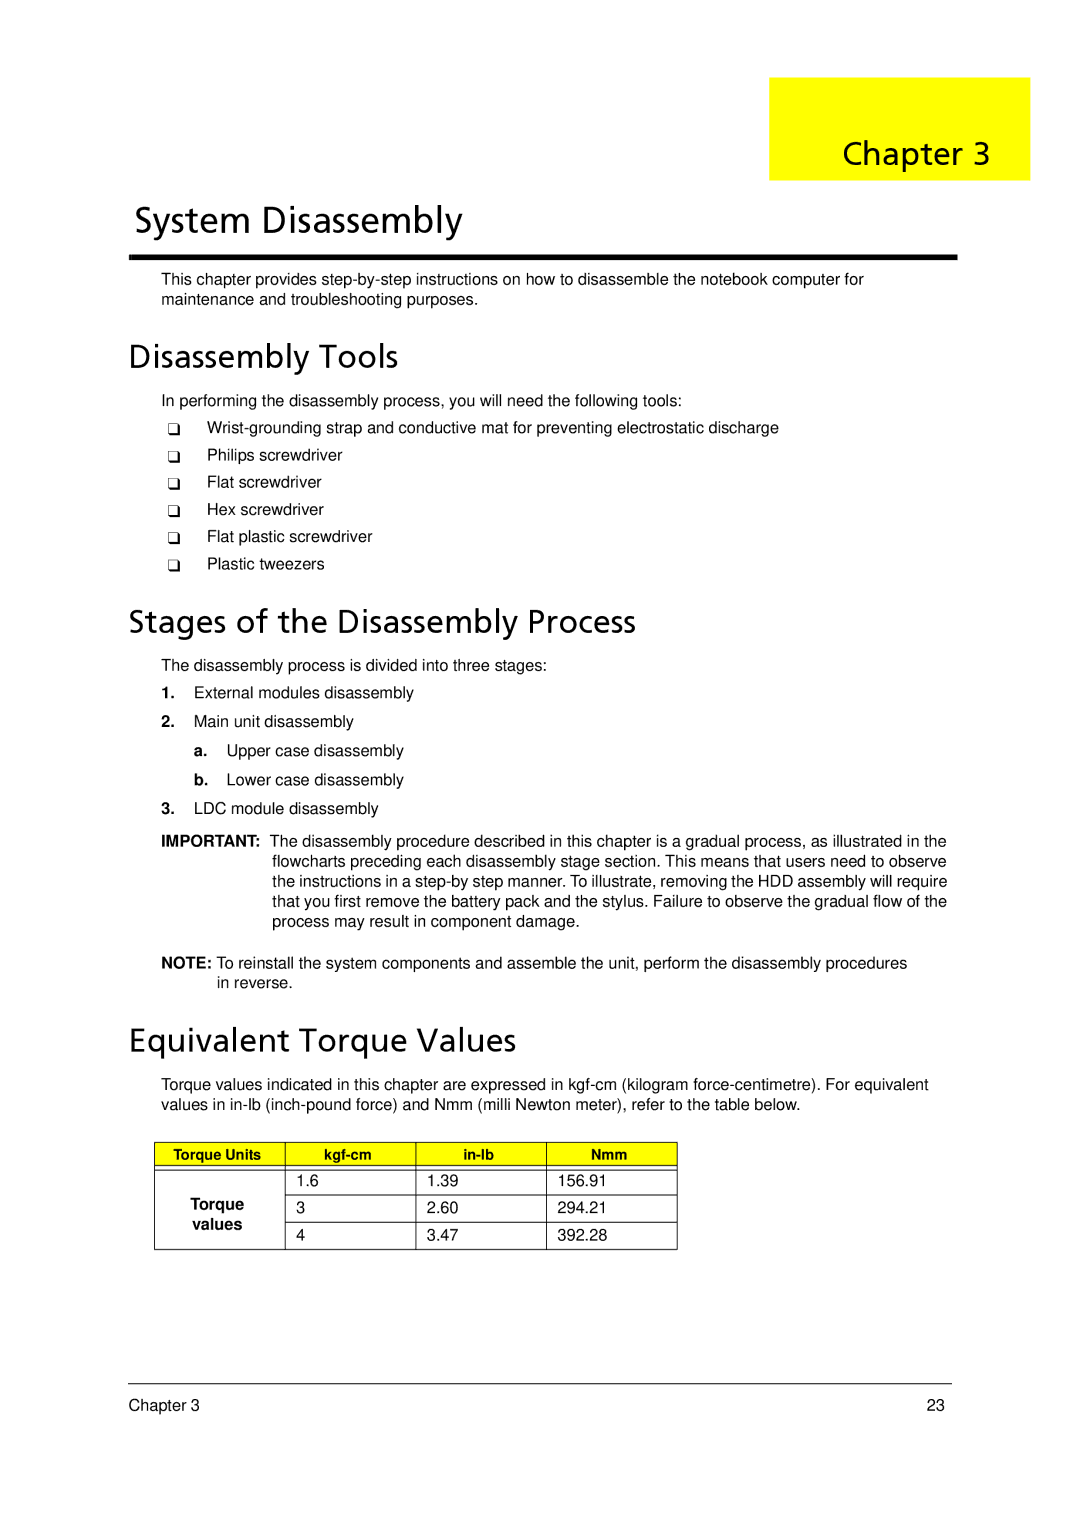
Equivalent Torque Values
Torque values indicated in this chapter are expressed in
Torque Units | Nmm | |||
|
|
|
| |
| 1.6 | 1.39 | 156.91 | |
Torque |
|
|
| |
3 | 2.60 | 294.21 | ||
values |
|
|
| |
4 | 3.47 | 392.28 | ||
| ||||
|
|
|
|
Chapter 3 | 23 |