Rear Panel Overview
The following is an overview of the
|
|
|
|
|
|
|
|
|
| ���� | ���� | ����� |
|
|
|
|
|
|
|
|
|
|
|
| |
|
|
|
|
|
|
| ������������� |
|
|
| ��� | �� |
|
|
|
| ��������� | ������� |
|
|
|
|
|
| |
|
|
|
| � | �� | �� | ��� |
|
|
|
| |
|
|
|
| ��������� |
|
|
|
| ||||
|
|
|
|
|
|
|
|
|
|
|
| �������� |
����������������� ���� | ���������������������� |
|
|
|
|
|
|
|
|
| ||
|
|
|
|
|
|
|
|
| �������������� | �������� |
|
|
���� | � | �� | �� | ����������� | � | �� | �� | ��� | ���� | ����� |
|
|
������� |
|
| ||||||||||
Chapter 1 - Welcome
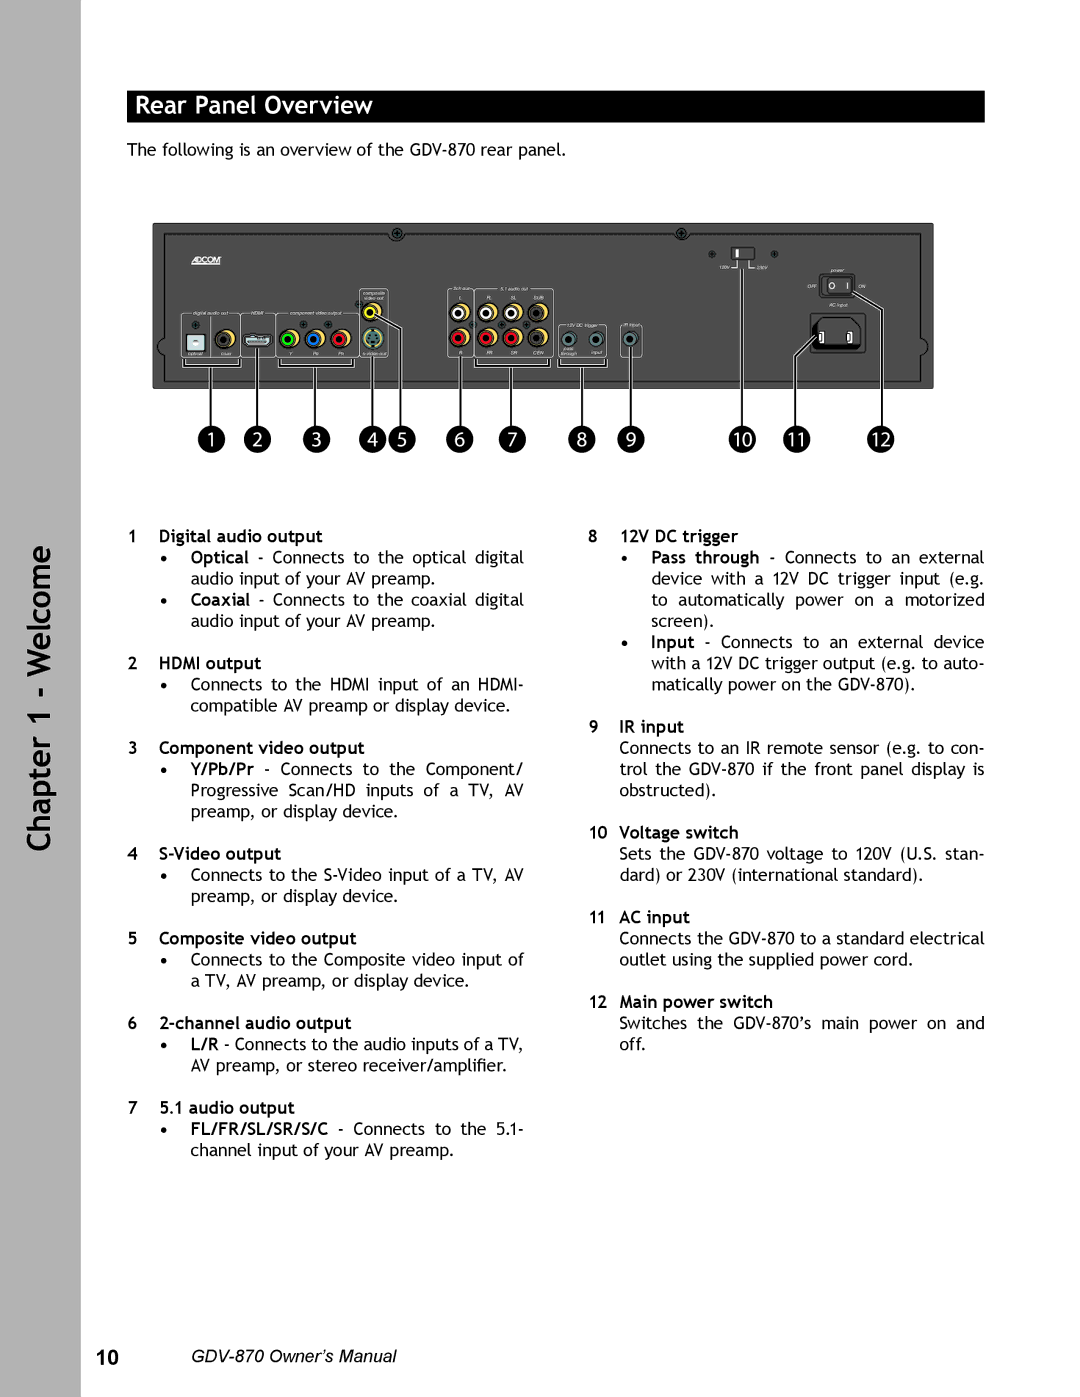
1Digital audio output
•Optical - Connects to the optical digital audio input of your AV preamp.
•Coaxial - Connects to the coaxial digital audio input of your AV preamp.
2HDMI output
•Connects to the HDMI input of an HDMI- compatible AV preamp or display device.
3Component video output
•Y/Pb/Pr - Connects to the Component/ Progressive Scan/HD inputs of a TV, AV preamp, or display device.
4
•Connects to the
5Composite video output
•Connects to the Composite video input of a TV, AV preamp, or display device.
6
•L/R - Connects to the audio inputs of a TV, AV preamp, or stereo receiver/amplifier.
75.1 audio output
•FL/FR/SL/SR/S/C - Connects to the 5.1- channel input of your AV preamp.
812V DC trigger
•Pass through - Connects to an external device with a 12V DC trigger input (e.g. to automatically power on a motorized screen).
•Input - Connects to an external device with a 12V DC trigger output (e.g. to auto- matically power on the
9IR input
Connects to an IR remote sensor (e.g. to con- trol the
10Voltage switch
Sets the
11AC input
Connects the
12Main power switch
Switches the
10