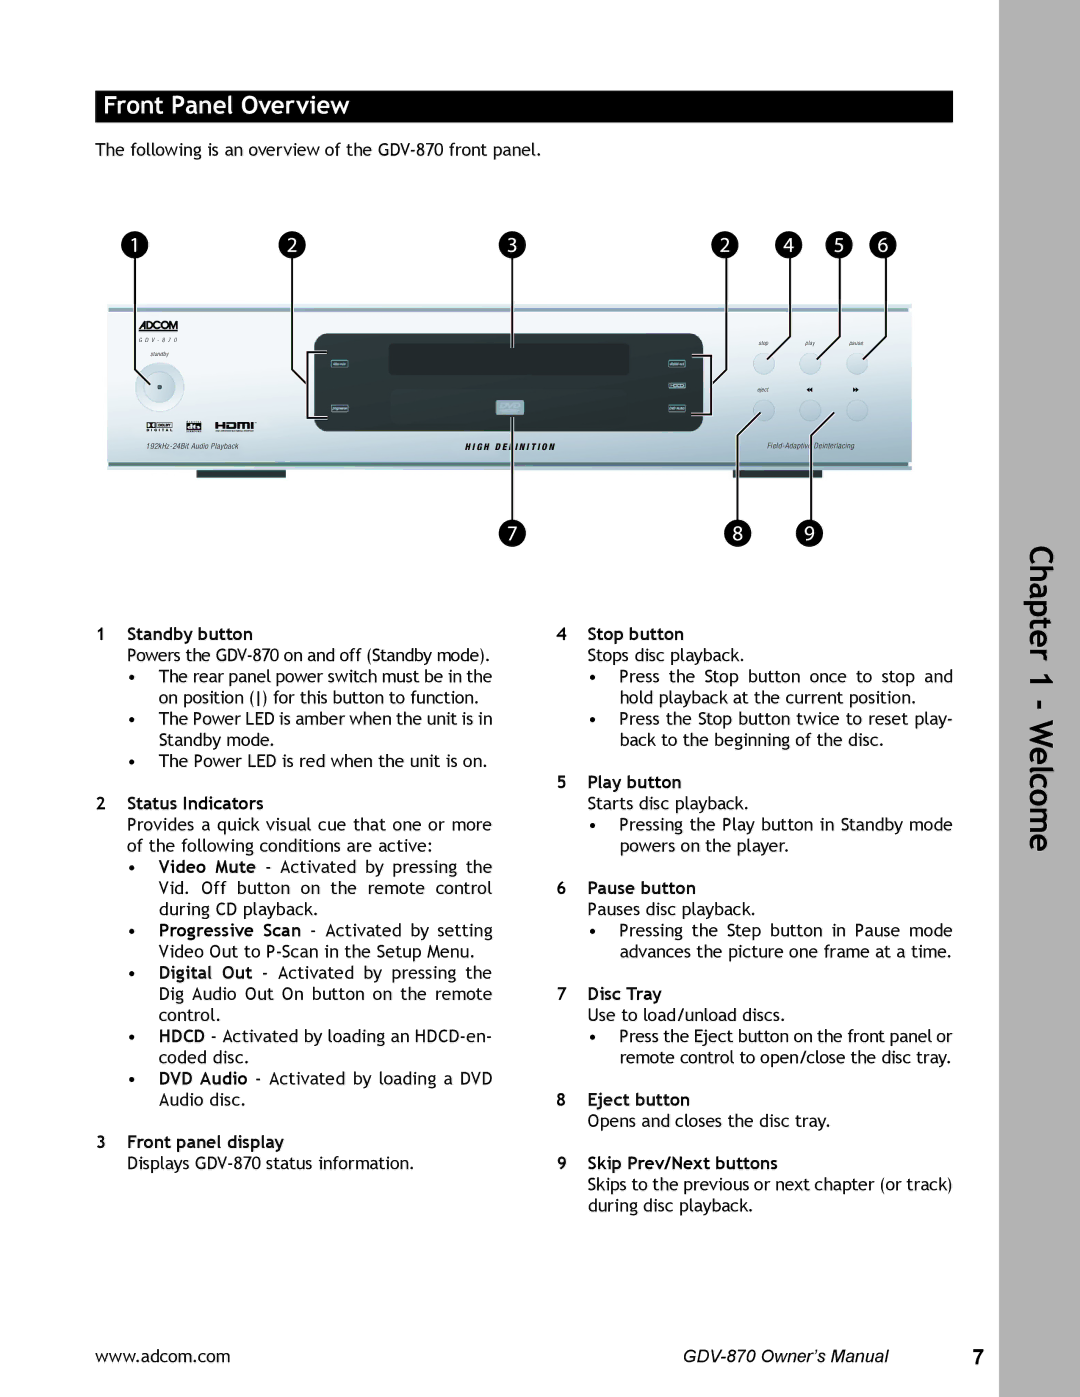
Front Panel Overview
The following is an overview of the
� � � � � � � | ���� | ���� | ����� |
| |||
������� |
|
|
|
| ����� |
|
|
���������������������������� � � � � � � � | � � � � � � � | ���������������������������� |
1Standby button
Powers the
•The rear panel power switch must be in the on position () for this button to function.
•The Power LED is amber when the unit is in Standby mode.
•The Power LED is red when the unit is on.
2Status Indicators
Provides a quick visual cue that one or more of the following conditions are active:
•Video Mute - Activated by pressing the Vid. Off button on the remote control during CD playback.
•Progressive Scan - Activated by setting Video Out to
•Digital Out - Activated by pressing the Dig Audio Out On button on the remote control.
•HDCD - Activated by loading an
•DVD Audio - Activated by loading a DVD Audio disc.
3Front panel display
Displays
4Stop button
Stops disc playback.
•Press the Stop button once to stop and hold playback at the current position.
•Press the Stop button twice to reset play- back to the beginning of the disc.
5Play button
Starts disc playback.
•Pressing the Play button in Standby mode powers on the player.
6Pause button Pauses disc playback.
•Pressing the Step button in Pause mode advances the picture one frame at a time.
7Disc Tray
Use to load/unload discs.
•Press the Eject button on the front panel or remote control to open/close the disc tray.
8Eject button
Opens and closes the disc tray.
9Skip Prev/Next buttons
Skips to the previous or next chapter (or track) during disc playback.
Chapter 1 - Welcome
www.adcom.com | 7 |
