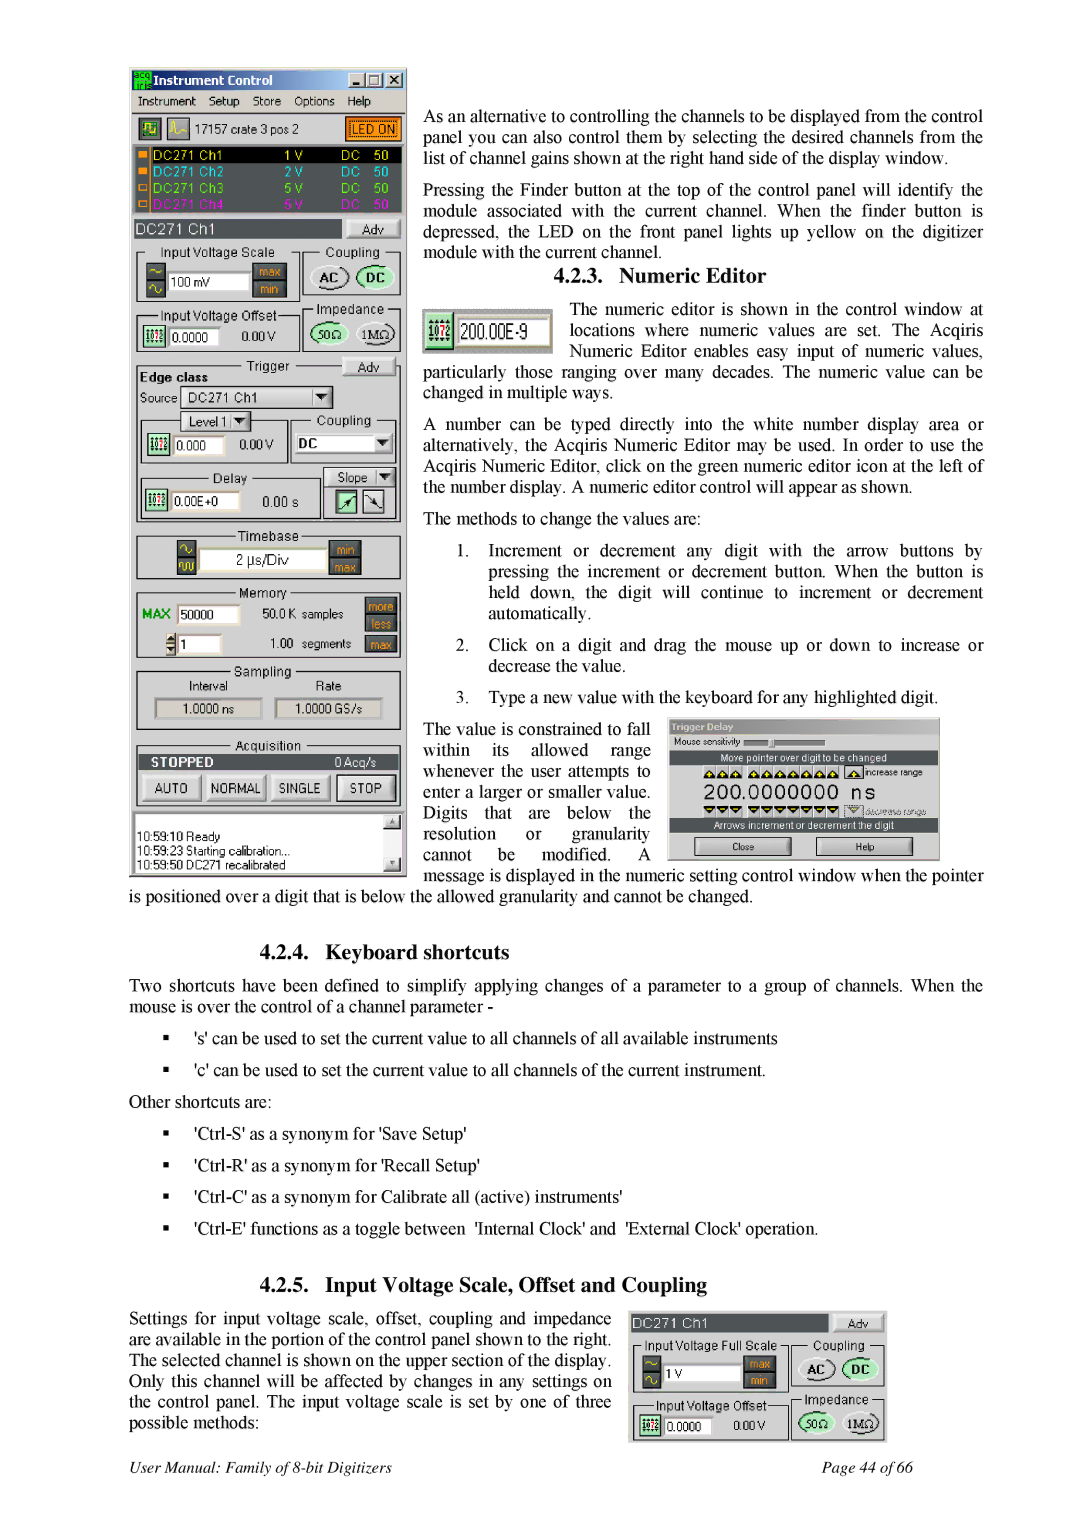
As an alternative to controlling the channels to be displayed from the control panel you can also control them by selecting the desired channels from the list of channel gains shown at the right hand side of the display window.
Pressing the Finder button at the top of the control panel will identify the module associated with the current channel. When the finder button is depressed, the LED on the front panel lights up yellow on the digitizer module with the current channel.
4.2.3. Numeric Editor
The numeric editor is shown in the control window at locations where numeric values are set. The Acqiris Numeric Editor enables easy input of numeric values,
particularly those ranging over many decades. The numeric value can be changed in multiple ways.
A number can be typed directly into the white number display area or alternatively, the Acqiris Numeric Editor may be used. In order to use the Acqiris Numeric Editor, click on the green numeric editor icon at the left of the number display. A numeric editor control will appear as shown.
The methods to change the values are:
1.Increment or decrement any digit with the arrow buttons by pressing the increment or decrement button. When the button is held down, the digit will continue to increment or decrement automatically.
2.Click on a digit and drag the mouse up or down to increase or decrease the value.
3.Type a new value with the keyboard for any highlighted digit.
The value is constrained to fall within its allowed range whenever the user attempts to enter a larger or smaller value. Digits that are below the resolution or granularity cannot be modified. A
message is displayed in the numeric setting control window when the pointer
is positioned over a digit that is below the allowed granularity and cannot be changed.
4.2.4. Keyboard shortcuts
Two shortcuts have been defined to simplify applying changes of a parameter to a group of channels. When the mouse is over the control of a channel parameter -
's' can be used to set the current value to all channels of all available instruments
'c' can be used to set the current value to all channels of the current instrument. Other shortcuts are:
4.2.5. Input Voltage Scale, Offset and Coupling
Settings for input voltage scale, offset, coupling and impedance are available in the portion of the control panel shown to the right. The selected channel is shown on the upper section of the display. Only this channel will be affected by changes in any settings on the control panel. The input voltage scale is set by one of three possible methods:
User Manual: Family of | Page 44 of 66 |
