Configuring OSPF | OSPF Quick Steps |
|
|
|
|
9Assign the OSPF interface to the area and the backbone using the ip ospf interface area command. For example:
or
10 Enable the OSPF interfaces using the ip ospf interface status command. For example:
or
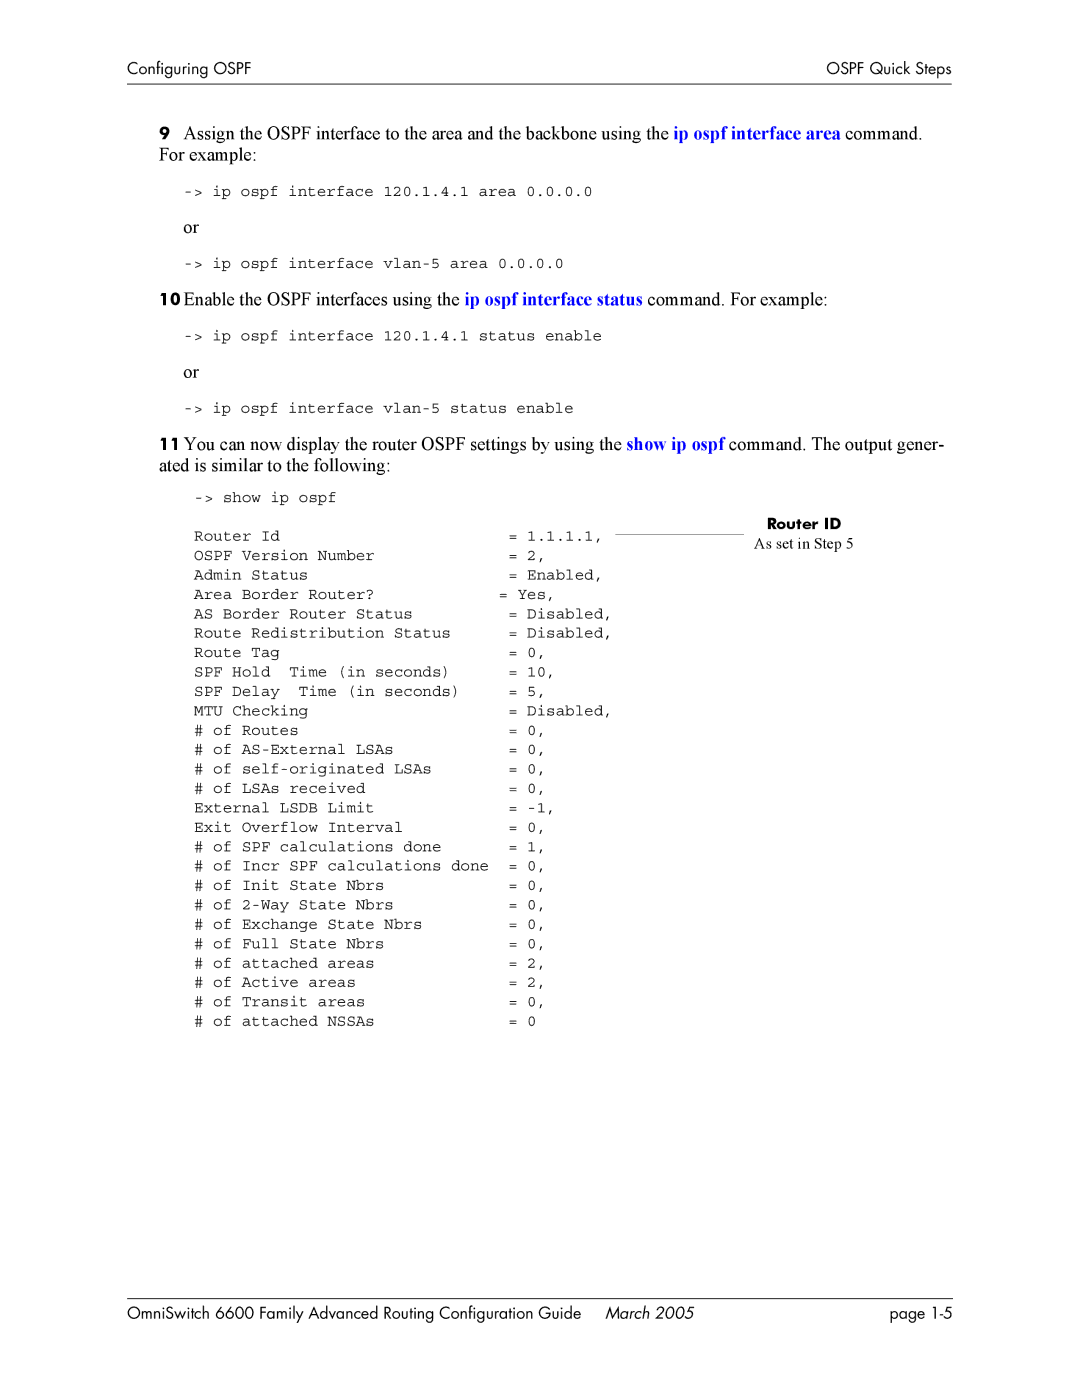
11 You can now display the router OSPF settings by using the show ip ospf command. The output gener- ated is similar to the following:
| ||
Router Id |
| = 1.1.1.1, |
OSPF Version Number | = 2, | |
Admin Status | = Enabled, | |
Area Border Router? | = Yes, | |
AS Border Router Status | = Disabled, | |
Route Redistribution Status | = Disabled, | |
Route Tag |
| = 0, |
SPF Hold | Time (in seconds) | = 10, |
SPF Delay | Time (in seconds) | = 5, |
MTU Checking | = Disabled, | |
# of Routes | = 0, | |
# of | = 0, | |
# of | = 0, | |
# of LSAs received | = 0, | |
External LSDB Limit | = | |
Exit Overflow Interval | = 0, | |
# of SPF calculations done | = 1, | |
# of Incr SPF calculations done | = 0, | |
# of Init State Nbrs | = 0, | |
# of | = 0, | |
# of Exchange State Nbrs | = 0, | |
# of Full State Nbrs | = 0, | |
# of attached areas | = 2, | |
# of Active areas | = 2, | |
# of Transit areas | = 0, | |
# of attached NSSAs | = 0 | |
Router ID
As set in Step 5
OmniSwitch 6600 Family Advanced Routing Configuration Guide March 2005 | page |
