Printing a document
To print a document, follow these steps:
1Open the document you want to print, or select its icon in the Macintosh Finder.
2Choose Print from the File menu.
A dialog box appears, displaying a number of printing options.
3Set any options you like.
The most common choices are already set for you.
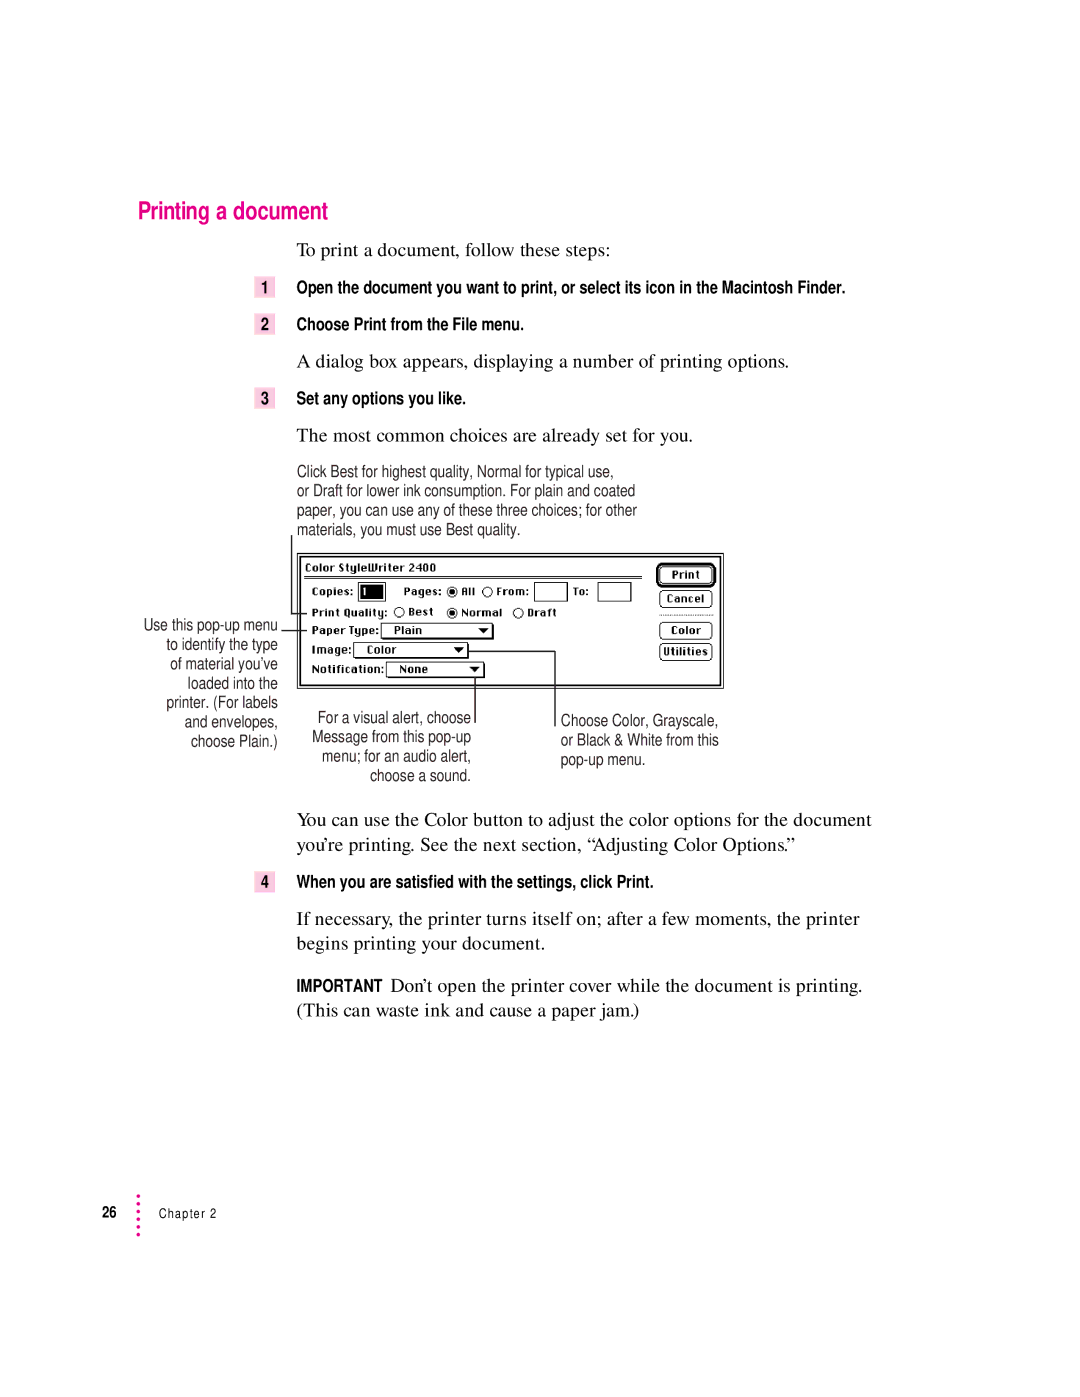
Click Best for highest quality, Normal for typical use, or Draft for lower ink consumption. For plain and coated paper, you can use any of these three choices; for other materials, you must use Best quality.
Use this |
|
|
|
|
to identify the type |
|
|
|
|
of material you’ve |
|
|
|
|
loaded into the |
|
|
|
|
|
|
|
| |
printer. (For labels |
| For a visual alert, choose |
| |
and envelopes, |
|
| ||
choose Plain.) |
| Message from this | ||
|
| menu; for an audio alert, | ||
|
| choose a sound. | ||
Choose Color, Grayscale, or Black & White from this
You can use the Color button to adjust the color options for the document you’re printing. See the next section, “Adjusting Color Options.”
4When you are satisfied with the settings, click Print.
If necessary, the printer turns itself on; after a few moments, the printer begins printing your document.
IMPORTANT Don’t open the printer cover while the document is printing. (This can waste ink and cause a paper jam.)