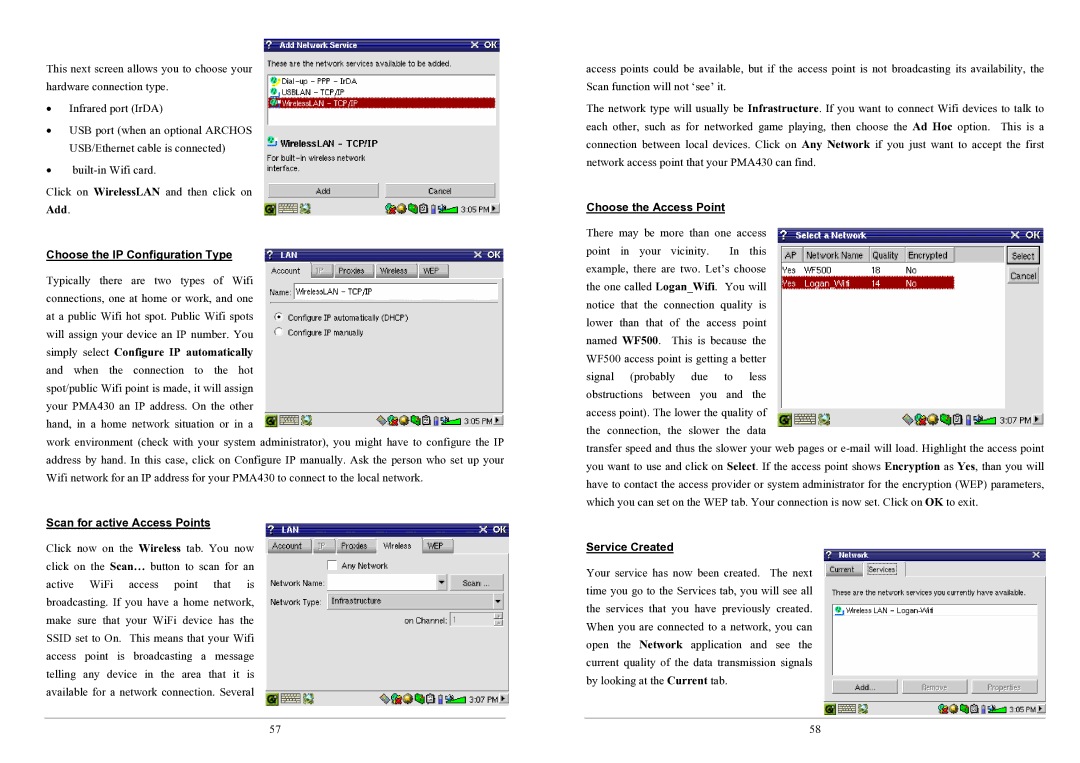
This next screen allows you to choose your hardware connection type.
•Infrared port (IrDA)
•USB port (when an optional ARCHOS USB/Ethernet cable is connected)
•
Click on WirelessLAN and then click on
Add.
Choose the IP Configuration Type
Typically there are two types of Wifi connections, one at home or work, and one at a public Wifi hot spot. Public Wifi spots will assign your device an IP number. You simply select Configure IP automatically and when the connection to the hot spot/public Wifi point is made, it will assign your PMA430 an IP address. On the other hand, in a home network situation or in a
work environment (check with your system administrator), you might have to configure the IP address by hand. In this case, click on Configure IP manually. Ask the person who set up your Wifi network for an IP address for your PMA430 to connect to the local network.
Scan for active Access Points
Click now on the Wireless tab. You now click on the Scan… button to scan for an active WiFi access point that is broadcasting. If you have a home network, make sure that your WiFi device has the SSID set to On. This means that your Wifi access point is broadcasting a message telling any device in the area that it is available for a network connection. Several
57
access points could be available, but if the access point is not broadcasting its availability, the Scan function will not ‘see’ it.
The network type will usually be Infrastructure. If you want to connect Wifi devices to talk to each other, such as for networked game playing, then choose the Ad Hoc option. This is a connection between local devices. Click on Any Network if you just want to accept the first network access point that your PMA430 can find.
Choose the Access Point
There may be more than one access point in your vicinity. In this example, there are two. Let’s choose the one called Logan_Wifi. You will notice that the connection quality is lower than that of the access point named WF500. This is because the WF500 access point is getting a better signal (probably due to less obstructions between you and the access point). The lower the quality of the connection, the slower the data
transfer speed and thus the slower your web pages or
Service Created
Your service has now been created. The next time you go to the Services tab, you will see all the services that you have previously created. When you are connected to a network, you can open the Network application and see the current quality of the data transmission signals by looking at the Current tab.
58