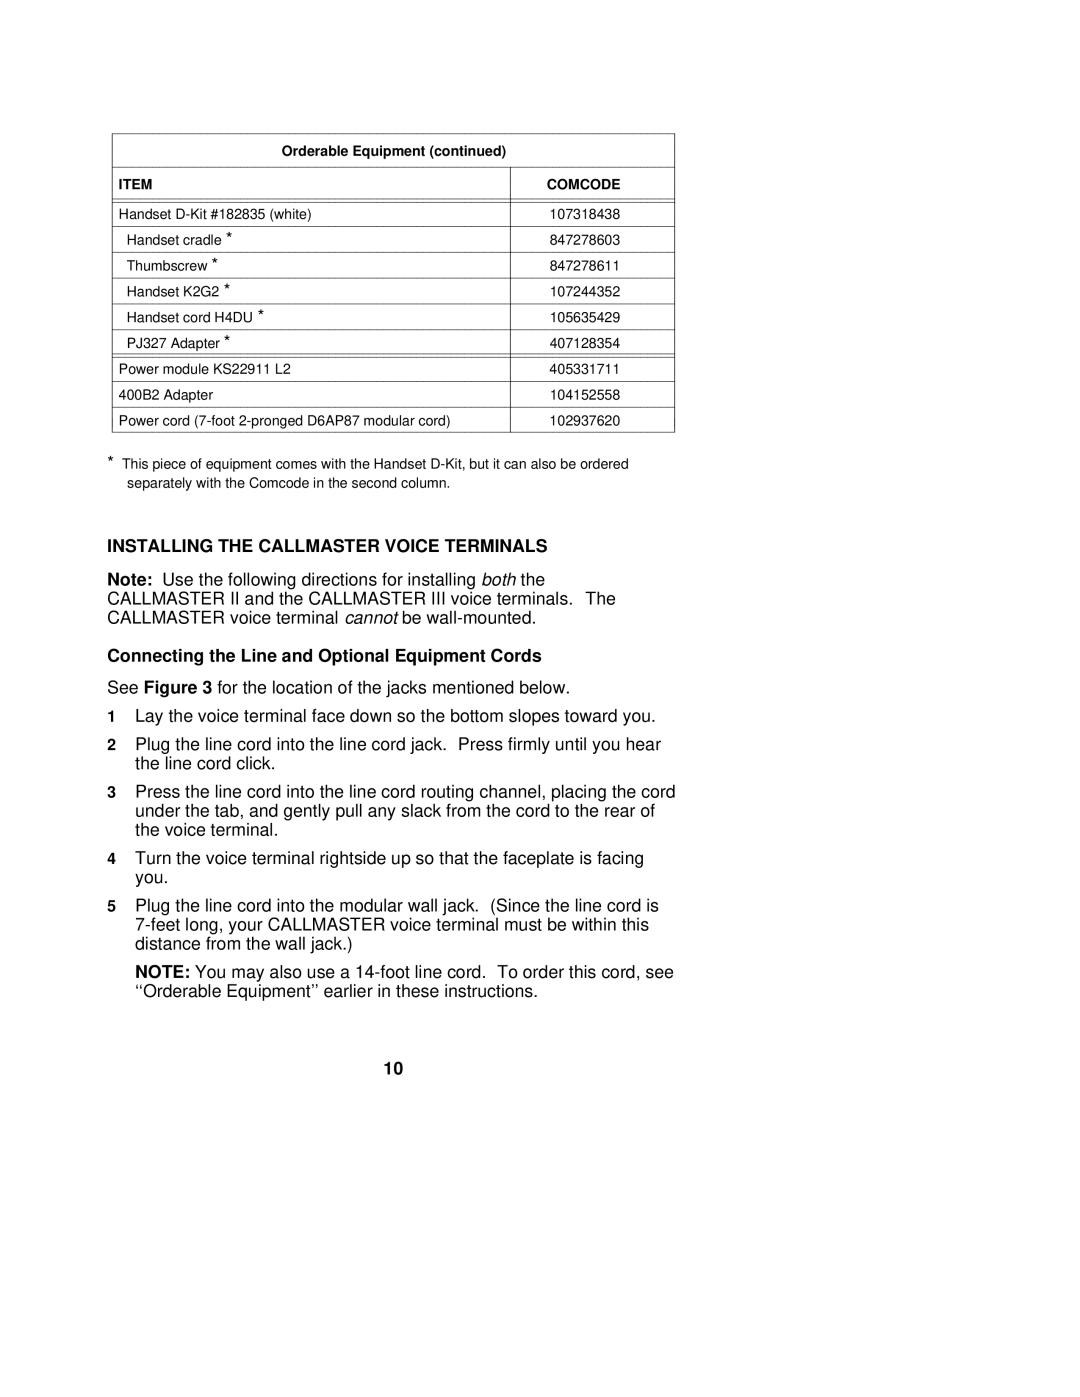
Orderable Equipment (continued) |
|
ITEM | COMCODE |
Handset | 107318438 |
Handset cradle * | 847278603 |
Thumbscrew * | 847278611 |
Handset K2G2 * | 107244352 |
Handset cord H4DU * | 105635429 |
PJ327 Adapter * | 407128354 |
Power module KS22911 L2 | 405331711 |
400B2 Adapter | 104152558 |
Power cord | 102937620 |
*This piece of equipment comes with the Handset
INSTALLING THE CALLMASTER VOICE TERMINALS
Note: Use the following directions for installing both the CALLMASTER II and the CALLMASTER III voice terminals. The CALLMASTER voice terminal cannot be
Connecting the Line and Optional Equipment Cords
See Figure 3 for the location of the jacks mentioned below.
1Lay the voice terminal face down so the bottom slopes toward you.
2Plug the line cord into the line cord jack. Press firmly until you hear the line cord click.
3Press the line cord into the line cord routing channel, placing the cord under the tab, and gently pull any slack from the cord to the rear of the voice terminal.
4Turn the voice terminal rightside up so that the faceplate is facing you.
5Plug the line cord into the modular wall jack. (Since the line cord is
NOTE: You may also use a
10
