TTW1 Universal Service
Replacement Blower
MITW
Cut just below these crimp connectors. Then, | ||
| remove (1) white and (1) green wire from | |
Step 8. | bundles. Trace wires back to power cord. | |
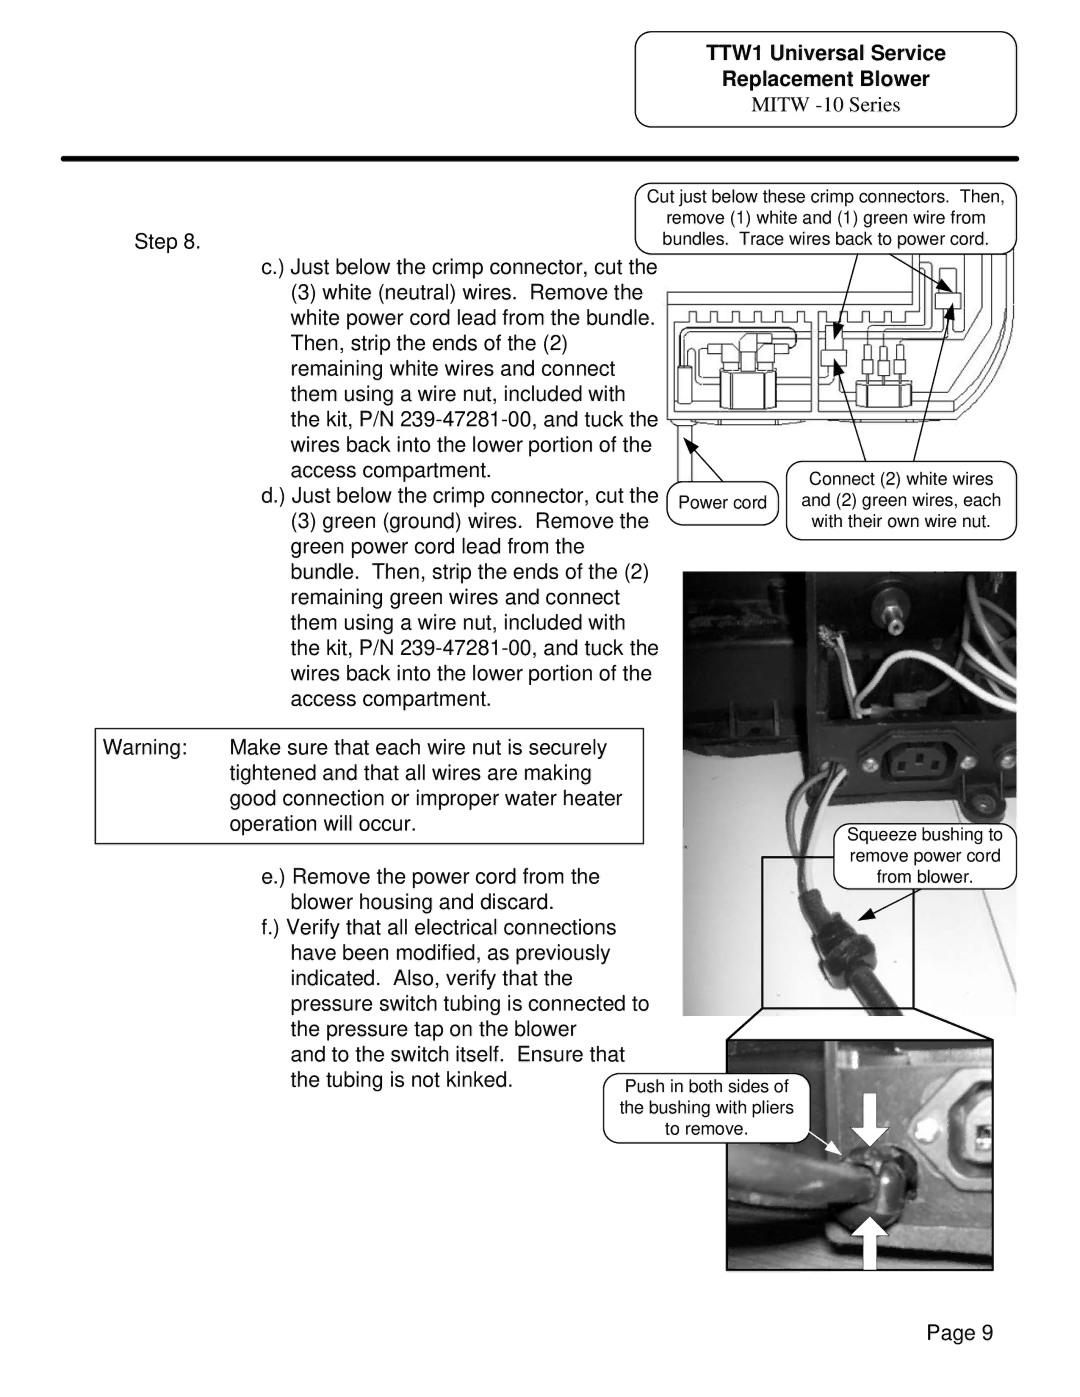
c.) Just below the crimp connector, cut the |
|
|
(3) white (neutral) wires. Remove the |
|
|
white power cord lead from the bundle. |
|
|
Then, strip the ends of the (2) |
|
|
remaining white wires and connect |
|
|
them using a wire nut, included with |
|
|
the kit, P/N |
|
|
wires back into the lower portion of the |
|
|
access compartment. |
| Connect (2) white wires |
d.) Just below the crimp connector, cut the |
| |
Power cord | and (2) green wires, each | |
(3) green (ground) wires. Remove the |
| with their own wire nut. |
green power cord lead from the bundle. Then, strip the ends of the (2) remaining green wires and connect them using a wire nut, included with the kit, P/N
Warning: | Make sure that each wire nut is securely |
|
| tightened and that all wires are making |
|
| good connection or improper water heater |
|
| operation will occur. |
|
|
|
|
| e.) Remove the power cord from the | |
| blower housing and discard. | |
| f.) Verify that all electrical connections | |
| have been modified, as previously | |
| indicated. Also, verify that the | |
| pressure switch tubing is connected to | |
| the pressure tap on the blower | |
| and to the switch itself. Ensure that | |
| the tubing is not kinked. | |
Squeeze bushing to remove power cord from blower.
Page 9
