TTW1 Universal Service
Replacement Blower
MITW
Step 9.
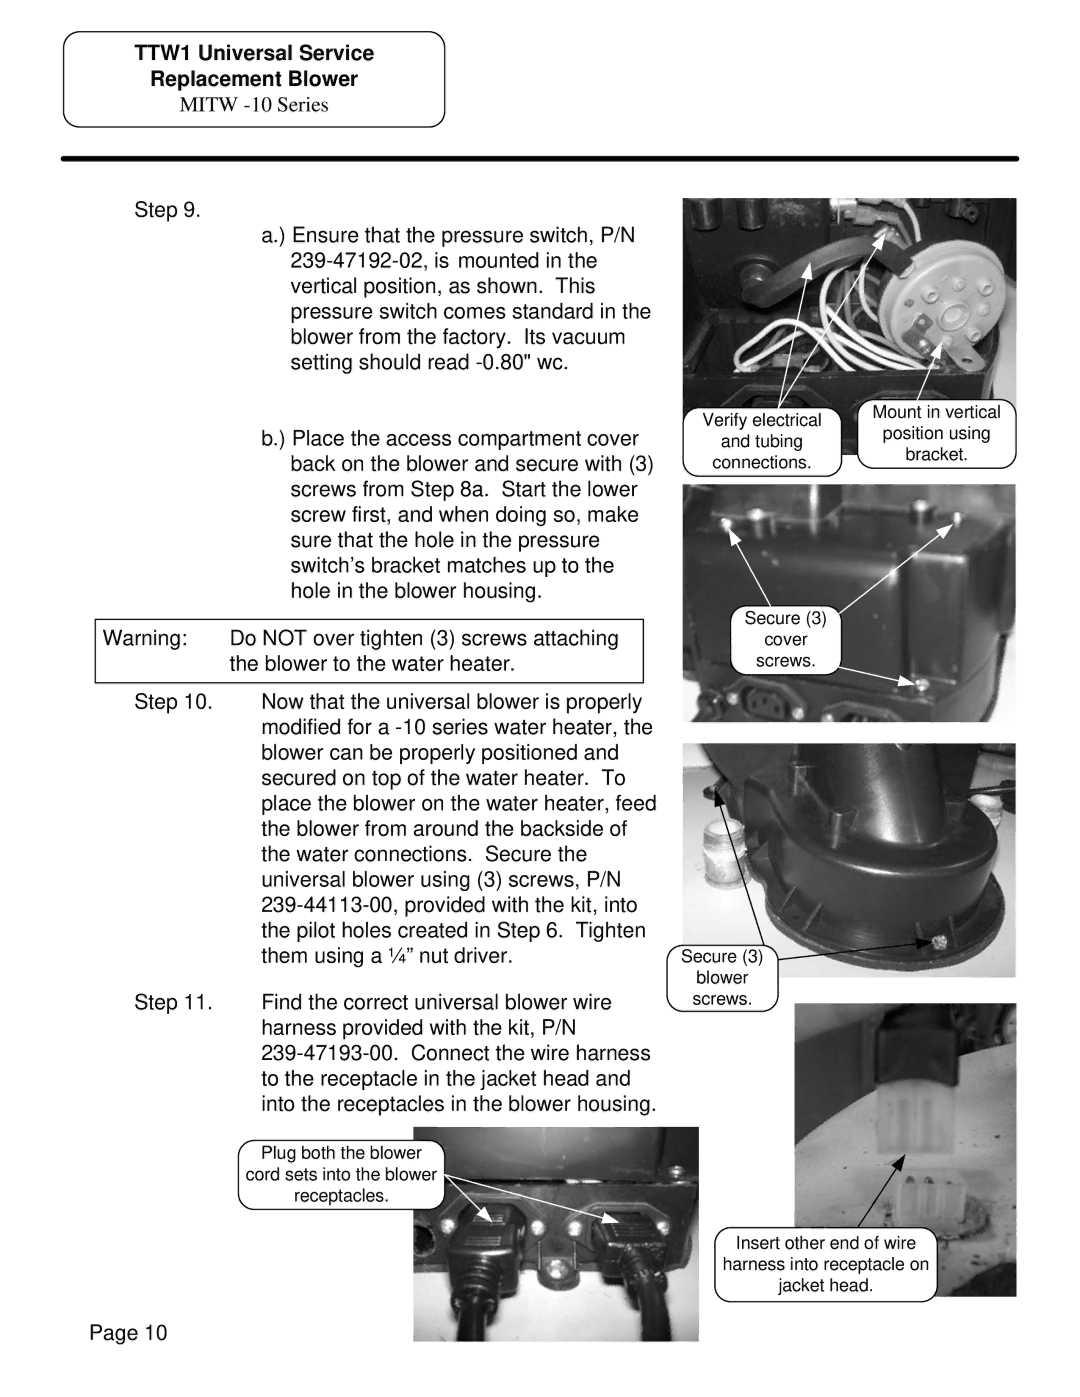
a.) Ensure that the pressure switch, P/N
b.) Place the access compartment cover
| back on the blower and secure with (3) | |
| screws from Step 8a. Start the lower | |
| screw first, and when doing so, make | |
| sure that the hole in the pressure | |
| switch’s bracket matches up to the | |
| hole in the blower housing. | |
|
| |
Warning: | Do NOT over tighten (3) screws attaching |
|
| the blower to the water heater. |
|
|
|
|
Step 10. | Now that the universal blower is properly | |
| modified for a | |
| blower can be properly positioned and | |
| secured on top of the water heater. To | |
| place the blower on the water heater, feed | |
| the blower from around the backside of | |
| the water connections. Secure the | |
| universal blower using (3) screws, P/N | |
| ||
| the pilot holes created in Step 6. Tighten | |
| them using a ¼” nut driver. | |
Step 11. | Find the correct universal blower wire | |
| harness provided with the kit, P/N | |
| ||
| to the receptacle in the jacket head and | |
| into the receptacles in the blower housing. | |
| Plug both the blower | |
| cord sets into the blower | |
| receptacles. | |
Verify electrical | Mount in vertical | |
position using | ||
and tubing | ||
bracket. | ||
connections. | ||
|
Secure (3)
cover
screws.
Secure (3)
blower screws.
Insert other end of wire
harness into receptacle on
jacket head.
Page 10