PUNTIPUNTADASBUILT INCORPORA- TIINCORPORADIN STITCHES AS
A
B
Puntada por encima de la orilla
XL5300 | XL5200 | XL5100 | Número de puntada | Largo de puntada | Ancho de puntada | |
PX300 | PX200 | PX100 | ||||
|
|
| ||||
14 | 12 | 15 | Puntada overlock |
| ||
|
|
|
|
|
| |
15 | 13 | 12 | Puntada overlock elástica | Fija 2,5 | Fija 5 | |
|
|
|
|
| ||
17 | 15 | 11 | Puntada punta de flecha |
| ||
|
| |||||
|
|
|
|
|
|
Estas puntadas se usan para juntar costuras y acabarlas en una sola operación. La puntada overlock elástica se utiliza en costuras de tejidos elásticos, mientras que la puntada punta de flecha resulta ideal para la costura de dobladillos de mantas.
1.Ponga el selector de puntadas en puntada overlock elástica, pespunto overlock o puntada punta de flecha.
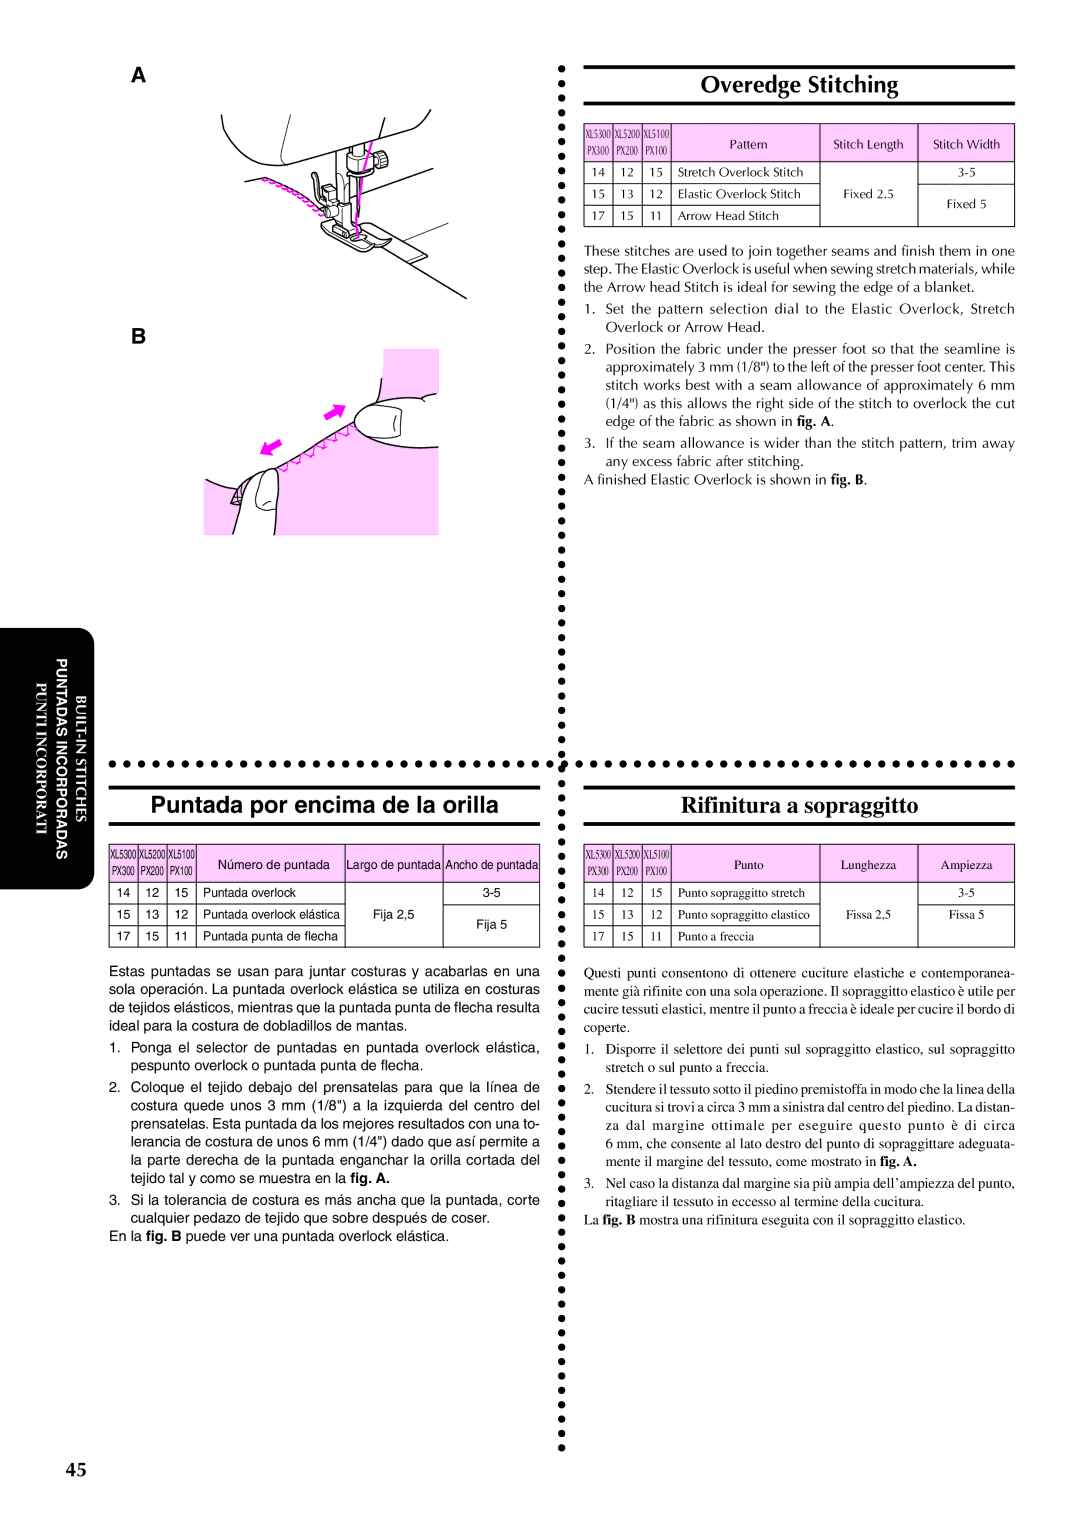
2.Coloque el tejido debajo del prensatelas para que la línea de costura quede unos 3 mm (1/8") a la izquierda del centro del prensatelas. Esta puntada da los mejores resultados con una to- lerancia de costura de unos 6 mm (1/4") dado que así permite a la parte derecha de la puntada enganchar la orilla cortada del tejido tal y como se muestra en la fig. A.
3.Si la tolerancia de costura es más ancha que la puntada, corte cualquier pedazo de tejido que sobre después de coser.
En la fig. B puede ver una puntada overlock elástica.
Overedge Stitching
XL5300 | XL5200 | XL5100 | Pattern | Stitch Length | Stitch Width | |
PX300 | PX200 | PX100 | ||||
|
|
| ||||
14 | 12 | 15 | Stretch Overlock Stitch |
| ||
|
|
|
|
|
| |
15 | 13 | 12 | Elastic Overlock Stitch | Fixed 2.5 | Fixed 5 | |
|
|
|
|
| ||
17 | 15 | 11 | Arrow Head Stitch |
| ||
|
| |||||
|
|
|
|
|
|
These stitches are used to join together seams and finish them in one step. The Elastic Overlock is useful when sewing stretch materials, while the Arrow head Stitch is ideal for sewing the edge of a blanket.
1.Set the pattern selection dial to the Elastic Overlock, Stretch Overlock or Arrow Head.
2.Position the fabric under the presser foot so that the seamline is approximately 3 mm (1/8") to the left of the presser foot center. This stitch works best with a seam allowance of approximately 6 mm (1/4") as this allows the right side of the stitch to overlock the cut edge of the fabric as shown in fig. A.
3.If the seam allowance is wider than the stitch pattern, trim away
any excess fabric after stitching.
A finished Elastic Overlock is shown in fig. B.
Rifinitura a sopraggitto
XL5300 | XL5200 | XL5100 | Punto | Lunghezza | Ampiezza | |
PX300 | PX200 | PX100 | ||||
|
|
| ||||
14 | 12 | 15 | Punto sopraggitto stretch |
| ||
|
|
|
|
|
| |
15 | 13 | 12 | Punto sopraggitto elastico | Fissa 2,5 | Fissa 5 | |
|
|
|
|
|
| |
17 | 15 | 11 | Punto a freccia |
|
| |
|
|
|
|
|
|
Questi punti consentono di ottenere cuciture elastiche e contemporanea- mente già rifinite con una sola operazione. Il sopraggitto elastico è utile per cucire tessuti elastici, mentre il punto a freccia è ideale per cucire il bordo di coperte.
1.Disporre il selettore dei punti sul sopraggitto elastico, sul sopraggitto stretch o sul punto a freccia.
2.Stendere il tessuto sotto il piedino premistoffa in modo che la linea della cucitura si trovi a circa 3 mm a sinistra dal centro del piedino. La distan- za dal margine ottimale per eseguire questo punto è di circa 6 mm, che consente al lato destro del punto di sopraggittare adeguata- mente il margine del tessuto, come mostrato in fig. A.
3.Nel caso la distanza dal margine sia più ampia dell’ampiezza del punto,
ritagliare il tessuto in eccesso al termine della cucitura.
La fig. B mostra una rifinitura eseguita con il sopraggitto elastico.
45