Button Sewing
XL5300 | XL5200 | XL5100 | Pattern | Stitch Length | Stitch Width | Foot | |||
PX300 | PX200 | PX100 | |||||||
|
|
|
|
|
| ||||
3 | 3 | 2 | Zigzag |
|
|
| Any | Button | |
Stitch |
|
|
| Sewing Foot | |||||
|
|
|
|
|
|
| |||
|
|
|
|
|
|
|
|
| |
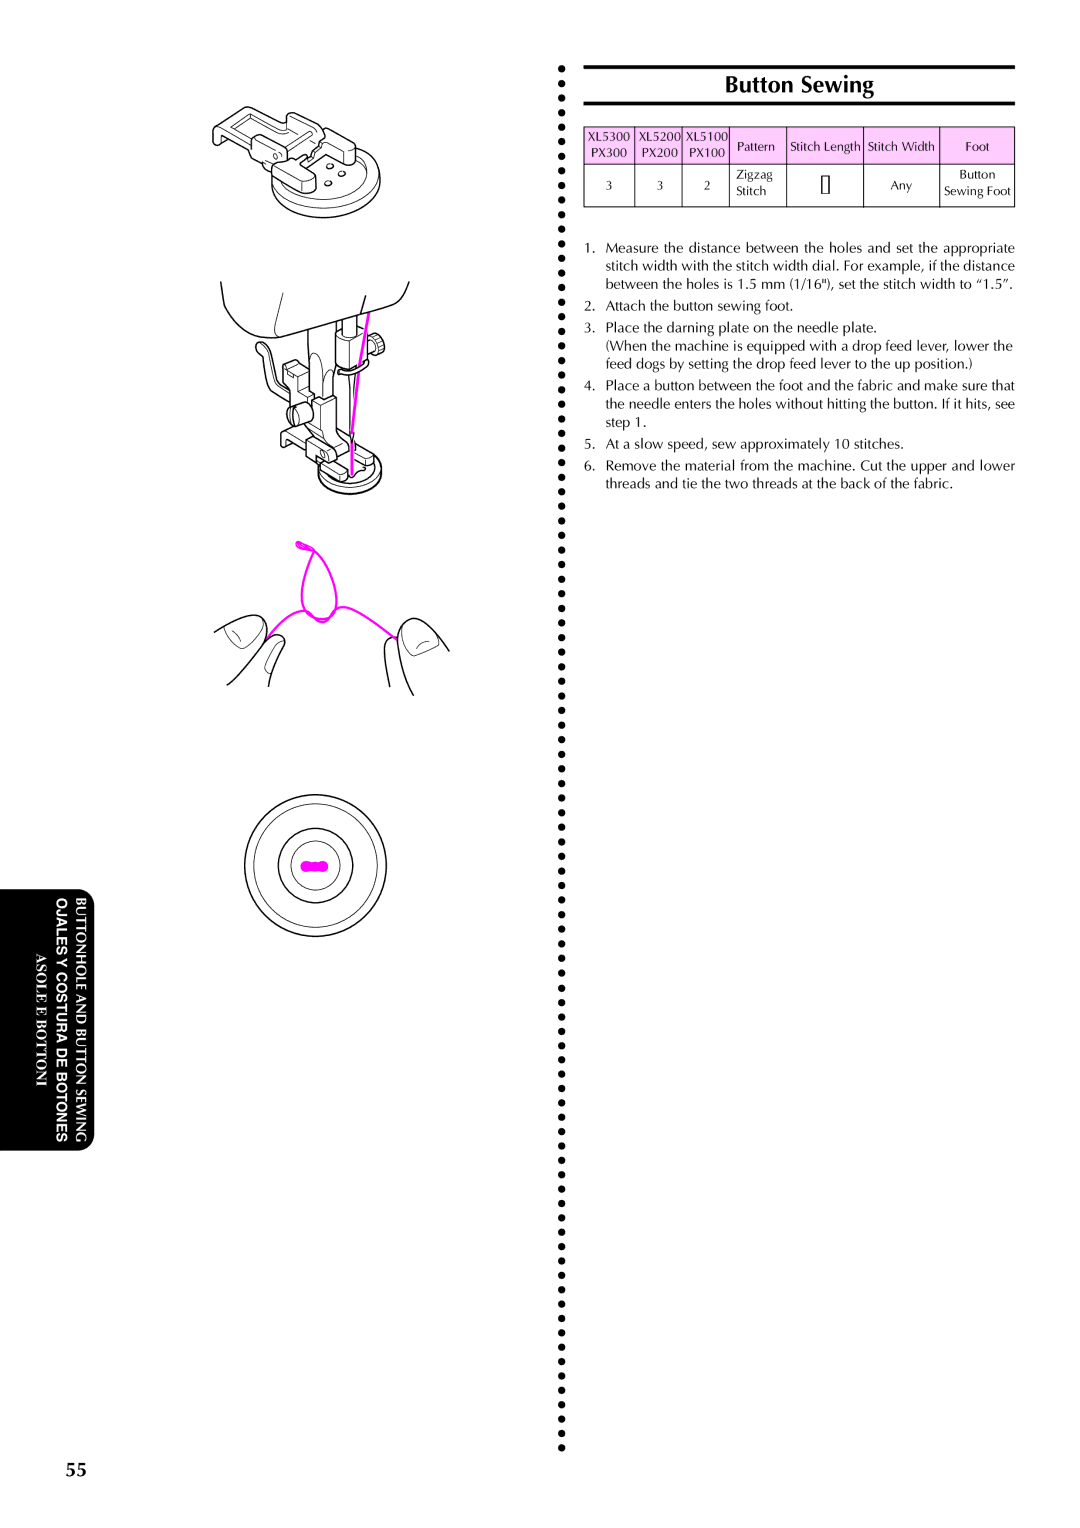
1.Measure the distance between the holes and set the appropriate stitch width with the stitch width dial. For example, if the distance between the holes is 1.5 mm (1/16"), set the stitch width to “1.5”.
2.Attach the button sewing foot.
3.Place the darning plate on the needle plate.
(When the machine is equipped with a drop feed lever, lower the feed dogs by setting the drop feed lever to the up position.)
4.Place a button between the foot and the fabric and make sure that the needle enters the holes without hitting the button. If it hits, see step 1.
5.At a slow speed, sew approximately 10 stitches.
6.Remove the material from the machine. Cut the upper and lower threads and tie the two threads at the back of the fabric.
ASOLEOJALES Y E BOTTONICOSTURA DE
BOTONES
BUTTONHOLE AND BUTTON SEWING
55