Section 7 | Optipay™CC | OPERATION |
1.Press the Plus ![]() key.
key.
An audible signal will sound and the Green LED will begin flashing indicating that the Coin Changer is no longer in a standard oper- ating mode and has now entered the filling level mode.
2.Insert the coin tubes.
The Coin Validator’s tube counter meters in the accepted coins, and the Coin Changer sorts the corresponding coin types into its rel- ative
–The full sensor is covered, or
–The maximum coin number is configured, or
–The float level is reached.
If the “float” function is active, tube coins inserted thereafter will not be accepted and will be directed to the return area tray.
Otherwise, they will be accepted and directed to the Cash Box.
If all the coin tubes are full:
3.Press the Plus ![]() key again.
key again.
Two audible signals will sound and the Green LED will light constantly indicating that the Coin Changer is no longer in the filling level mode, and has returned to the operating mode.
If no coins are inserted in a 30 second time period, the Coin Changer will automatically return to the operating
mode, without having to press the Plus ![]() key a second time.
key a second time.
Inhibiting Coin Types Using DIP Switch Block Settings
By setting various switches on the DIP Switch Block located on the rear Coin Validator’s circuit board, it is possible to inhibit configured coin types related to the first eight memory slots (coin chan- nels) of the Coin Changer without using the add- itional configuration tools available. For details on which coin type has been programmed for each coin channel, please contact your JCM represent- ative, or connect the Coin Validator to the Palm
Pilot® using PalmA66® and/or PalmEMP® soft- ware (see section 11 "Configuration").
To inhibit a specific coin type:
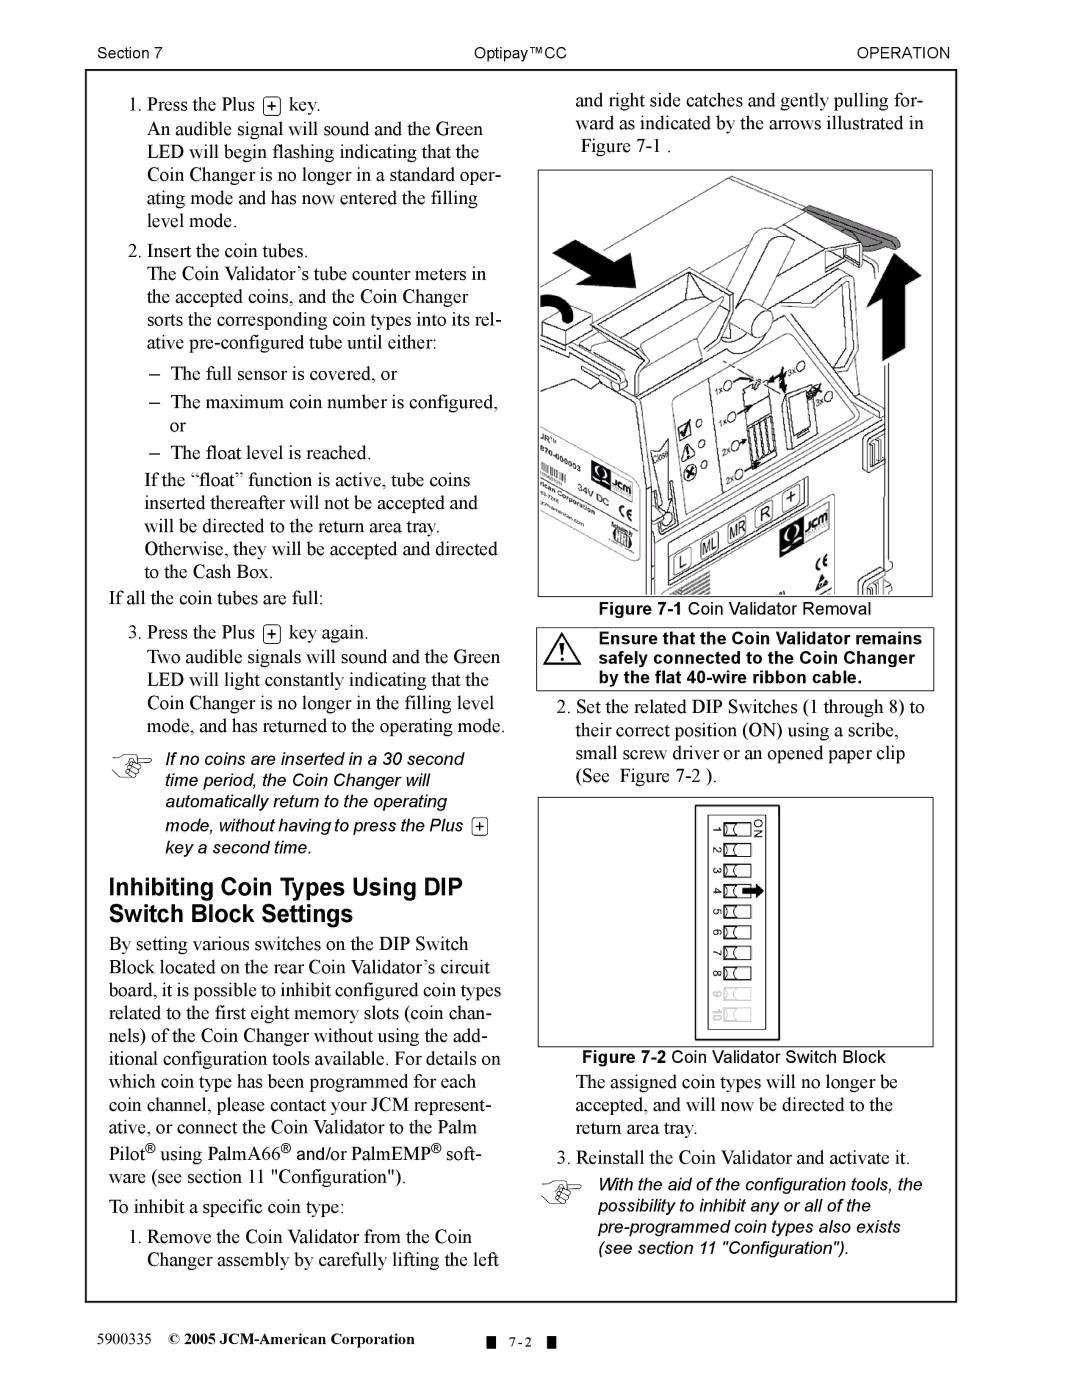
1.Remove the Coin Validator from the Coin Changer assembly by carefully lifting the left
and right side catches and gently pulling for- ward as indicated by the arrows illustrated in Figure
Figure 7-1 Coin Validator Removal
Ensure that the Coin Validator remains safely connected to the Coin Changer by the flat
2.Set the related DIP Switches (1 through 8) to their correct position (ON) using a scribe, small screw driver or an opened paper clip (See Figure
Figure 7-2 Coin Validator Switch Block
The assigned coin types will no longer be accepted, and will now be directed to the return area tray.
3. Reinstall the Coin Validator and activate it.
With the aid of the configuration tools, the possibility to inhibit any or all of the
5900335 © 2005
7 - 2