Installing the ESX
Strain-Relief
Bracket
MULTI PORT ETHERNET SWITCH |
|
|
|
|
|
|
|
|
|
|
|
|
|
|
|
|
|
|
|
|
|
|
| ||
|
|
|
|
|
|
|
|
|
|
|
|
|
|
|
|
|
|
|
|
|
|
|
| ||
| PWR |
|
|
|
|
|
|
|
|
|
|
|
| RECEIVE |
|
|
|
|
|
|
|
|
|
|
|
| CPU |
|
|
|
|
|
|
|
|
|
|
|
| TRANSMIT |
|
|
|
|
|
|
|
|
|
|
|
COM 2 | COM 1 | 1 | 2 | 3 | 4 | 5 | 6 | 7 | 8 | 9 | 10 | 11 | 12 | PORT | 2X | 3X | 4X | 5X | 6X | 7X | 8X | 9X | 10X | 11X | 12X |
|
|
|
|
|
|
|
|
|
|
|
| 1X | |||||||||||||
Screws (4) |
Figure 3-10 Attaching the Strain-Relief Bracket
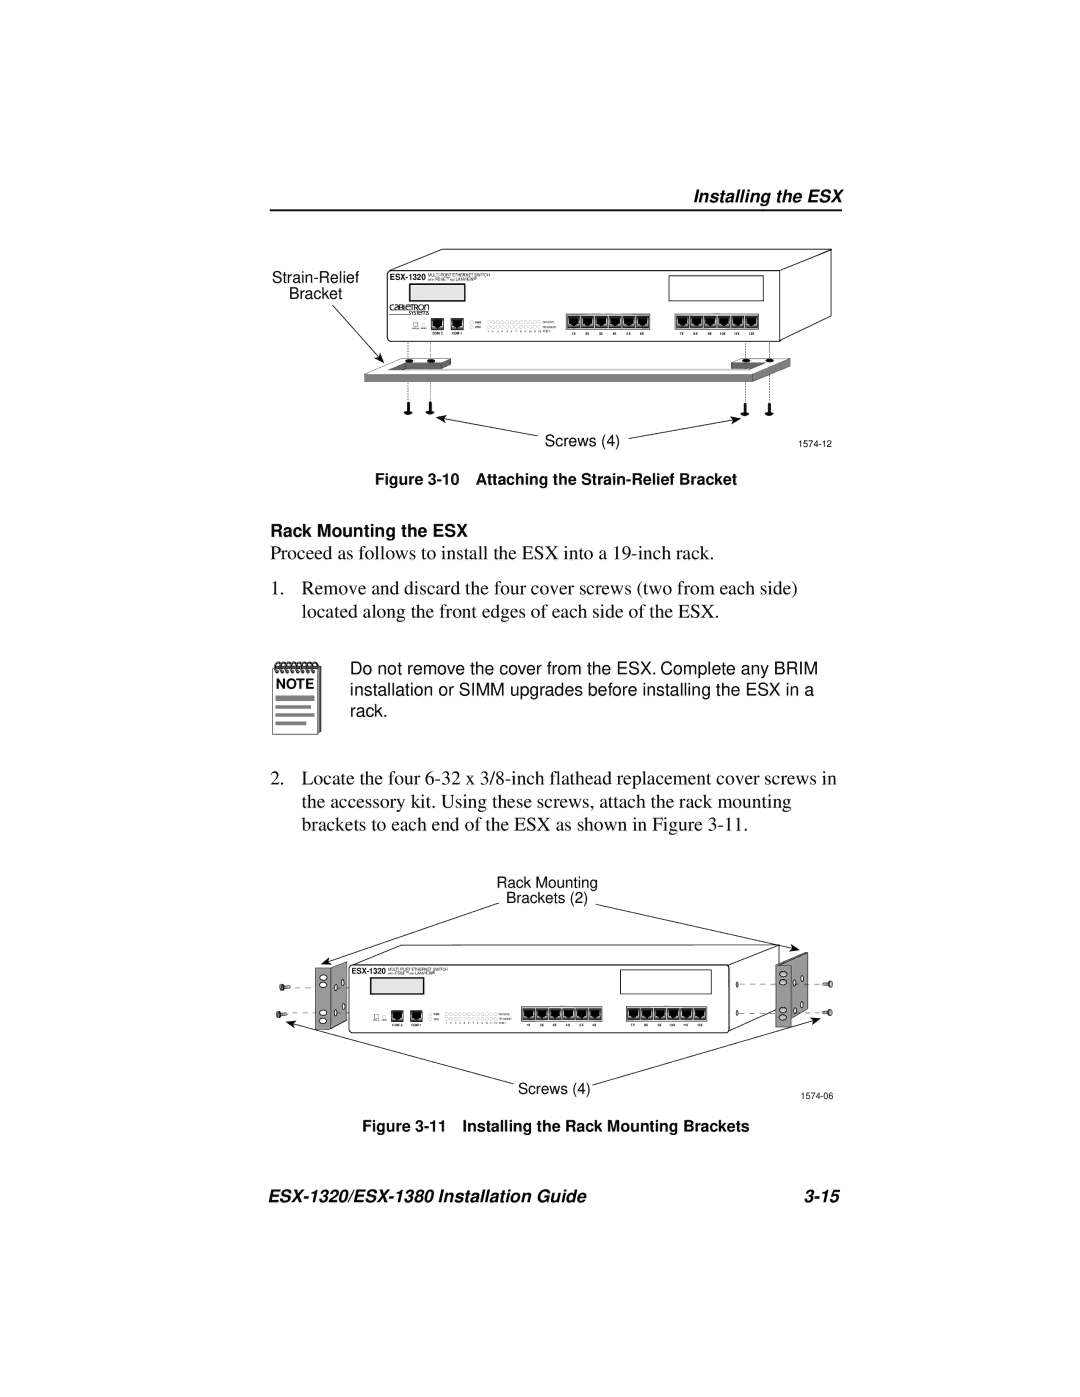
Rack Mounting the ESX
Proceed as follows to install the ESX into a
1.Remove and discard the four cover screws (two from each side) located along the front edges of each side of the ESX.
NOTE |
Do not remove the cover from the ESX. Complete any BRIM installation or SIMM upgrades before installing the ESX in a rack.
2.Locate the four
Rack Mounting
Brackets (2)
MULTI PORT ETHERNET SWITCH |
|
|
|
|
|
|
|
|
|
|
|
|
|
|
|
|
|
|
|
|
|
|
| ||
|
|
|
|
|
|
|
|
|
|
|
|
|
|
|
|
|
|
|
|
|
|
|
| ||
| PWR |
|
|
|
|
|
|
|
|
|
|
|
| RECEIVE |
|
|
|
|
|
|
|
|
|
|
|
| CPU |
|
|
|
|
|
|
|
|
|
|
|
| TRANSMIT |
|
|
|
|
|
|
|
|
|
|
|
COM 2 | COM 1 | 1 | 2 | 3 | 4 | 5 | 6 | 7 | 8 | 9 | 10 | 11 | 12 | PORT | 2X | 3X | 4X | 5X | 6X | 7X | 8X | 9X | 10X | 11X | 12X |
|
|
|
|
|
|
|
|
|
|
|
| 1X | |||||||||||||
Screws (4)
Figure 3-11 Installing the Rack Mounting Brackets
|