Appendices
Specifications
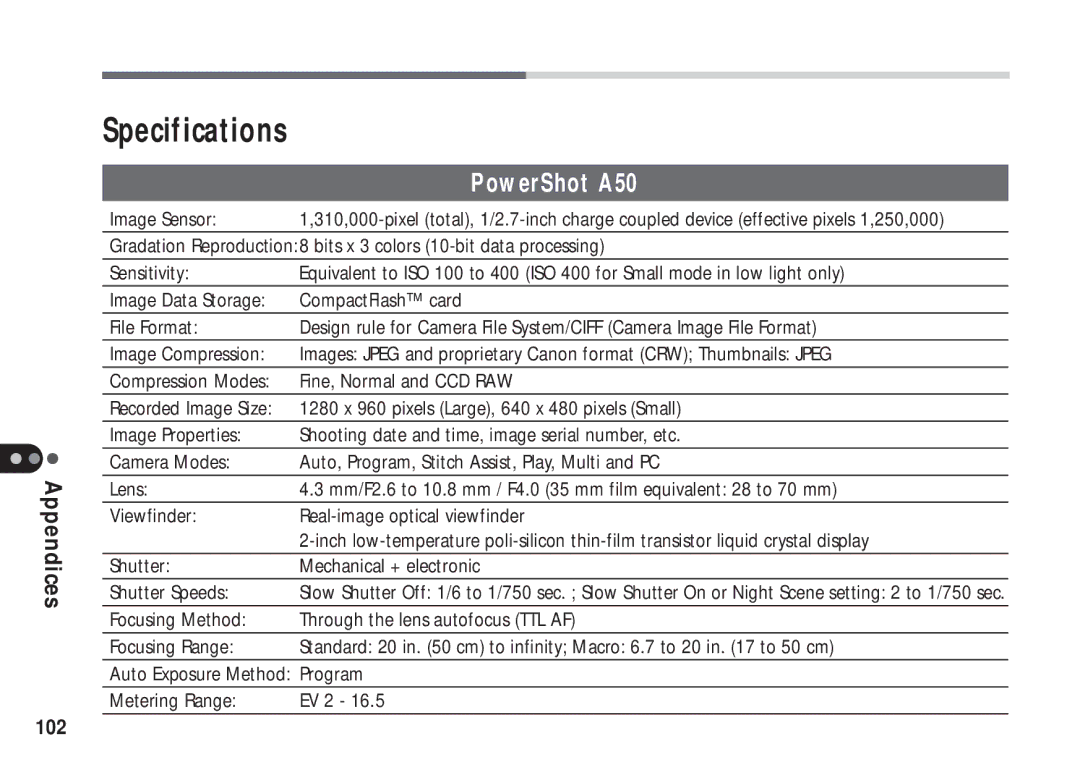
| PowerShot A50 |
Image Sensor: | |
Gradation Reproduction:8 bits x 3 colors | |
Sensitivity: | Equivalent to ISO 100 to 400 (ISO 400 for Small mode in low light only) |
Image Data Storage: | CompactFlash™ card |
File Format: | Design rule for Camera File System/CIFF (Camera Image File Format) |
Image Compression: | Images: JPEG and proprietary Canon format (CRW); Thumbnails: JPEG |
Compression Modes: | Fine, Normal and CCD RAW |
Recorded Image Size: | 1280 x 960 pixels (Large), 640 x 480 pixels (Small) |
Image Properties: | Shooting date and time, image serial number, etc. |
Camera Modes: | Auto, Program, Stitch Assist, Play, Multi and PC |
Lens: | 4.3 mm/F2.6 to 10.8 mm / F4.0 (35 mm film equivalent: 28 to 70 mm) |
Viewfinder: | |
| |
Shutter: | Mechanical + electronic |
Shutter Speeds: | Slow Shutter Off: 1/6 to 1/750 sec. ; Slow Shutter On or Night Scene setting: 2 to 1/750 sec. |
Focusing Method: | Through the lens autofocus (TTL AF) |
Focusing Range: | Standard: 20 in. (50 cm) to infinity; Macro: 6.7 to 20 in. (17 to 50 cm) |
Auto Exposure Method: | Program |
Metering Range: | EV 2 - 16.5 |