Basic Menu Operations
Menu functions are operated by the MENU, +/- and SET buttons.
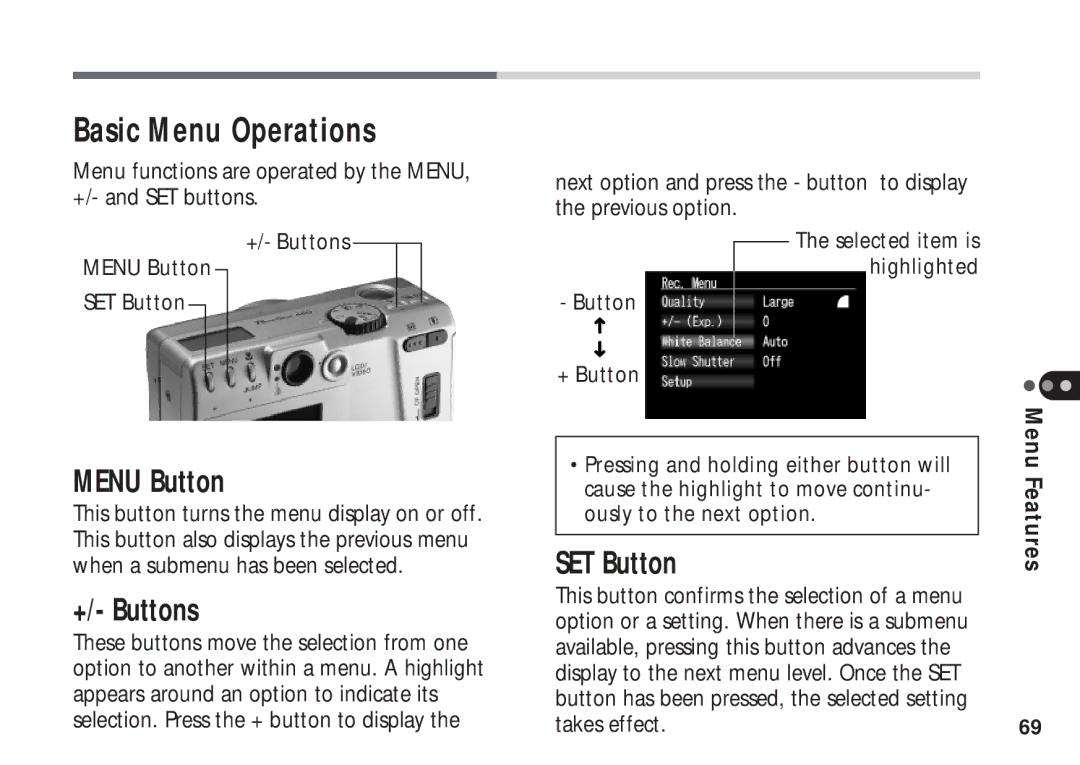
+/- Buttons
MENU Button
SET Button
MENU Button
This button turns the menu display on or off. This button also displays the previous menu when a submenu has been selected.
+/- Buttons
These buttons move the selection from one option to another within a menu. A highlight appears around an option to indicate its selection. Press the + button to display the
next option and press the - button to display the previous option.
The selected item is highlighted
-Button
+ Button
•Pressing and holding either button will cause the highlight to move continu- ously to the next option.
SET Button
This button confirms the selection of a menu option or a setting. When there is a submenu available, pressing this button advances the display to the next menu level. Once the SET button has been pressed, the selected setting takes effect.
Menu Features
69