Franais E
English E
MiniirY Digita
Product to Rain or Moisture
Important Usage Instructions
Copyright Warning
Fully
=-2
Round NECSECTION820
Nd References
Using This Manual
Usedin
Manual
Contents
Trimming Settings
Using
Memory
Direct Printing
Checking Supplied Accessories
Components Guide
Unlock
@ TAPE/CARD
ELURA90/ELURA85
USB
START/STOP
Zero SET Memory
Photo
Search
Turn the Power switch to OFF
Preparing the Power Supply
Connect the power cord
Power adapter
Usingold
BP-2L12 BP-2L14
Playback Times
Time
Cover
OPEN/EJECT
Insert the battery holder Close the LCD panel
Ins,ailing ,he Backup Ba**ery
LCD panel
Hold the camcorder with your right
Preparing the Camcorder
Left
MnHnfinn fh Wi Affr.hmnf
Atta th u
Arrow and pull out the battery holder
Using the Wireless Controller
Rotating the LCD Screen
Adjusting the LCD Screen
LGD Backlight
Press the Open button and open LCD panel 90 degrees
Press the Menu button to open the menu
Setting the Time Zone Date and Time
ZONE/DST
Press
London Wellgtn
Di g Date m ig Qdig
Push
Recording Movies on a Tape
Open button at LCD
Panel and open the LCD panel Press Start/stop button
Image
Menu Display Setup LCD MIRROR...ON
LCD Mirror
Page
ScreenDispays during RecQrding
Re iei n g an d S e ar c b in g w be n Re c or d ing
Camcorder returns to record pause mode
Record Review
Record Search
Move it
Zooming
Dinifn 7nnm
Turn the SET dial to select a setting option
Holdincj the Camcorder
Tips for Making Better Videos
For More Stability
Open the LCD panel
Playing Back a Tape
Press the l button to rewind the tape
Press the /l button to begin playback
Fast Forward Playback / Rewind PJayback
PJayback Pause
Adjusting
Adjusting the Volume
Menu
TVs with AudiQLVideo Temina!s
Playing Back on a TV Screen
Se! ctin g tbeAudio
Se!,c,tin N,,nu ,and,,,Settings
Menus and Settings
= =
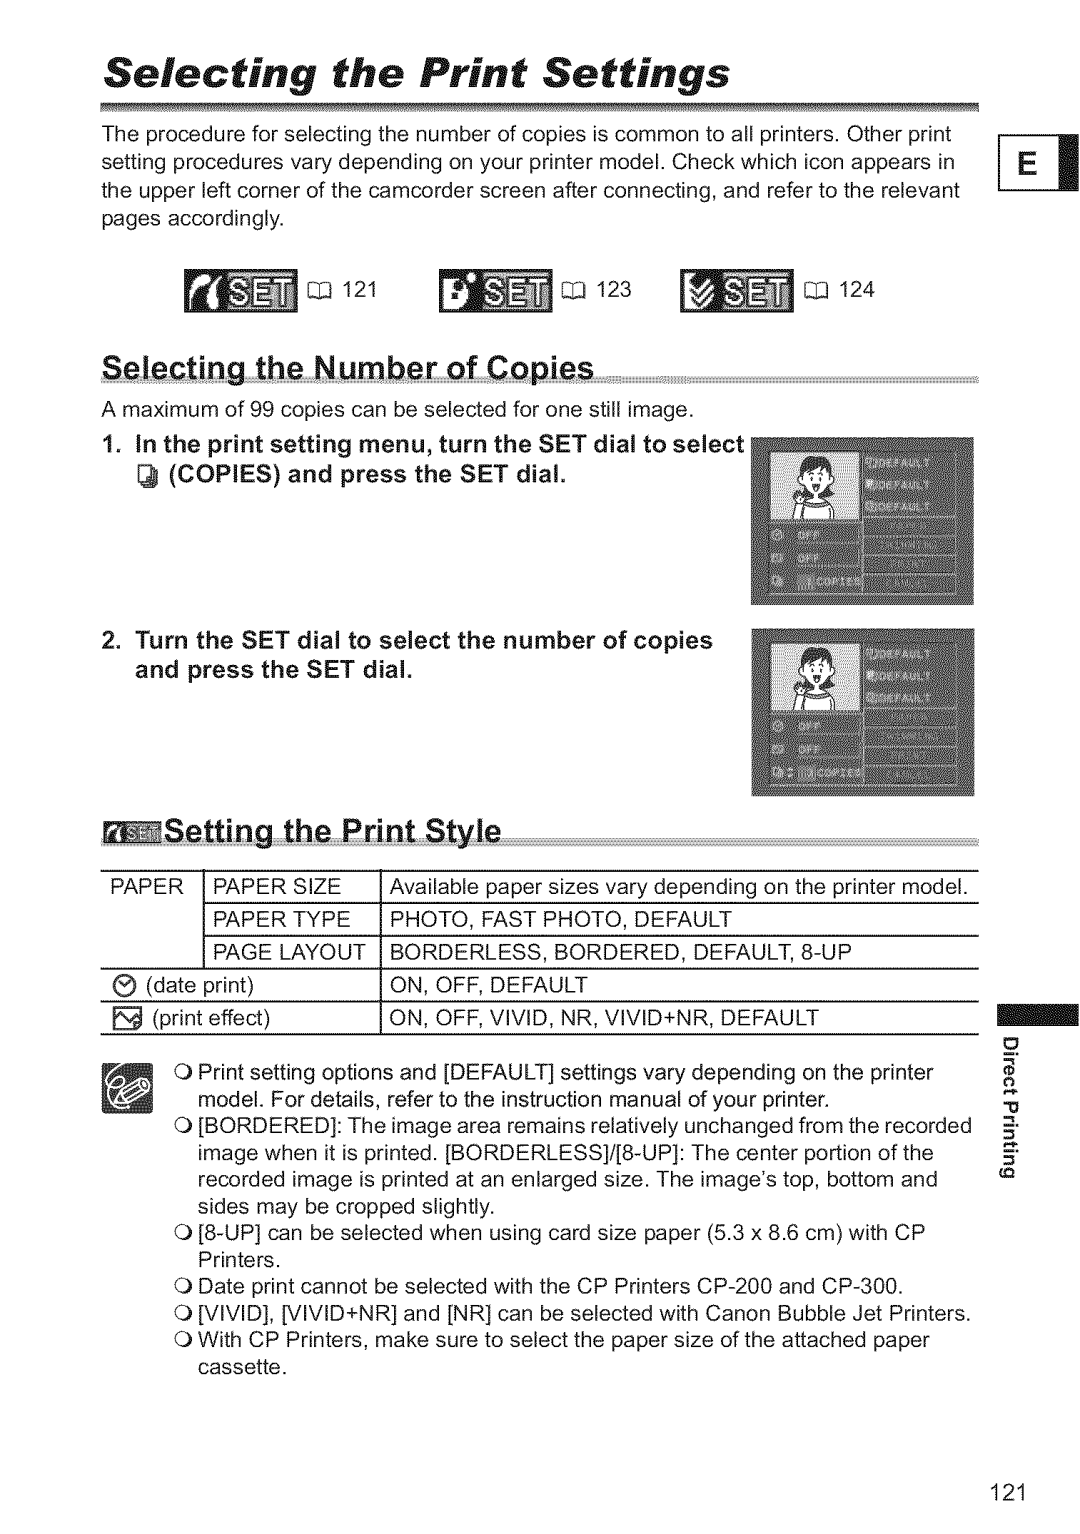
Effect Setup
Menu
Moderate
Submenu Menu Item
Card Camera Menu
Submenu Menu Item
Print
Card Play Menu
Using the Recording Programs
Set Program Selector To Easy
RecordiogProgram, O l
List of the program AE modes appears
Press the SET dial
Menu
Using the Night Modes
Settheprogram selector to @
Skin Detail Function
Set the program Selector
Adjusting Exposure Manually
SET
Press the Focus button. iv1Fappears
Adjusting the Focus Manually
Focus
Set the program
MF oo appears
Infinity Eus
Menu
Setting White Balance
Auto
Indoor
Page
Set the program selector to
Setting the Shutter Speed
Close the menu
Autoauto
Set It to OFF and close Menu
Open Menu Select
Press Start/stop
Using the SelFTimer
Tape, picture and We recommend using
Audio Recording
Using HeadphQnes during ReCording
Changing AudiQ MQde
To 16bit and close the menu
Recording With an
Audio Setup
MicmphQne
Wind Screen
Faders
Using Digital Effects
Fade Trigger
FADE-T
Multi-Image Screen q3
Effects
Sequences
Modes
Button
Play VCR
Se!e¢ing a Effec
Using,,,,the,,,,M
Effects
Widescreen
Widescreen TV Recording
Recpause
Move the zoom lever toward T
Magnh ing the Image
Displaying the Data Code
Open the menu and select Display SETUP/ . Select Data Code
Cting tbDatel!ime Disp!a CQmbination
Set it to Camera Data or CAM. & D/T and close the menu
It to on and close the menu
Mmm
End Search
Recorded consecutively
Returning to a Pre-marked Position
Date Search
Customizing the Camcorder
Select a setting option and close the menu
Changing the My Camera S etti n g s
Select the menu item you wish to change
Select
Changing the Display Language
Select
Language Close
Dzsplay Setup
Other Camcorder Settings
Menu Brzghtness
Brightness
Disappears
Tuning Qff b Image SbiJize
Stop playback
Recording to a VCR or Digital Video Device
Page
Devices
Analog Video
Or Can
Recording from Digital Video Devices
DV Dubbing
Press the button to stop recording
Signals Analog-Digital Converter
Converting Analog Signals into Digital
Nptin n the Dvie
Video
VcRsETop3oLAv........ov
Connecting an Audio Device
Connecting
Audio Dubbing
Microphone
Press the Audio DUB. button on the wireJess controller
00,osE,0P L12b,,ERE01Jt,00,o
Transferring Video Recordings to a
Computer IEEE1394
ReQing the Cad
Inserting and Removing a Memory Card
Open
Insert
Banging the StiU image Quality
Selecting the Image QualitylSize
160×120 and close the menu
Changing tb
File Numbers
Continuous Reset
Example
MENU38
Recording Still Images on a Memory Card
Set Camcorder To Card Camera Mode
Press Photo
Halfway
Screeo Disp!ays dudog Stil! Image Recordiog
While you are recording a movie, press the Photo button
Recording a Still image on a Memory Card While
Appears
Immediately
Recording from Qther Device
Set the camcorder to Play VCR mode
Press the flash button
Using the Flash
Press the Photo button halfway
Recording
Reviewing Still Image Right after
100
Recording Motion Jpeg Movies on a Memory Card
MB SD
@M lerai@t6
ScreenDispays during Movie RecQrding
101
102
NCA,ERASETOP38/ IlLFcsPR.... J
Selecting the Focusing Point
Selecting
Drive Mode
Press and hold the Photo button
104
105
Press the Photo button
Select the direction with the Card +/- button
Recording Panoramic Images S,i,ch Assis, Mode
Card + button clockwise. Card button counterclockwise
106
107
Video Software Instruction Manual
Images
Playing Back a Memory Card
Show
109
Cardmix
Slide Show
Select the image you wish to protect
Protecting Images
Card Operations
Protect
Eras ing a Sing!e !mage
Erasing In, ages
Erasing a Single ImagelA!! !mages
111
Card Chroma Key Card Chroma
Combining Images Card Mix
Card Luminance Key Card Lumi
Camera Chroma Key CAM. Chroma
113
Mixleveladjustmentblueareaofthecardanimationimage
Card Animation
Card Luminance Key
Card Chroma Key
Camera Chroma Key
115
116
Formatting a Memory Card
Select Format
Select a still image with the Card +/- buttons
Creating a Start-up Image
Printing Still Images
Connecting
Inte
118
Printing ae Se!ecting th Pint Sttings
Select the print settings 3
119
Select Still image you wish to print with
120
Printing Errors
Turn the SET dial to select Print and press the SET dial
Setting Rint Sty!e
Selecting the Print Settings
122
Including the Date in the Print
Print setting Style and press
Setting the Print Effect image Optimize
Sttig the Pdnt Style
Menu, turn the SET dial to select the SET dial
Turn the SET dial to select Borders and press the SET dial
Rint Sty!e
Image Standard
Multiple
Selecting the Borders
Selecting the Imaqe Style
126
Trimming Settings
Copies
Printing with Print Order Settings
Wish To print Press
Open File OPER. menu Select
128
Erasing All Print Orders
Computer
Digital Video Solution Disk
Transferring Memory Card Images to a
130
Epaatiens
Ransfer Qrder
Transferring All images, New images or images with
131
Orders
132
Erasin g, A!! Iransfer Qders
Selecting Images for Transfer Transfer Order
Open the menu and select Card Operations
You Wish
Preparati
About the Network Mode DV Messenger Version2
Start DV Messenger
134
Menu Display Setup Displays
SETUP/ . Select TV Screen
Screen Displays
It to
@ @@@@@
Screen Disp!ays duEing RecordingL!ayback
Mode
136
137
Card Play Mode
MemQry
List Messages
Card
Re!ated
139
Direct Prit Re!ted Mssages
140
Printer Error
Carncorder Body and Lens
MaintenancelOthers
Storage
LCD Screen
Room
When the camcorder is left in a humid
142
Cases
143
Battery Pack Hand!ing PrecautiQns
About
Protecting Tapes from Accidental Erasure
It hiu m B u tie n B atte ry H an d !in g R re cau tio n s
Power Sources
Using ,,,,the
145
Playback on a IV Screen
Power Source
Troubleshooting
Recording/Playback
146
147
Recording
148
Editing
Memory Card Operation
=s=
149
150
System Diagram Availability differs from area to area
Use of genuine Canon accessories is recommended
Optional Accessories
Packs
CB-2LT
WD-H34 Wide-converter
152
WS-2O Wrist Strap
153
SC-1000/SC-2000 Soft Carrying Case
ELU RAgO/ELU !851ELU
Specifications
Pawer
CA5ZO CQmpact
Adapter
NB2LH Batte Pack
Optional Accessories
Provided Accessories
Item Codes
TV, VCR
AV-DV
Network
MIC
159
For the United States
160
Icanadai