Appendix
How to adjust multiple screens
With the Edge blending and Color matching functions, you can seamlessly display the images from more than two projectors. Follow the steps below to adjust multiple projector images.
Edge blending
1Confirm if you use the same type of color wheel (high brightness or rich color reproduction color wheel) for each projector, and set the same screen size and image level.
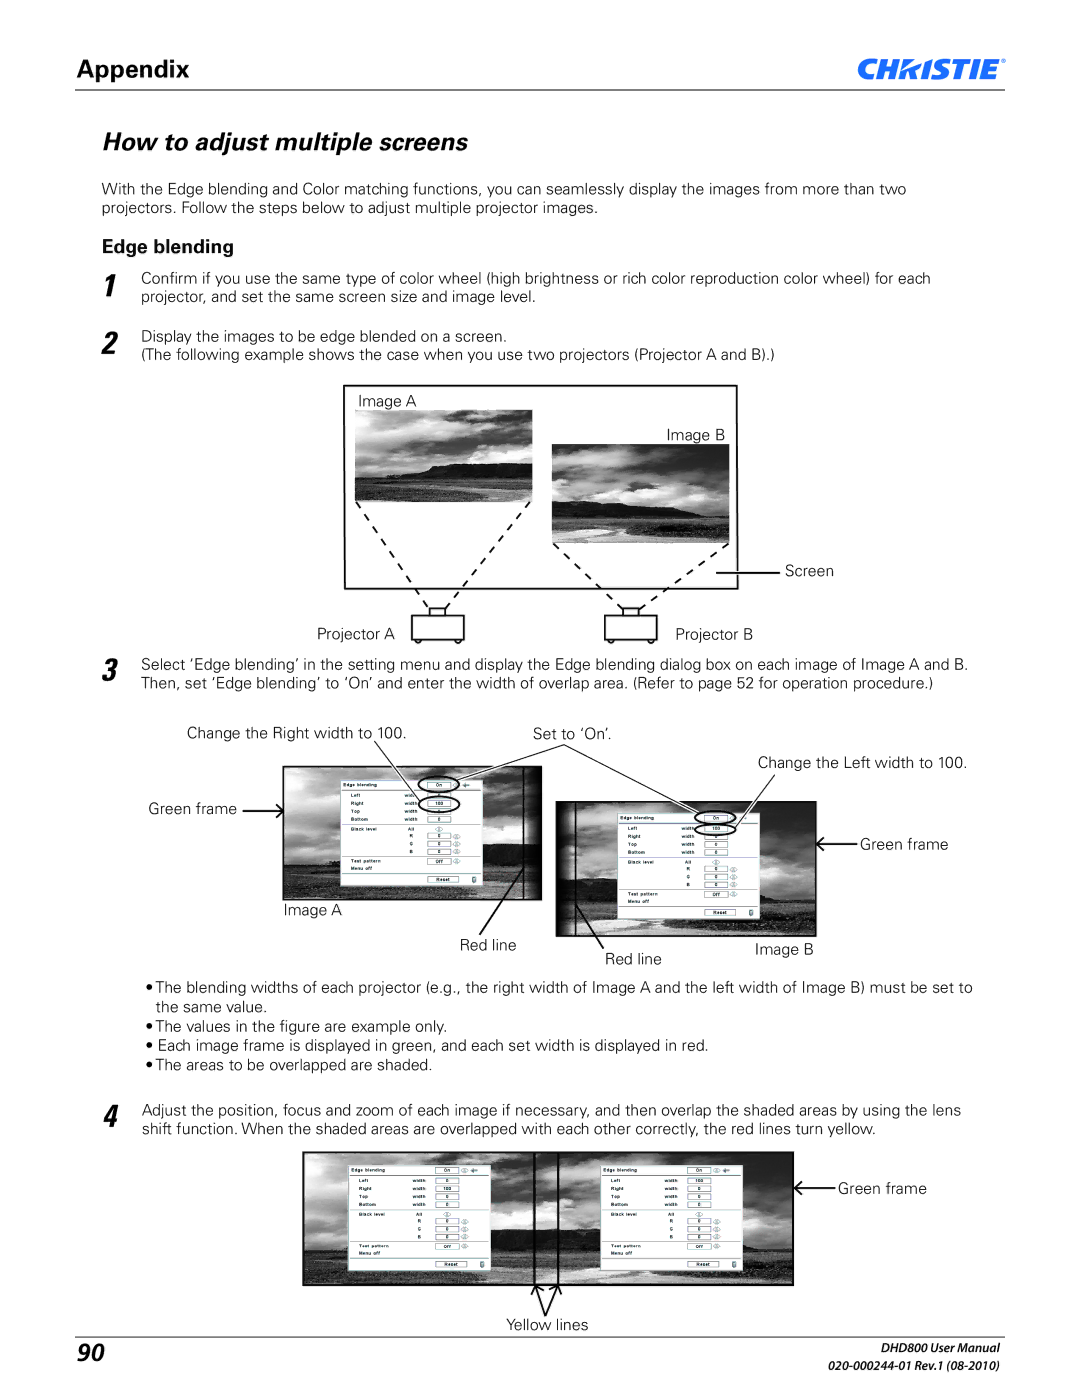
2Display the images to be edge blended on a screen.
(The following example shows the case when you use two projectors (Projector A and B).)
Image A
Image B
Screen
Projector A
Projector B
3Select ‘Edge blending’ in the setting menu and display the Edge blending dialog box on each image of Image A and B. Then, set ‘Edge blending’ to ‘On’ and enter the width of overlap area. (Refer to page 52 for operation procedure.)
Change the Right width to 100. | Set to ‘On’. |
Change the Left width to 100.
Green frame ![]()
![]() Green frame
Green frame
Image A
Red line | Red line | Image B |
|
|
•The blending widths of each projector (e.g., the right width of Image A and the left width of Image B) must be set to the same value.
•The values in the figure are example only.
•Each image frame is displayed in green, and each set width is displayed in red.
•The areas to be overlapped are shaded.
4Adjust the position, focus and zoom of each image if necessary, and then overlap the shaded areas by using the lens shift function. When the shaded areas are overlapped with each other correctly, the red lines turn yellow.
![]() Green frame
Green frame
Yellow lines
90 | DHD800 User Manual | |
|