Wireless-G IP Phone
The Front Panel
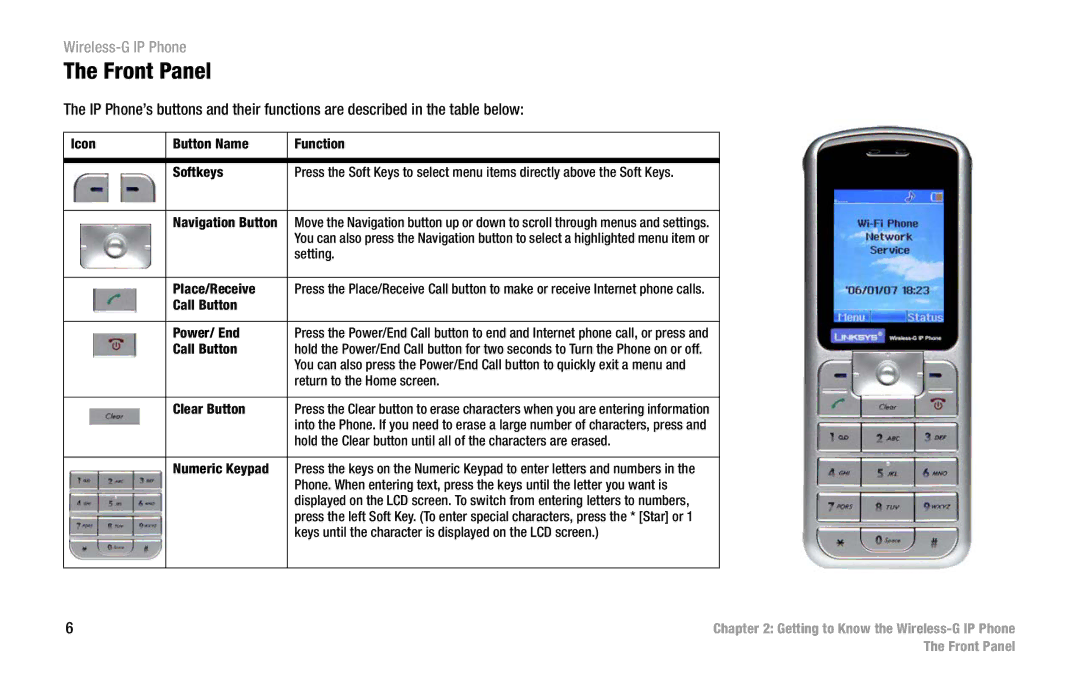
The IP Phone’s buttons and their functions are described in the table below:
Icon | Button Name | Function |
|
|
|
|
|
| Softkeys | Press the Soft Keys to select menu items directly above the Soft Keys. |
|
|
|
|
|
| Navigation Button | Move the Navigation button up or down to scroll through menus and settings. |
|
|
| You can also press the Navigation button to select a highlighted menu item or |
|
|
| setting. |
|
|
|
|
|
| Place/Receive | Press the Place/Receive Call button to make or receive Internet phone calls. |
|
| Call Button |
|
|
|
|
|
|
| Power/ End | Press the Power/End Call button to end and Internet phone call, or press and |
|
| Call Button | hold the Power/End Call button for two seconds to Turn the Phone on or off. |
|
|
| You can also press the Power/End Call button to quickly exit a menu and |
|
|
| return to the Home screen. |
|
|
|
|
|
| Clear Button | Press the Clear button to erase characters when you are entering information |
|
|
| into the Phone. If you need to erase a large number of characters, press and |
|
|
| hold the Clear button until all of the characters are erased. |
|
|
|
|
|
| Numeric Keypad | Press the keys on the Numeric Keypad to enter letters and numbers in the |
|
|
| Phone. When entering text, press the keys until the letter you want is |
|
|
| displayed on the LCD screen. To switch from entering letters to numbers, |
|
|
| press the left Soft Key. (To enter special characters, press the * [Star] or 1 |
|
|
| keys until the character is displayed on the LCD screen.) |
|
|
|
|
|
6 |
| Chapter 2: Getting to Know the | |
|
|
| The Front Panel |