2 | Setting Up 9084 Network Remote Control | |
|
|
|
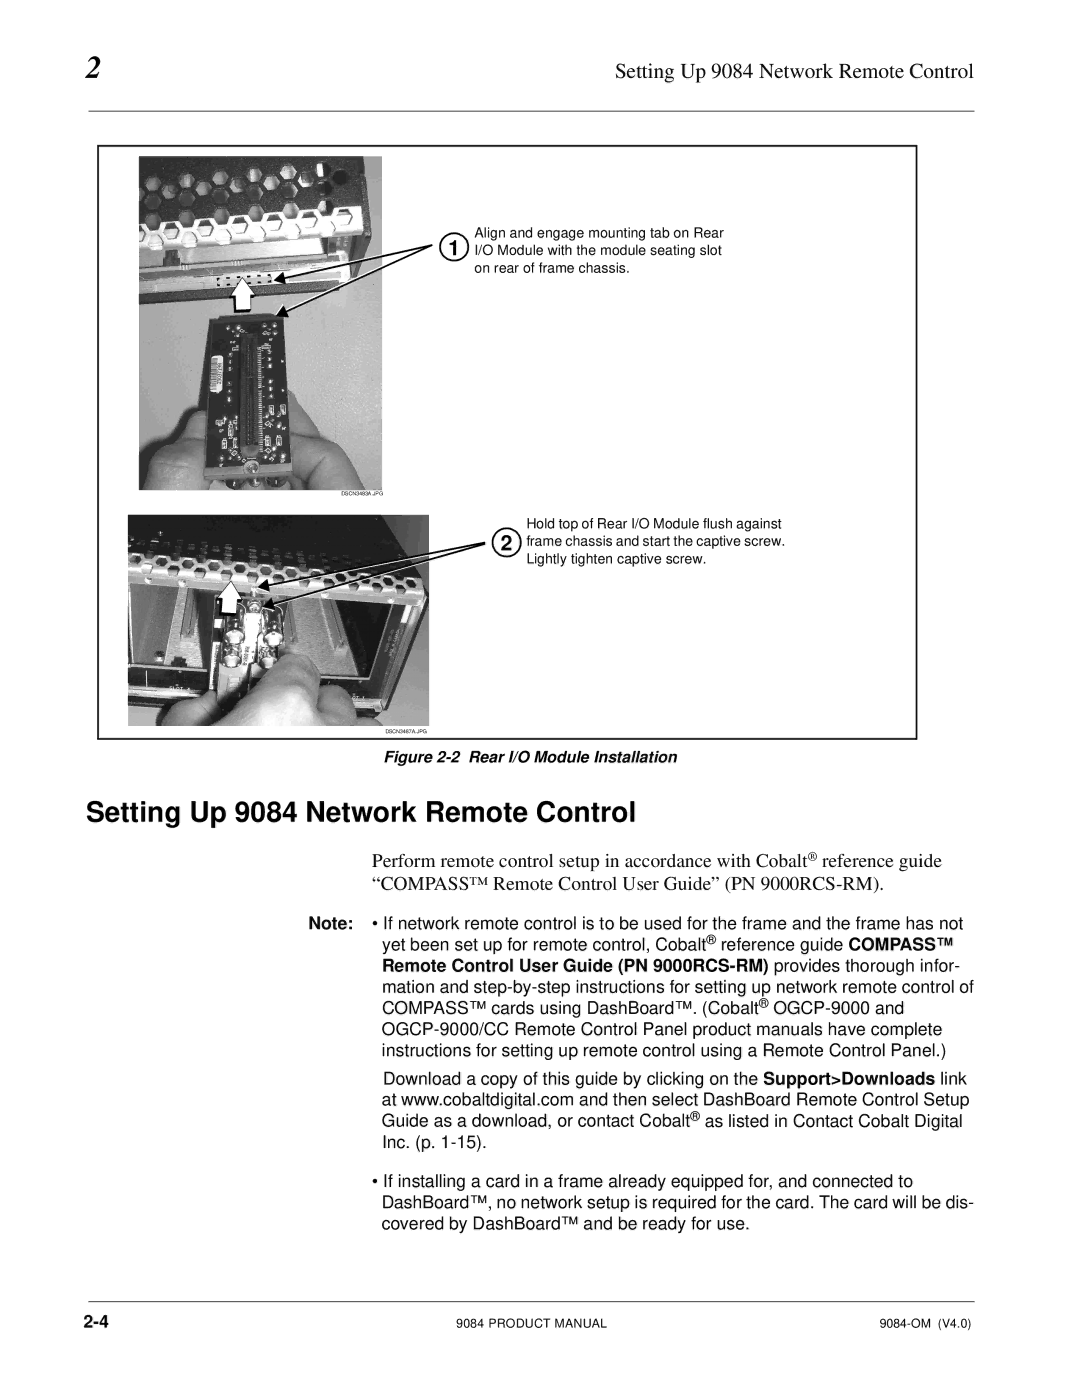
Align and engage mounting tab on Rear
1 I/O Module with the module seating slot on rear of frame chassis.
DSCN3483A.JPG
Hold top of Rear I/O Module flush against
2 frame chassis and start the captive screw. Lightly tighten captive screw.
DSCN3487A.JPG
Figure 2-2 Rear I/O Module Installation
Setting Up 9084 Network Remote Control
Perform remote control setup in accordance with Cobalt® reference guide “COMPASS™ Remote Control User Guide” (PN
Note: • If network remote control is to be used for the frame and the frame has not yet been set up for remote control, Cobalt® reference guide COMPASS™ Remote Control User Guide (PN
Download a copy of this guide by clicking on the Support>Downloads link at www.cobaltdigital.com and then select DashBoard Remote Control Setup Guide as a download, or contact Cobalt® as listed in Contact Cobalt Digital Inc. (p.
•If installing a card in a frame already equipped for, and connected to DashBoard™ , no network setup is required for the card. The card will be dis- covered by DashBoard™ and be ready for use.
9084 PRODUCT MANUAL |
