DSL-604+ ADSL Ethernet Router User’s Guide
Static Route Configuration
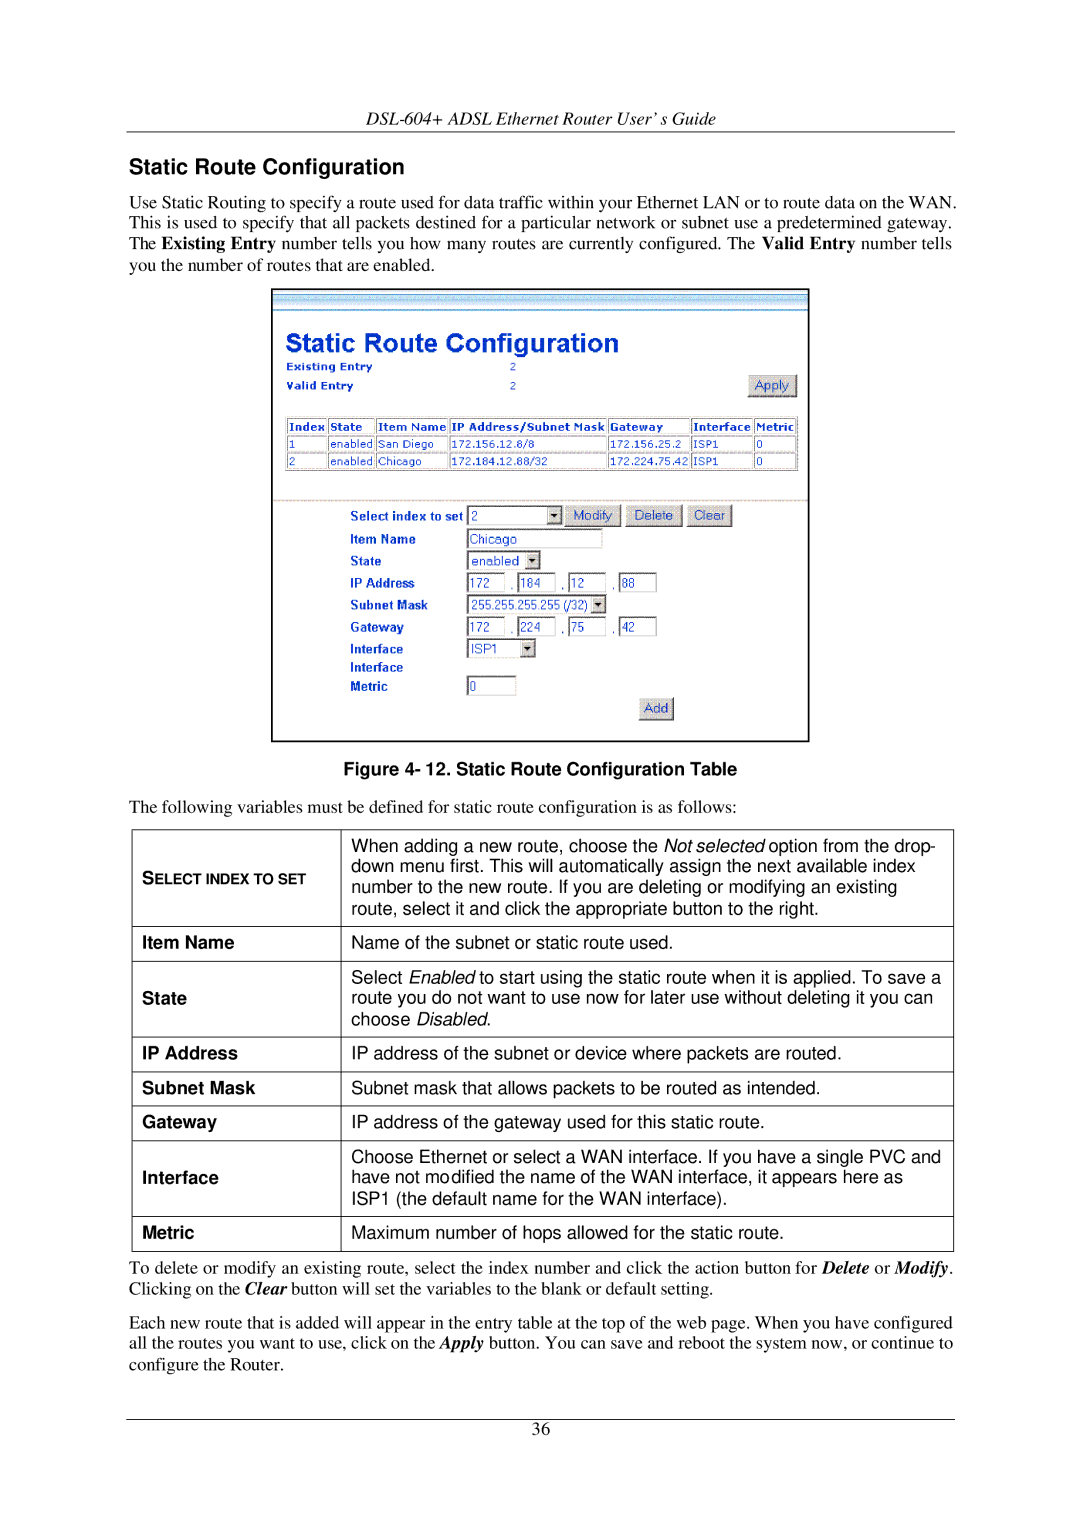
Use Static Routing to specify a route used for data traffic within your Ethernet LAN or to route data on the WAN. This is used to specify that all packets destined for a particular network or subnet use a predetermined gateway. The Existing Entry number tells you how many routes are currently configured. The Valid Entry number tells you the number of routes that are enabled.
|
| Figure 4- 12. Static Route Configuration Table |
The following variables must be defined for static route configuration is as follows: | ||
|
|
|
|
| When adding a new route, choose the Not selected option from the drop- |
| SELECT INDEX TO SET | down menu first. This will automatically assign the next available index |
| number to the new route. If you are deleting or modifying an existing | |
|
| |
|
| route, select it and click the appropriate button to the right. |
|
|
|
| Item Name | Name of the subnet or static route used. |
|
|
|
|
| Select Enabled to start using the static route when it is applied. To save a |
| State | route you do not want to use now for later use without deleting it you can |
|
| choose Disabled. |
|
|
|
| IP Address | IP address of the subnet or device where packets are routed. |
|
|
|
| Subnet Mask | Subnet mask that allows packets to be routed as intended. |
|
|
|
| Gateway | IP address of the gateway used for this static route. |
|
|
|
|
| Choose Ethernet or select a WAN interface. If you have a single PVC and |
| Interface | have not modified the name of the WAN interface, it appears here as |
|
| ISP1 (the default name for the WAN interface). |
|
|
|
| Metric | Maximum number of hops allowed for the static route. |
|
|
|
To delete or modify an existing route, select the index number and click the action button for Delete or Modify. Clicking on the Clear button will set the variables to the blank or default setting.
Each new route that is added will appear in the entry table at the top of the web page. When you have configured all the routes you want to use, click on the Apply button. You can save and reboot the system now, or continue to configure the Router.
36
