APPENDIX B. PREPARING THE INDOOR TO OUTDOOR CABLE

The Indoor-to-Outdoor cable provides pin-to-pin connection on both sides. It is supplied open-ended at both sides, to allow the installer to conveniently route the cable into the waterproof seal off the Outdoor unit and through holes in walls.

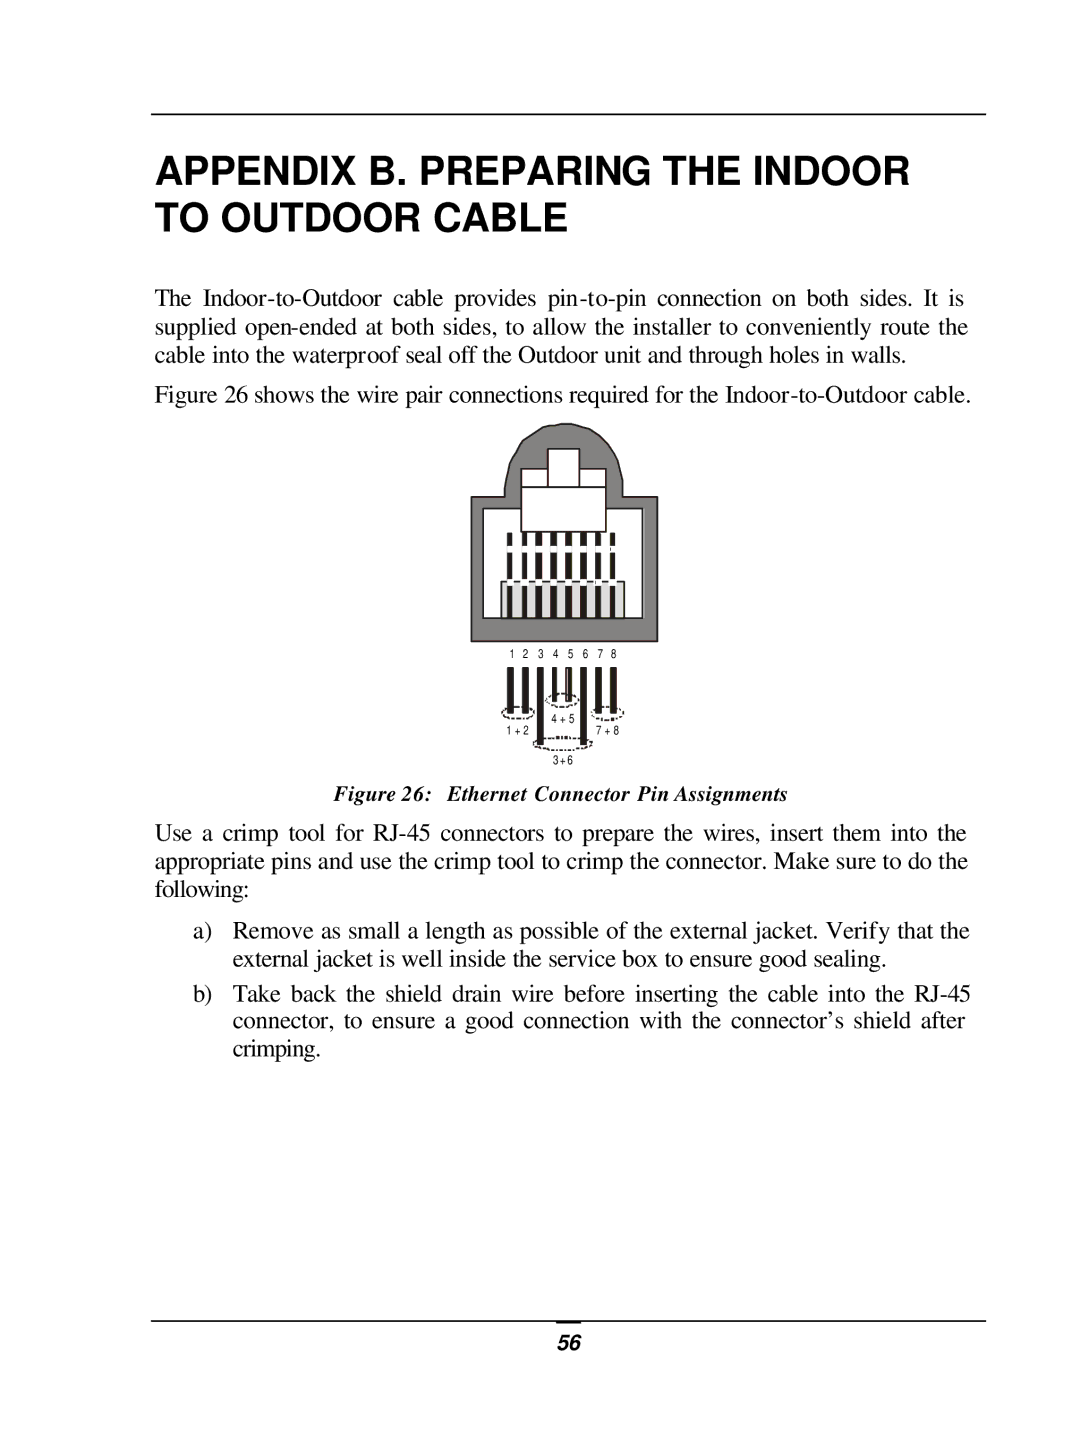
Figure 26 shows the wire pair connections required for the Indoor-to-Outdoor cable.

1 2 3 4 5 6 7 8

1 + 2

4 + 5

3 + 6

7 + 8

Figure 26: Ethernet Connector Pin Assignments

Use a crimp tool for RJ-45 connectors to prepare the wires, insert them into the appropriate pins and use the crimp tool to crimp the connector. Make sure to do the following:

a)Remove as small a length as possible of the external jacket. Verify that the external jacket is well inside the service box to ensure good sealing.

b)Take back the shield drain wire before inserting the cable into the RJ-45 connector, to ensure a good connection with the connector’s shield after crimping.

56

Page 61
Image 61
D-Link DWL-1800 user manual Appendix B. Preparing the Indoor to Outdoor Cable, Ethernet Connector Pin Assignments