Contents | IdentificationI ti i ti of Controlstrols |
Product Information
Safety Instructions _____________________________1
Before you use your DVD recorder ____________2
Contents _______________________________________4
Identification of Controls_______________________5
Installation
Connecting your DVD recorder to the TV set ___12 Connecting additional devices _________________14
Installing your DVD recorder __________________16
Initial installation / Using a satellite receiver Automatic TV channel search (Autoinstall) Manual TV search
Sorting and clearing TV channels manually Setting the time and date
![]() Recording
Recording
Manual recording______________________________33
General information
Recording without automatic switch off
Interrupt recording (Pause)
Recording with automatic switch off (OTR) Protecting the disc against accidental recording Lining up recordings within a title (assemble cut) Selecting the recording mode (quality) Automatic recording from a satellite receiver
Managing the disc contents____________________40
General information / Editing recording titles (name)
Playing back titles / Erasing a recording/title
Disc settings / Edit Menu
Programming a recording (TIMER) _____________47
General information
![]() Front panel
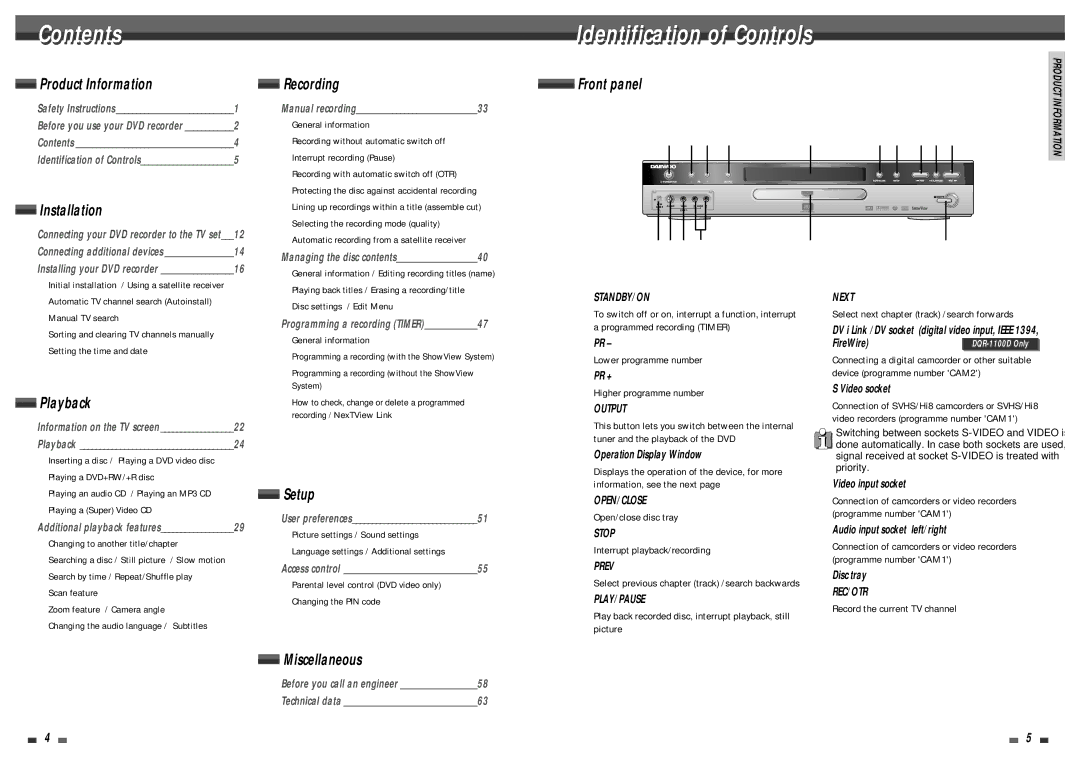
Front panel
! @ # $ | % | ^ & * ( ) |
| ||||||||||||||
|
|
|
|
|
|
|
|
|
|
|
|
|
|
|
|
|
|
|
|
|
|
|
|
|
|
|
|
|
|
|
|
|
|
|
|
|
|
|
|
|
|
|
|
|
|
|
|
|
|
|
|
|
|
|
|
|
|
|
|
|
|
|
|
|
|
|
|
|
|
|
|
|
|
|
|
|
|
|
|
|
|
|
|
|
|
|
|
|
|
|
|
|
|
|
|
|
|
|
|
|
|
|
|
|
|
|
|
|
|
|
|
|
|
|
|
|
|
|
|
|
|
|
|
|
|
123 4 | 5 | 6 |
! STANDBY/ON | ) NEXT |
|
|
To switch off or on, interrupt a function, interrupt | Select next chapter (track) /search forwards | ||
a programmed recording (TIMER) | 1 DV i Link /DV socket | (digital video input, IEEE 1394, | |
@ PR – | FireWire) |
|
|
| |||
PRODUCT INFORMATION
Playback
Information on the TV screen __________________22
Playback ______________________________________24
Inserting a disc / Playing a DVD video disc Playing a DVD+RW/+R disc
Playing an audio CD / Playing an MP3 CD Playing a (Super) Video CD
Additional playback features__________________29
Changing to another title/chapter
Searching a disc / Still picture / Slow motion Search by time / Repeat/Shuffle play
Scan feature
Zoom feature / Camera angle
Changing the audio language / Subtitles
Programming a recording (with the ShowView System)
Programming a recording (without the ShowView System)
How to check, change or delete a programmed recording / NexTView Link
![]() Setup
Setup
User preferences_______________________________51
Picture settings / Sound settings
Language settings / Additional settings
Access control _________________________________55
Parental level control (DVD video only)
Changing the PIN code
![]() Miscellaneous
Miscellaneous
Before you call an engineer ___________________58
Technical data _________________________________63
Lower programme number
#PR +
Higher programme number
$OUTPUT
This button lets you switch between the internal tuner and the playback of the DVD
%Operation Display Window
Displays the operation of the device, for more information, see the next page
^OPEN/CLOSE
Open/close disc tray
&STOP
Interrupt playback/recording
*PREV
Select previous chapter (track) /search backwards
(PLAY/PAUSE
Play back recorded disc, interrupt playback, still picture
Connecting a digital camcorder or other suitable device (programme number 'CAM2')
2S Video socket
Connection of SVHS/Hi8 camcorders or SVHS/Hi8 video recorders (programme number 'CAM1')
Switching between sockets
3Video input socket
Connection of camcorders or video recorders (programme number 'CAM1')
4Audio input socket left/right
Connection of camcorders or video recorders (programme number 'CAM1')
5Disc tray
6 REC/OTR
Record the current TV channel
4 |
|
|
| 5 |
|
|