Programming a recording (TIMER)
How to check, change or delete a programmed recording (TIMER)
User preferences
In this section you will learn how to set your user preferences on the DVD recorder. The symbols have the following meanings:
Timer
ShowView system
1 | Switch on the TV set. If required, select the programme number for the |
| DVD recorder. |
2 | Press [TIMER] on the remote control. The programming method last |
| selected is marked. |
Sound | Feature | Installation |
Picture | Language | Recording |
…Timer programming
◆√Timer List |
| √ | |
† |
|
|
|
|
| To store |
|
|
| Press OK |
|
Timer |
|
| |
Timer List | VPS | Rec | |
|
| ||
Date Prog. Start PDC End | Mode | ||
01 | EXT1 22:26 | 00:26 | SP |
- - | |||
| Total record time :02:00 |
| |
To change | To exit |
| |
Press > | Press TIMER | ||
3 | Select ‘Timer List' using […] or [†] and confirm with [√]. The current |
| information will appear on the screen. |
4 | Select the programmed recording (TIMER) you want to check, change or |
| delete with […] or [†]. |
5 | Press [√]. |
| Select the input field with [œ] or [√]. |
| If required, change the information with […], [†] or the number buttons |
| [0..9] . |
6 | Confirm with [OK]. |
7 | To end, press [TIMER]. |
8 | Switch off with [STANDBY]. |
Delete programmed recording
1Press the [CLEAR] button.
2Confirm with [OK]. 'Cleared' will briefly appear on the TV screen.
3To end, press [TIMER].
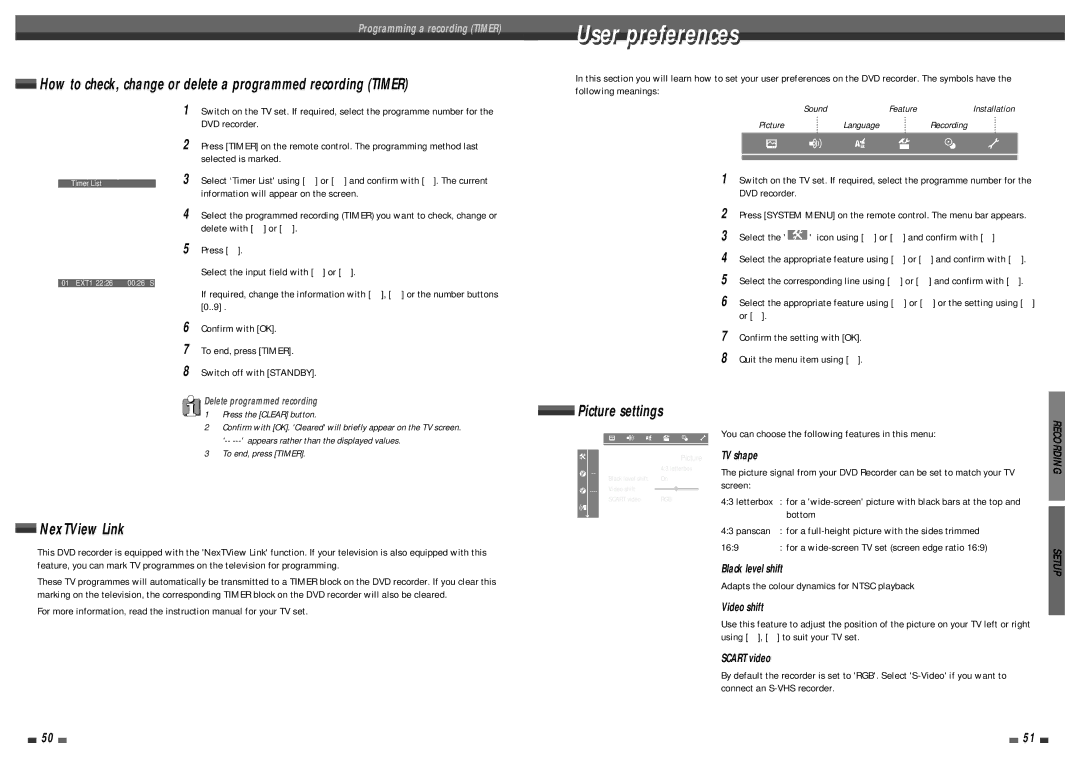
![]() Picture settings
Picture settings
|
| Picture | ||
TV Shape | √4:3 letterbox | |||
Black level shift | On | |||
| ||||
Video shift |
|
| ||
|
| |||
| SCART video | RGB | ||
1Switch on the TV set. If required, select the programme number for the DVD recorder.
2Press [SYSTEM MENU] on the remote control. The menu bar appears.
3Select the '  ' icon using […] or [†] and confirm with [√]
4Select the appropriate feature using [œ] or [√] and confirm with [†].
5Select the corresponding line using […] or [†] and confirm with [√].
6Select the appropriate feature using […] or [†] or the setting using [œ] or [√].
7Confirm the setting with [OK].
8Quit the menu item using [œ].
You can choose the following features in this menu:
TV shape
The picture signal from your DVD Recorder can be set to match your TV screen:
4:3 letterbox : for a |
bottom |
RECORDING
NexTView Link
This DVD recorder is equipped with the 'NexTView Link' function. If your television is also equipped with this feature, you can mark TV programmes on the television for programming.
These TV programmes will automatically be transmitted to a TIMER block on the DVD recorder. If you clear this marking on the television, the corresponding TIMER block on the DVD recorder will also be cleared.
For more information, read the instruction manual for your TV set.
4:3 panscan | : | for a |
16:9 | : | for a |
Black level shift
Adapts the colour dynamics for NTSC playback
Video shift
Use this feature to adjust the position of the picture on your TV left or right using [œ], [√] to suit your TV set.
SCART video
By default the recorder is set to 'RGB'. Select
SETUP
50 |
|
|
| 51 |
|
|