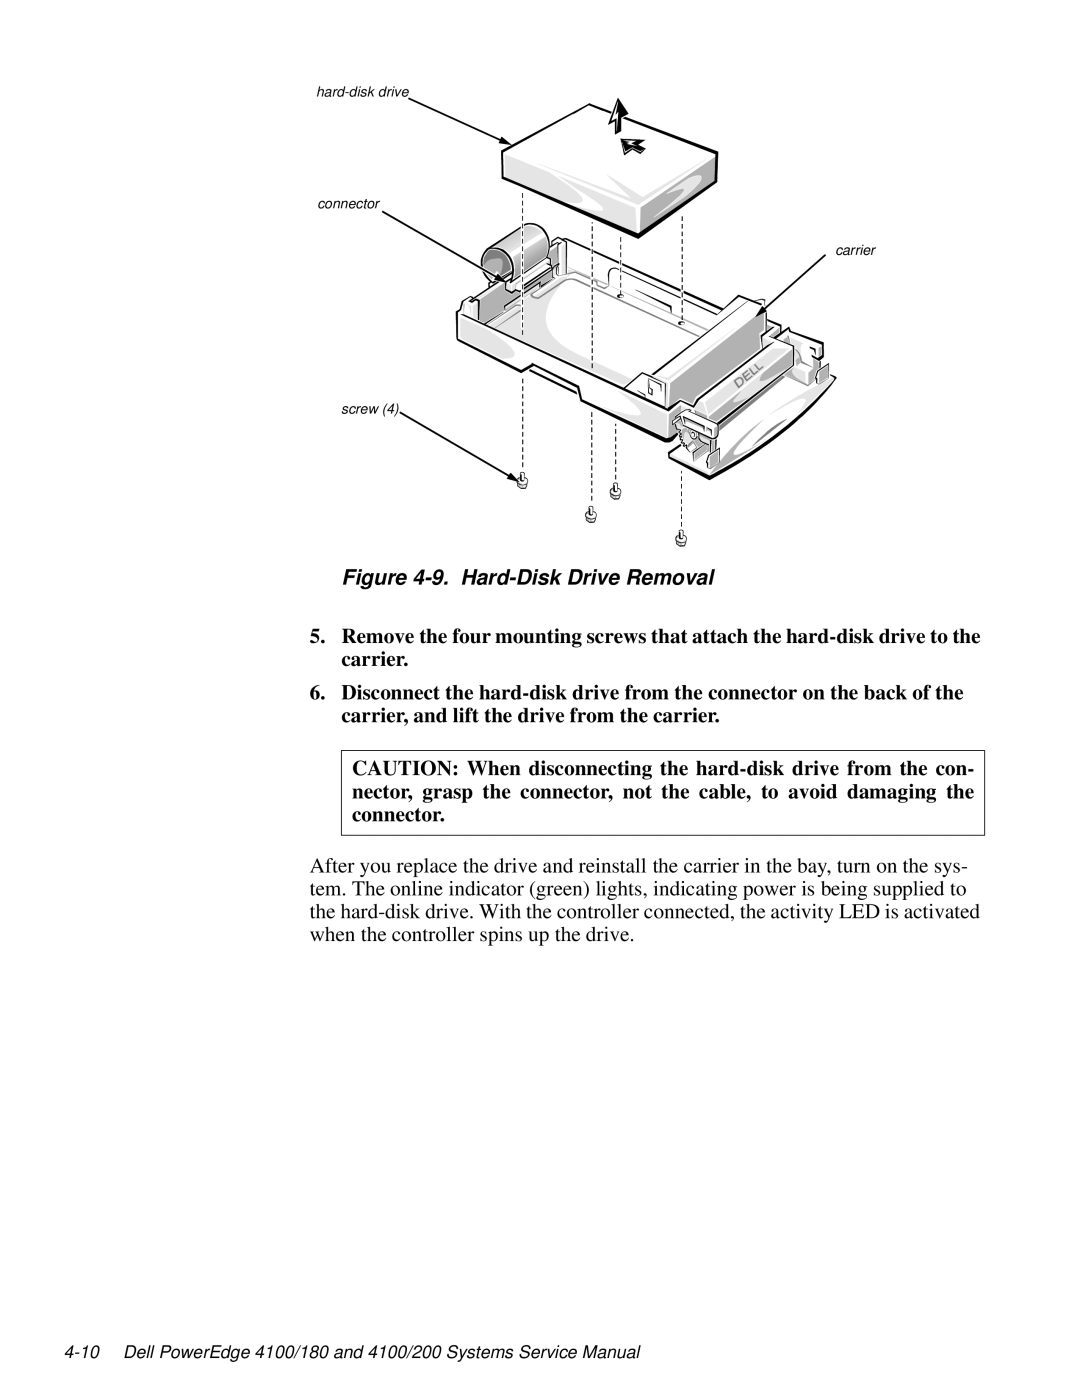
hard-disk drive
connector
carrier
screw (4)
Figure 4-9. Hard-Disk Drive Removal
5.Remove the four mounting screws that attach the hard-disk drive to the carrier.
6.Disconnect the hard-disk drive from the connector on the back of the carrier, and lift the drive from the carrier.
CAUTION: When disconnecting the hard-disk drive from the con- nector, grasp the connector, not the cable, to avoid damaging the connector.
After you replace the drive and reinstall the carrier in the bay, turn on the sys- tem. The online indicator (green) lights, indicating power is being supplied to the hard-disk drive. With the controller connected, the activity LED is activated when the controller spins up the drive.
4-10 Dell PowerEdge 4100/180 and 4100/200 Systems Service Manual