Dell 4100, 200, 180 service manual Front-Panel Inserts, Front-Panel Insert Removal

Models: 180 4100 200

1 82
Download 82 pages 39.19 Kb
Page 48
Image 48

Front-Panel Inserts

front-panel insert

tab (2)

latch (2)

back of the front bezel

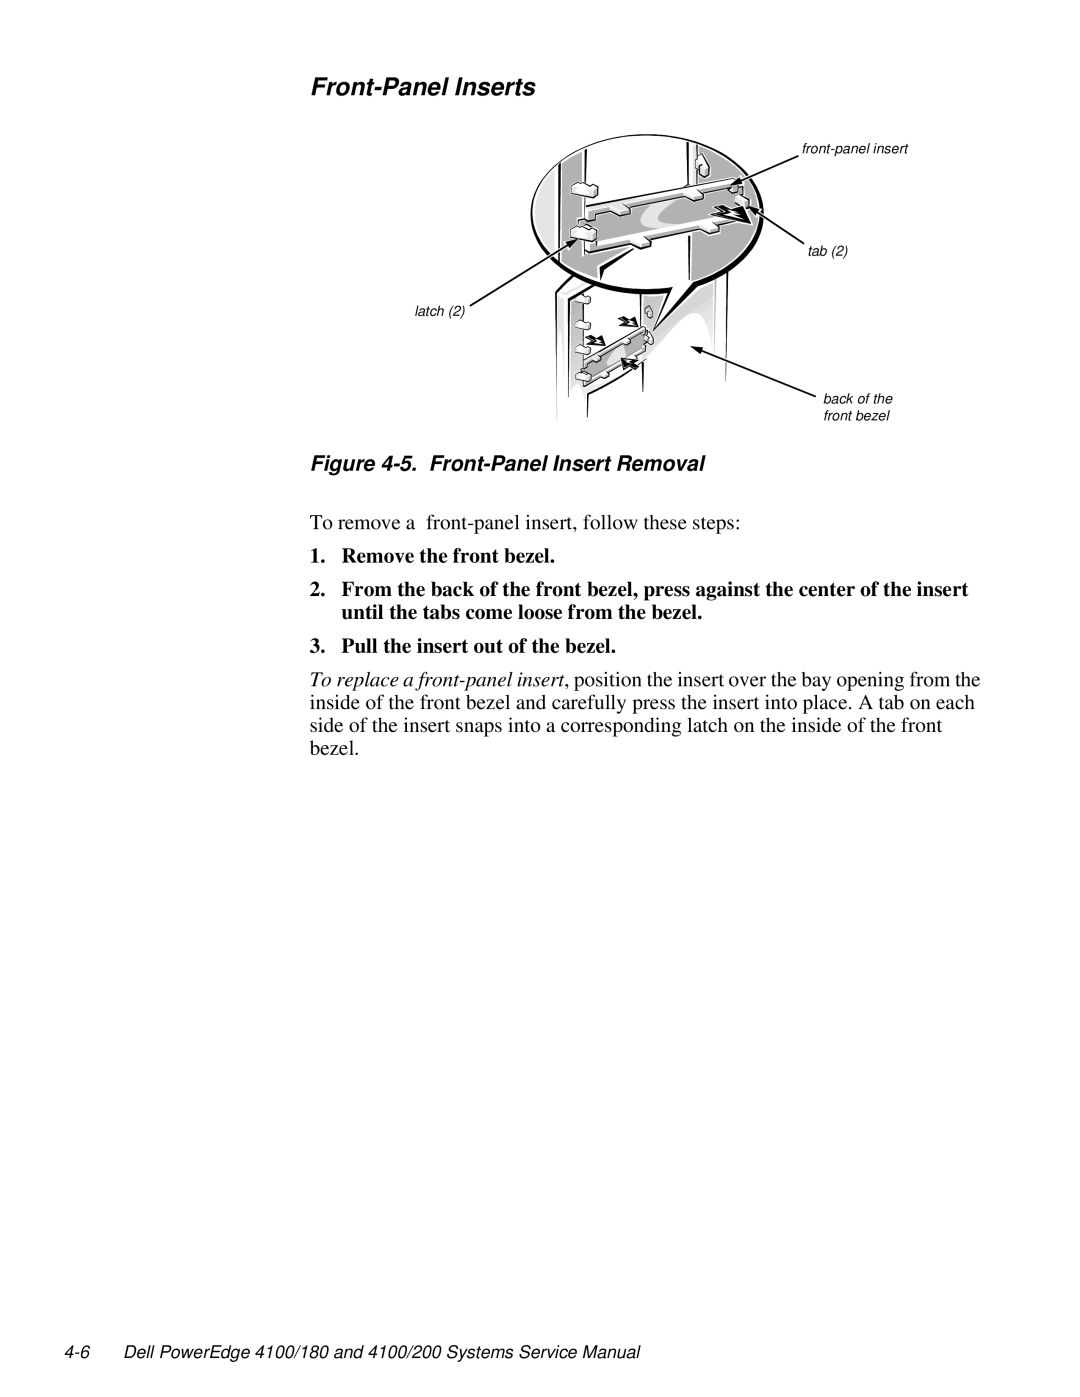
Figure 4-5. Front-Panel Insert Removal

To remove a front-panel insert, follow these steps:

1.Remove the front bezel.

2.From the back of the front bezel, press against the center of the insert until the tabs come loose from the bezel.

3.Pull the insert out of the bezel.

To replace a front-panel insert, position the insert over the bay opening from the inside of the front bezel and carefully press the insert into place. A tab on each side of the insert snaps into a corresponding latch on the inside of the front bezel.

4-6 Dell PowerEdge 4100/180 and 4100/200 Systems Service Manual

Page 48
Image 48
Dell 4100, 200, 180 service manual Front-Panel Inserts, Front-Panel Insert Removal