System Board
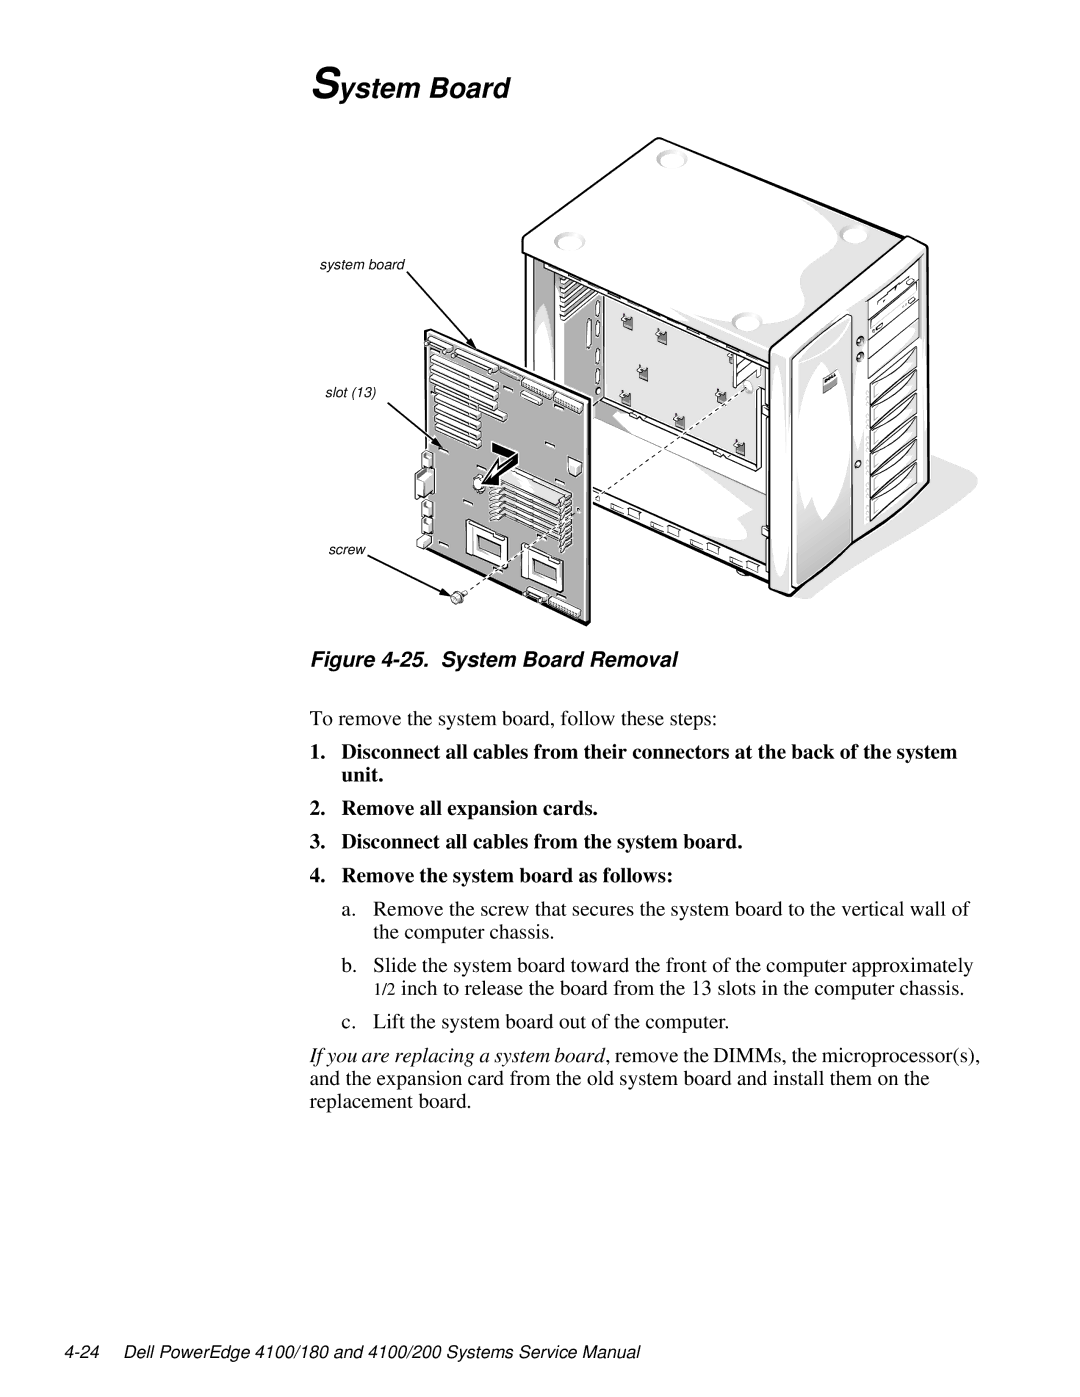
system board
slot (13)
screw
Figure 4-25. System Board Removal
To remove the system board, follow these steps:
1.Disconnect all cables from their connectors at the back of the system unit.
2.Remove all expansion cards.
3.Disconnect all cables from the system board.
4.Remove the system board as follows:
a.Remove the screw that secures the system board to the vertical wall of the computer chassis.
b.Slide the system board toward the front of the computer approximately 1/2 inch to release the board from the 13 slots in the computer chassis.
c.Lift the system board out of the computer.
If you are replacing a system board, remove the DIMMs, the microprocessor(s), and the expansion card from the old system board and install them on the replacement board.