1
3
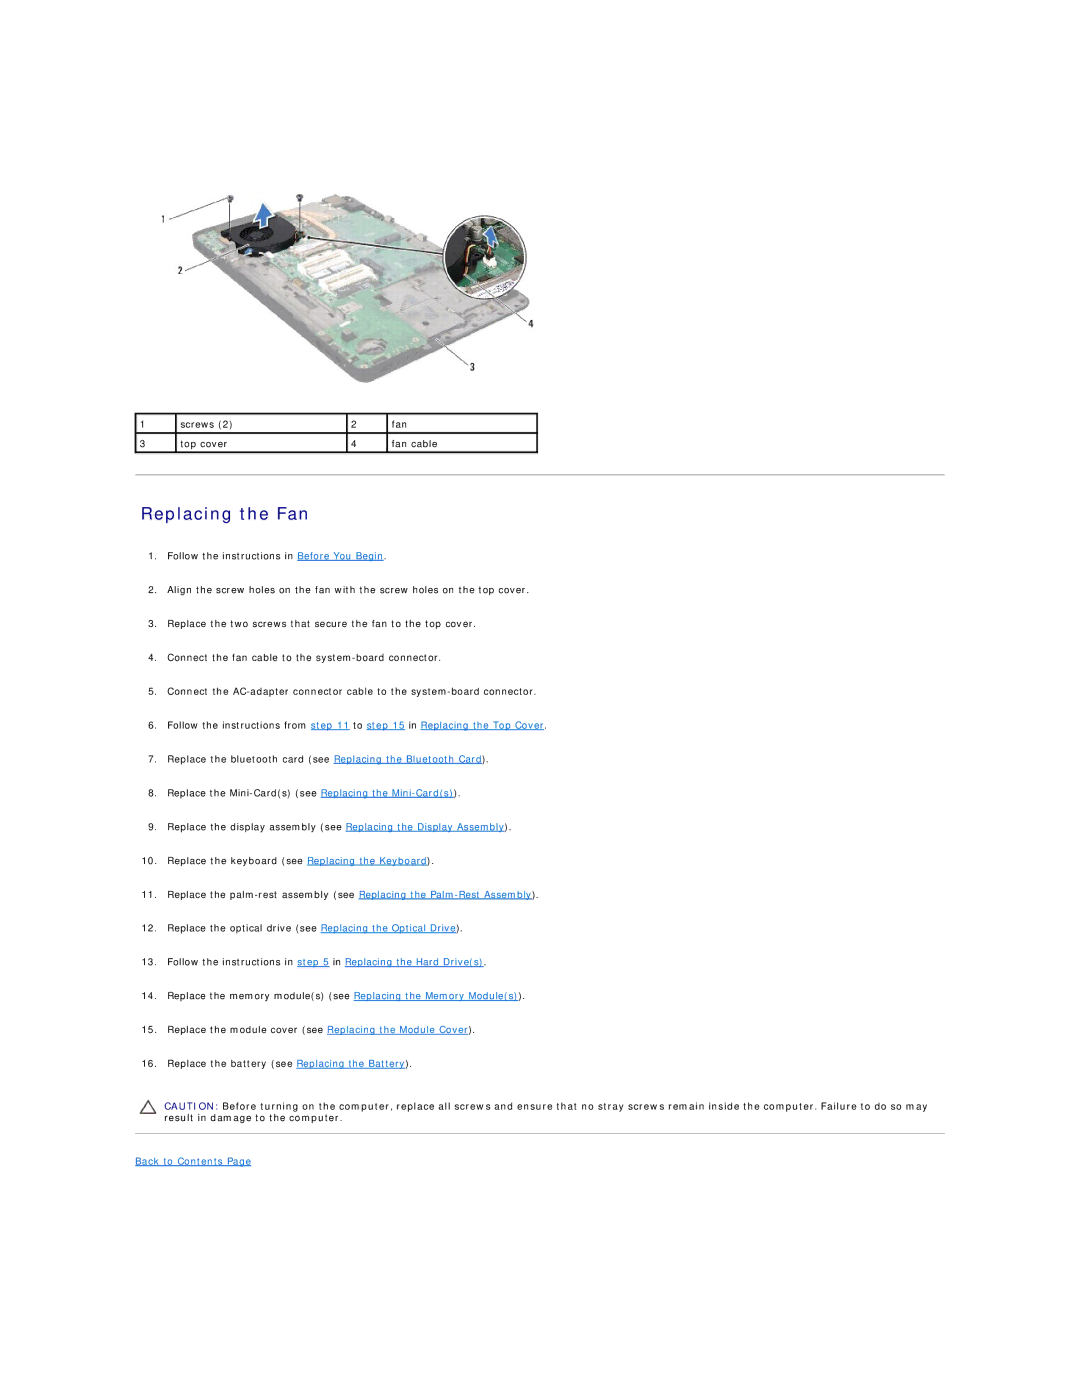
screws (2) | 2 | fan |
top cover | 4 | fan cable |
|
|
|
Replacing the Fan
1.Follow the instructions in Before You Begin.
2.Align the screw holes on the fan with the screw holes on the top cover.
3.Replace the two screws that secure the fan to the top cover.
4.Connect the fan cable to the
5.Connect the
6.Follow the instructions from step 11 to step 15 in Replacing the Top Cover.
7.Replace the bluetooth card (see Replacing the Bluetooth Card).
8.Replace the
9.Replace the display assembly (see Replacing the Display Assembly).
10.Replace the keyboard (see Replacing the Keyboard).
11.Replace the
12.Replace the optical drive (see Replacing the Optical Drive).
13.Follow the instructions in step 5 in Replacing the Hard Drive(s).
14.Replace the memory module(s) (see Replacing the Memory Module(s)).
15.Replace the module cover (see Replacing the Module Cover).
16.Replace the battery (see Replacing the Battery).
CAUTION: Before turning on the computer, replace all screws and ensure that no stray screws remain inside the computer. Failure to do so may result in damage to the computer.