eUse ui p to input the address and press ENTER.
IP Address :
Set the IP address within the ranges shown below. The Network Audio function cannot be used if other IP addresses are set. CLASS A: 10.0.0.0 ~ 10.255.255.255
CLASS B: 172.16.0.0 ~ 172.31.255.255
CLASS C: 192.168.0.0 ~ 192.168.255.255
Subnet Mask :
When connecting an xDSL modem or terminal adapter directly to the
Default Gateway :
When connected to a gateway (router), input its IP address.
Primary DNS Secondary DNS :
If there is only one DNS address indicated in the documentation supplied by your provider, input it at “Primary DNS”. If there are two or more DNS addresses, input the first one at “Secondary DNS”.
rUse i to select “Exit” and press ENTER. Setup is complete.
bWhen connecting to the network via a Proxy server, select “Proxy” and press ENTER (vpage 38 “Proxy settings”).
Wireless LAN settings
Use this procedure to configure the Wireless LAN settings.
1Fitting a rod antenna (vpage 22).
b If a LAN cable is connected, remove it.
2Turn on the
3Set the access point at the GUI menu “Manual Setup”
– “Network Setup” – “Network Setup”.
When searching access points to connect automatically, refer to “Automatic settings”.
When searching access points to connect manually, refer to “Manual settings”.
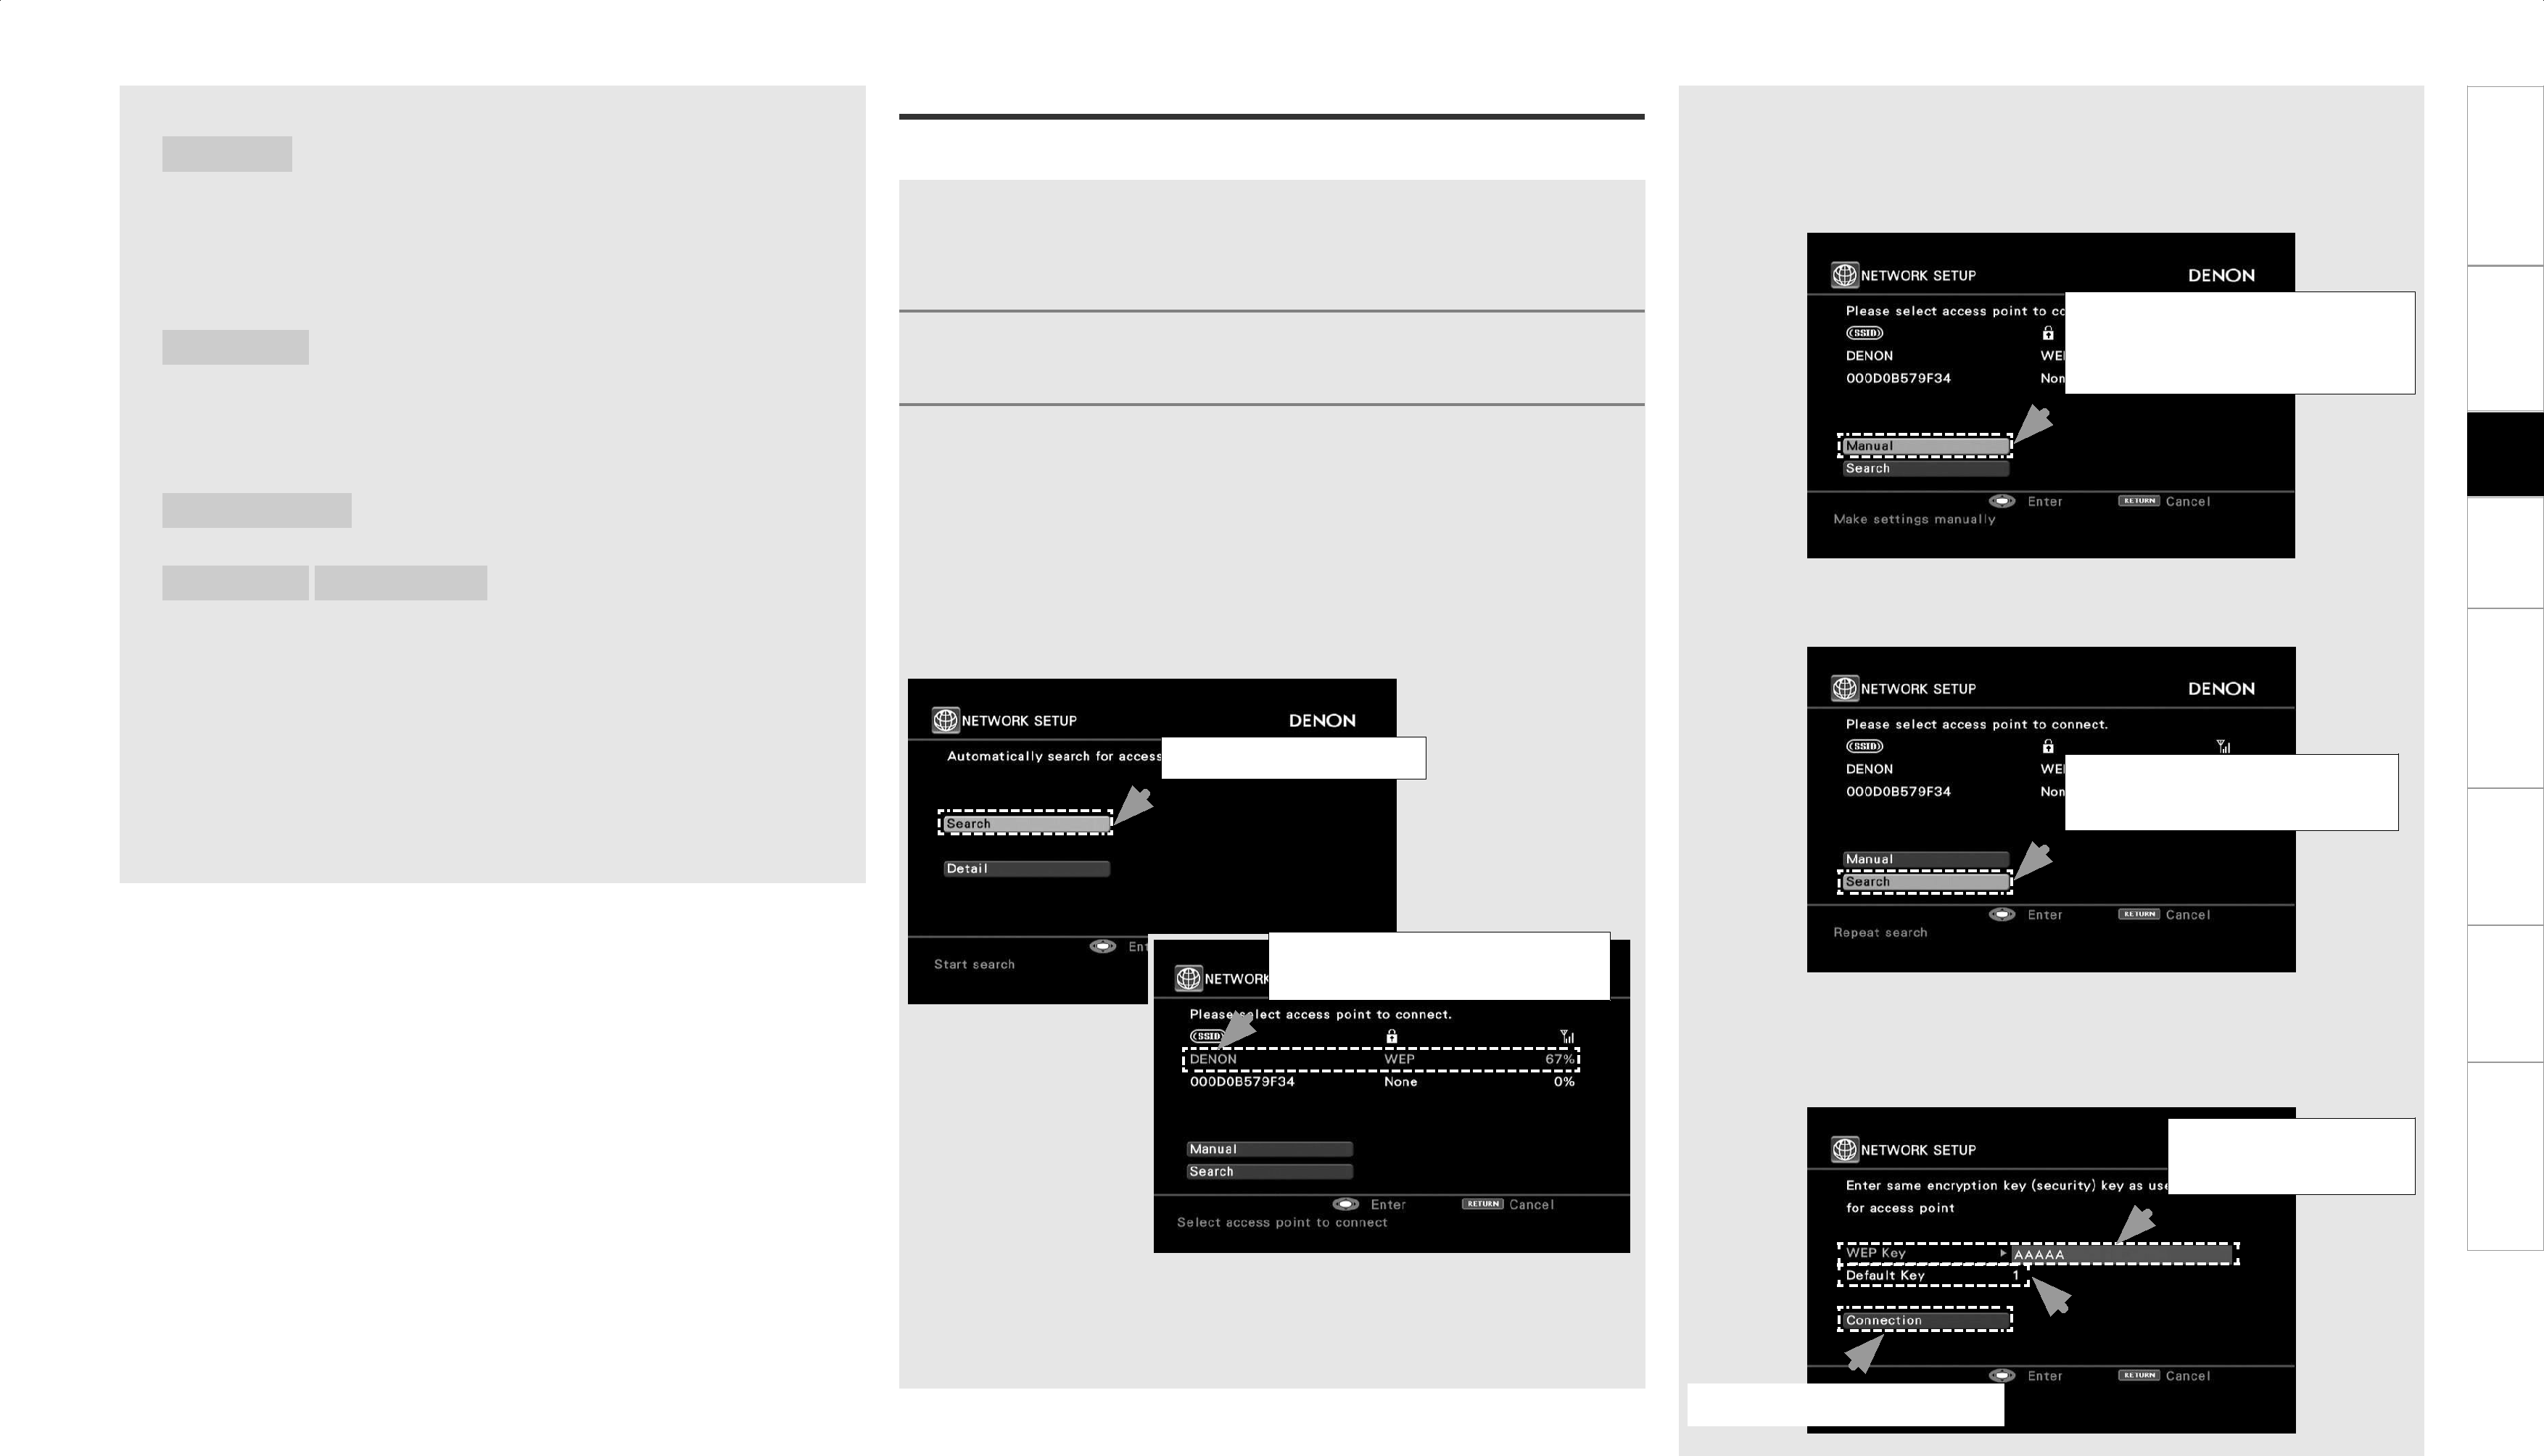
nAutomatic settings
qSelect “Search”.
w Select the access point. Example) DENON
bIf the access points are not detected automatically, use i to select the “Manual” and press ENTER.
Setting becomes manual. For details, see “Manual settings” (vpage 37, 38).
Select when access points cannot be searched automatically.
bIf the access points are repeat search, use i to select the “Search” and press ENTER.
Select when searching access points again.
eIf there is an encryption setting for the access point you selected in step w, enter same encryption key as used for the access point. (If there is no encryption setting, proceed to step t.
e Enter encryption key.
Troubleshooting Information
q Select “Search” and press ENTER. |
|
|
|
The access point you have set is displayed. |
|
|
|
|
| r Set only during | |
w Use ui to select the access point, and then press ENTER. |
|
| |
|
| “WEP” in step w. | |
|
|
| |
| t Select “Connection”. |
|
|
|
| ||
|
|
|
|
36