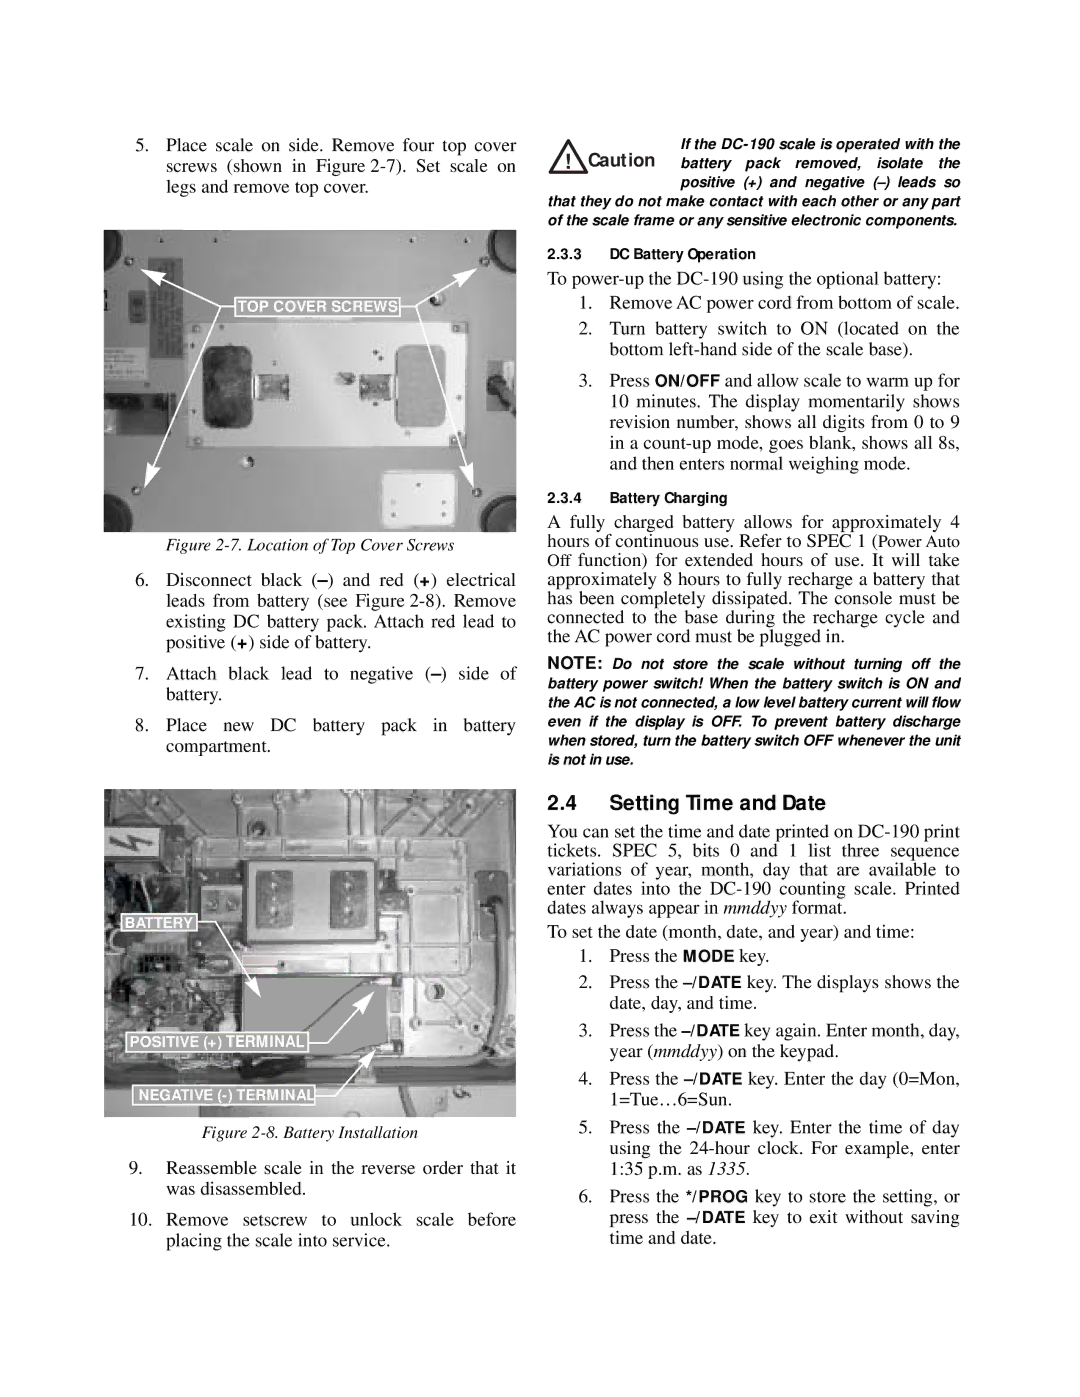
5.Place scale on side. Remove four top cover screws (shown in Figure
TOP COVER SCREWS![]()
![]()
Figure 2-7. Location of Top Cover Screws
6.Disconnect black
7.Attach black lead to negative
8.Place new DC battery pack in battery compartment.
If the
positive (+) and negative
2.3.3DC Battery Operation
To
1.Remove AC power cord from bottom of scale.
2.Turn battery switch to ON (located on the bottom
3.Press ON/OFF and allow scale to warm up for 10 minutes. The display momentarily shows revision number, shows all digits from 0 to 9 in a
2.3.4Battery Charging
A fully charged battery allows for approximately 4 hours of continuous use. Refer to SPEC 1 (Power Auto Off function) for extended hours of use. It will take approximately 8 hours to fully recharge a battery that has been completely dissipated. The console must be connected to the base during the recharge cycle and the AC power cord must be plugged in.
NOTE: Do not store the scale without turning off the battery power switch! When the battery switch is ON and the AC is not connected, a low level battery current will flow even if the display is OFF. To prevent battery discharge when stored, turn the battery switch OFF whenever the unit is not in use.
BATTERY
POSITIVE (+) TERMINAL ![]()
NEGATIVE
Figure 2-8. Battery Installation
9.Reassemble scale in the reverse order that it was disassembled.
10.Remove setscrew to unlock scale before placing the scale into service.
2.4Setting Time and Date
You can set the time and date printed on
To set the date (month, date, and year) and time:
1.Press the MODE key.
2.Press the
3.Press the
4.Press the
5.Press the
6.Press the */PROG key to store the setting, or press the
