DIRECTV SYSTEM FROM HUGHES NETWORK SYSTEMS - OWNER’S MANUAL
Attaching the Reflector onto the LNB Support Arm
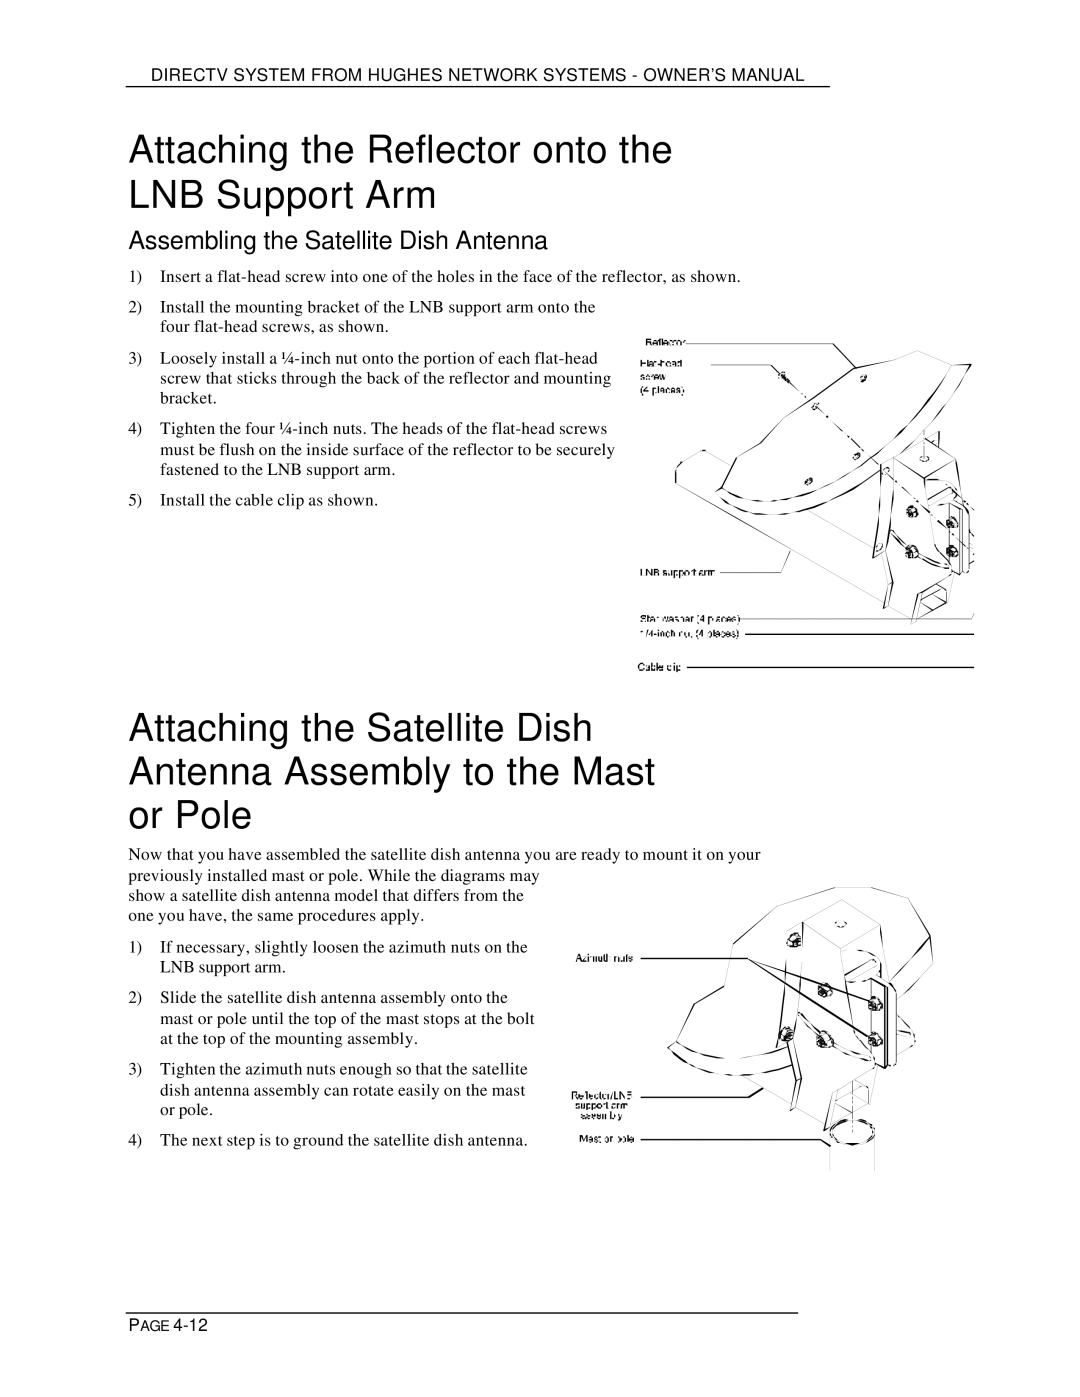
Assembling the Satellite Dish Antenna
1)Insert a
2)Install the mounting bracket of the LNB support arm onto the four
3) Loosely install a
4) Tighten the four
5) Install the cable clip as shown.
Attaching the Satellite Dish Antenna Assembly to the Mast or Pole
Now that you have assembled the satellite dish antenna you are ready to mount it on your previously installed mast or pole. While the diagrams may
show a satellite dish antenna model that differs from the one you have, the same procedures apply.
1) If necessary, slightly loosen the azimuth nuts on the LNB support arm.
2) Slide the satellite dish antenna assembly onto the mast or pole until the top of the mast stops at the bolt at the top of the mounting assembly.
3) Tighten the azimuth nuts enough so that the satellite dish antenna assembly can rotate easily on the mast or pole.
4) The next step is to ground the satellite dish antenna.
PAGE