Installing and Removing an IOM
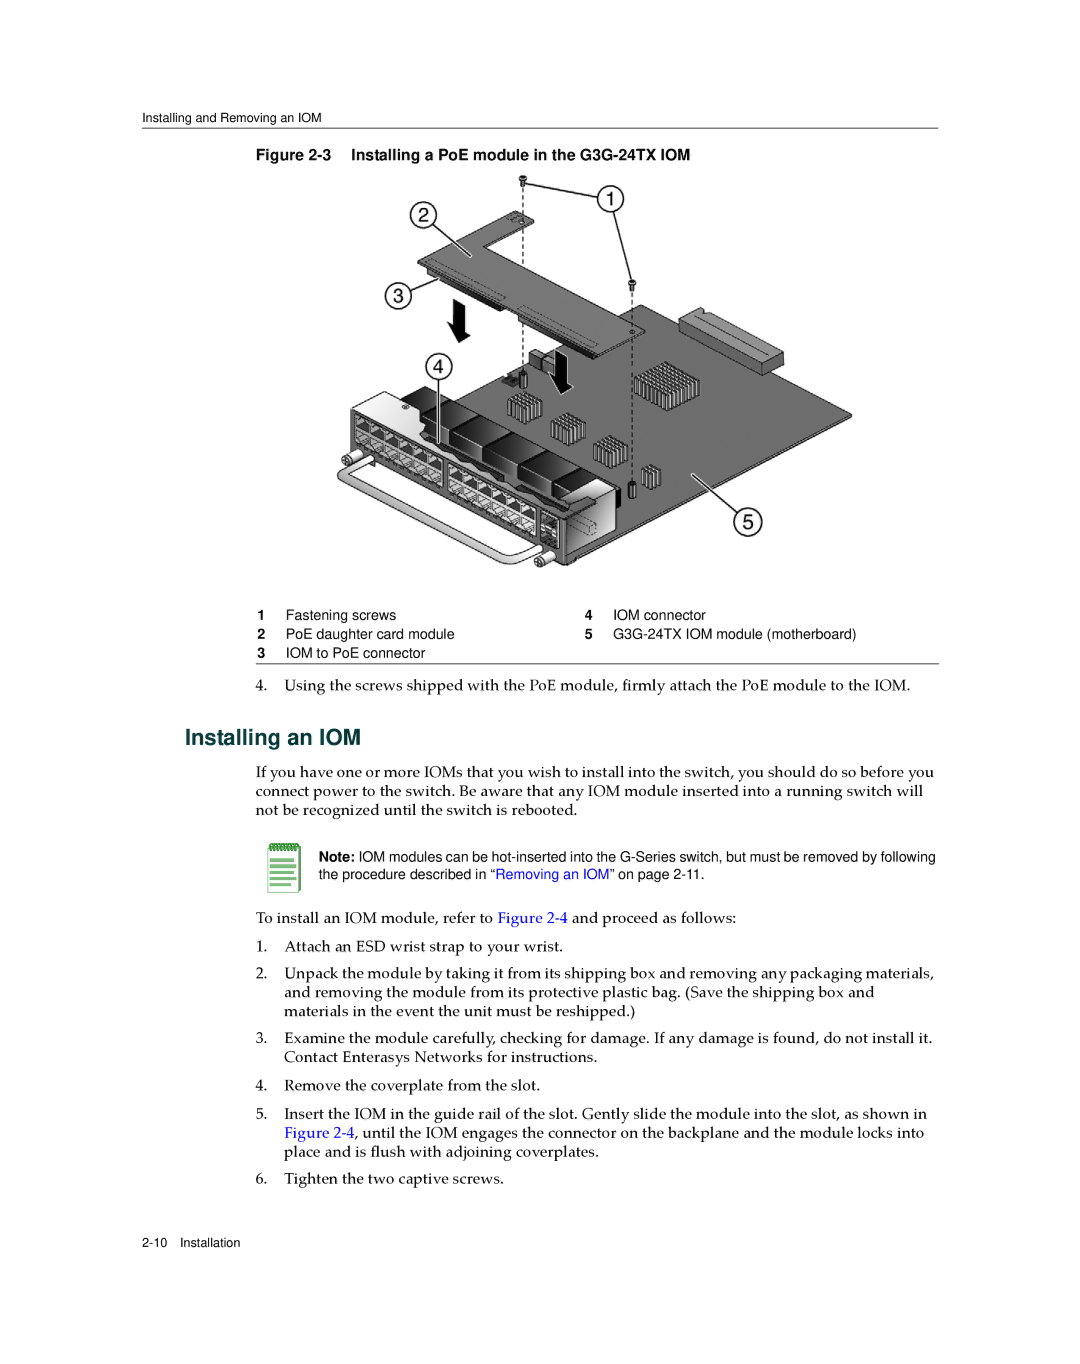
Figure 2-3 Installing a PoE module in the G3G-24TX IOM
1 | Fastening screws | 4 | IOM connector |
2 | PoE daughter card module | 5 |
3IOM to PoE connector
4.Using the screws shipped with the PoE module, firmly attach the PoE module to the IOM.
Installing an IOM
If you have one or more IOMs that you wish to install into the switch, you should do so before you connect power to the switch. Be aware that any IOM module inserted into a running switch will not be recognized until the switch is rebooted.
Note: IOM modules can be
To install an IOM module, refer to Figure 2‐4 and proceed as follows:
1.Attach an ESD wrist strap to your wrist.
2.Unpack the module by taking it from its shipping box and removing any packaging materials, and removing the module from its protective plastic bag. (Save the shipping box and materials in the event the unit must be reshipped.)
3.Examine the module carefully, checking for damage. If any damage is found, do not install it. Contact Enterasys Networks for instructions.
4.Remove the coverplate from the slot.
5.Insert the IOM in the guide rail of the slot. Gently slide the module into the slot, as shown in Figure 2‐4, until the IOM engages the connector on the backplane and the module locks into place and is flush with adjoining coverplates.
6.Tighten the two captive screws.