Chapter 4 • Connecting Multiple Switchers
System 4xi with SW4/6 ARMX Switchers
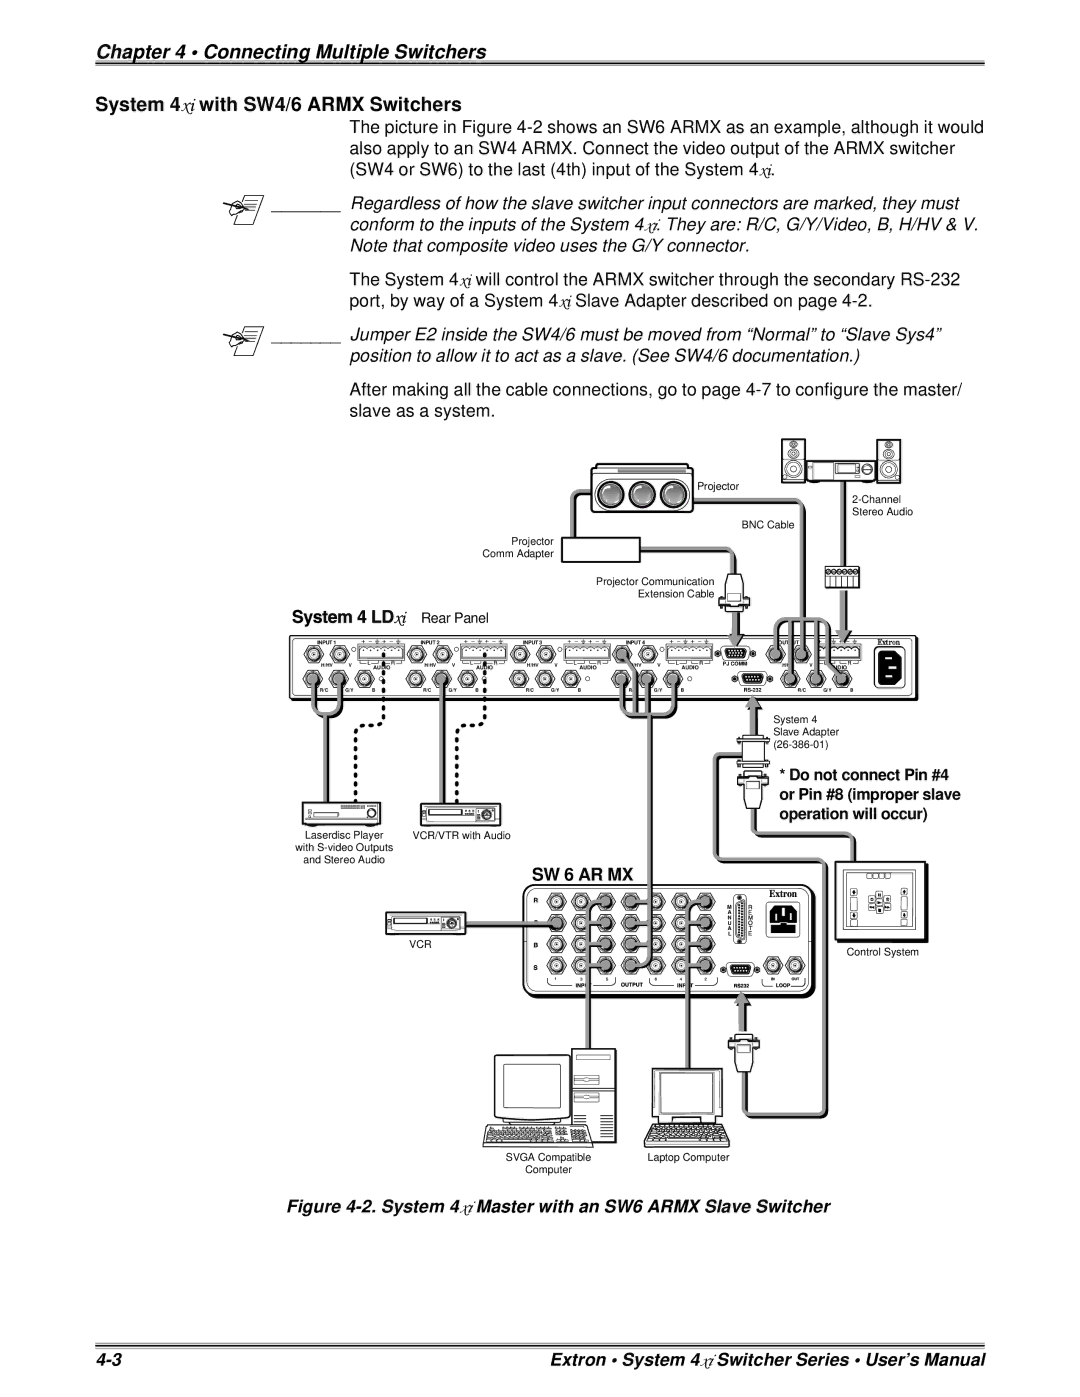
The picture in Figure
_______ Regardless of how the slave switcher input connectors are marked, they must
conform to the inputs of the System 4xi. They are: R/C, G/Y/Video, B, H/HV & V. Note that composite video uses the G/Y connector.
The System 4xi will control the ARMX switcher through the secondary
_______ Jumper E2 inside the SW4/6 must be moved from “Normal” to “Slave Sys4”
position to allow it to act as a slave. (See SW4/6 documentation.)
After making all the cable connections, go to page
Projector
BNC Cable
Projector
Comm Adapter
Projector Communication
Extension Cable ![]()
![]()
![]()
Rear Panel
INPUT 1
H/HV V
AUDIO
R/C G/Y B
INPUT 2
H/HV | V | AUDIO |
|
| |
R/C | G/Y | B |
INPUT 3
H/HV V
AUDIO
R/C G/Y B
INPUT 4
H/HV V
AUDIO
R/C G/Y B
| OUTPUT |
|
|
|
PJ COMM | H/HV | V | AUDIO |
|
|
|
|
| |
R/C |
| G/Y | B |
System 4 Slave Adapter ![]()
![]()
![]()
* Do not connect Pin #4 or Pin #8 (improper slave operation will occur)
Laserdisc Player | VCR/VTR with Audio |
with |
|
and Stereo Audio |
|
SW 6 AR MX
M
A
N
U
A
L
VCR
Control System
SVGA Compatible | Laptop Computer |
Computer |
|
Figure 4-2. System 4xi Master with an SW6 ARMX Slave Switcher
Extron • System 4xi Switcher Series • User’s Manual |
