3.INITIALIZATION AND ADJUSTMENT
3.1Tuning Initialization
Tune the radar as follows: Press [RADAR MENU] [0] [0] [2] [0] [0] [0] [0] (TUNE INITIALIZE on RADAR 3 menu) and press the [ENT] key. Also, confirm that "2.MODEL" is set to
3.2Accessing Menus for Initialization and Adjustment
1.Turn on the power.
2.Press the [RADAR MENU] key five times while pressing and holding down the [HL OFF] key.
3.2.1 Restoring default settings
1.Press [RADAR MENU] [0] [0] [0] [2] [0] [0] [0] to display the INITIAL SETTING 4 menu.
2.Press the [0] key to select FACTORY DEFAULT.
3.Press the [ENTER] key five times, and turn the power off and on again.
4.“Initializing” appears during restoring. It takes about 90 seconds to restore the default settings, after which the normal display appears. Confirm that "2.MODEL" is set to
3.3Adjusting Video Signal Level
When the signal cable is very long, the video amplifier input level decreases, shrinking target echoes. To prevent this, confirm (and adjust if necessary) video amplifier input level.
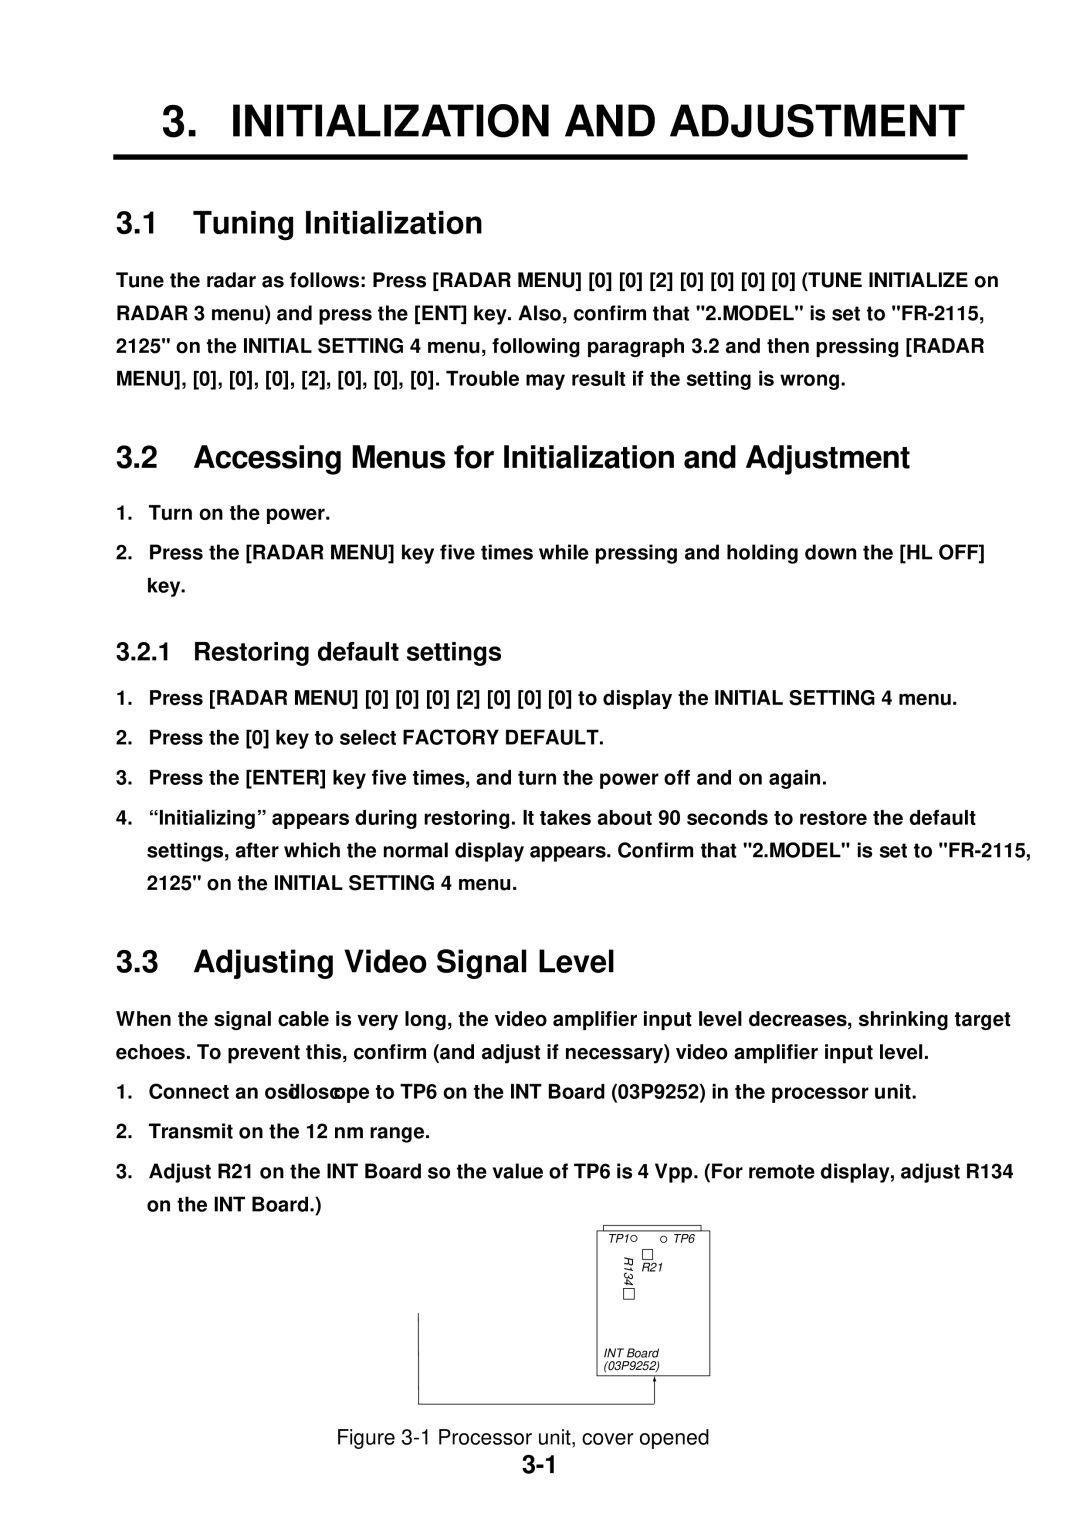
1.Connect an oscilloscope to TP6 on the INT Board (03P9252) in the processor unit.
2.Transmit on the 12 nm range.
3.Adjust R21 on the INT Board so the value of TP6 is 4 Vpp. (For remote display, adjust R134 on the INT Board.)
TP1![]()
R134
![]() TP6
TP6
R21
INT Board (03P9252)