Installation Instructions
WALL-MOUNTED INSTALLATION—RECIRCULATING
6 CONNECT ELECTRICAL
Verify that power is turned off at the source.
WARNING: If house wiring is not
ADVERTISSEMENT
Si la maison n’est pas câblee avec deux fils et un fil
de terre, l’installateur doit installer un fil de terre. Quand les fils sont en aluminium, il faut prendre soin d’utiliser des connecteurs aluminium à cuivre avec une pâte antioxydante approuvée par U.L.
•Remove junction box cover and knockout.
•Use a conduit connector to secure the conduit to the junction box.
•Connect white leads to branch circuit white lead.
•Connect black leads to branch circuit black lead.
•Connect green/yellow leads to branch circuit green lead or bare ground lead.
•Secure all connections with wire nuts on each electrical connector.
•Push wires into junction box and replace cover. Be sure wires are not pinched.
•Secure electrical panel cover with original screws.
7 INSTALL DUCT COVERS
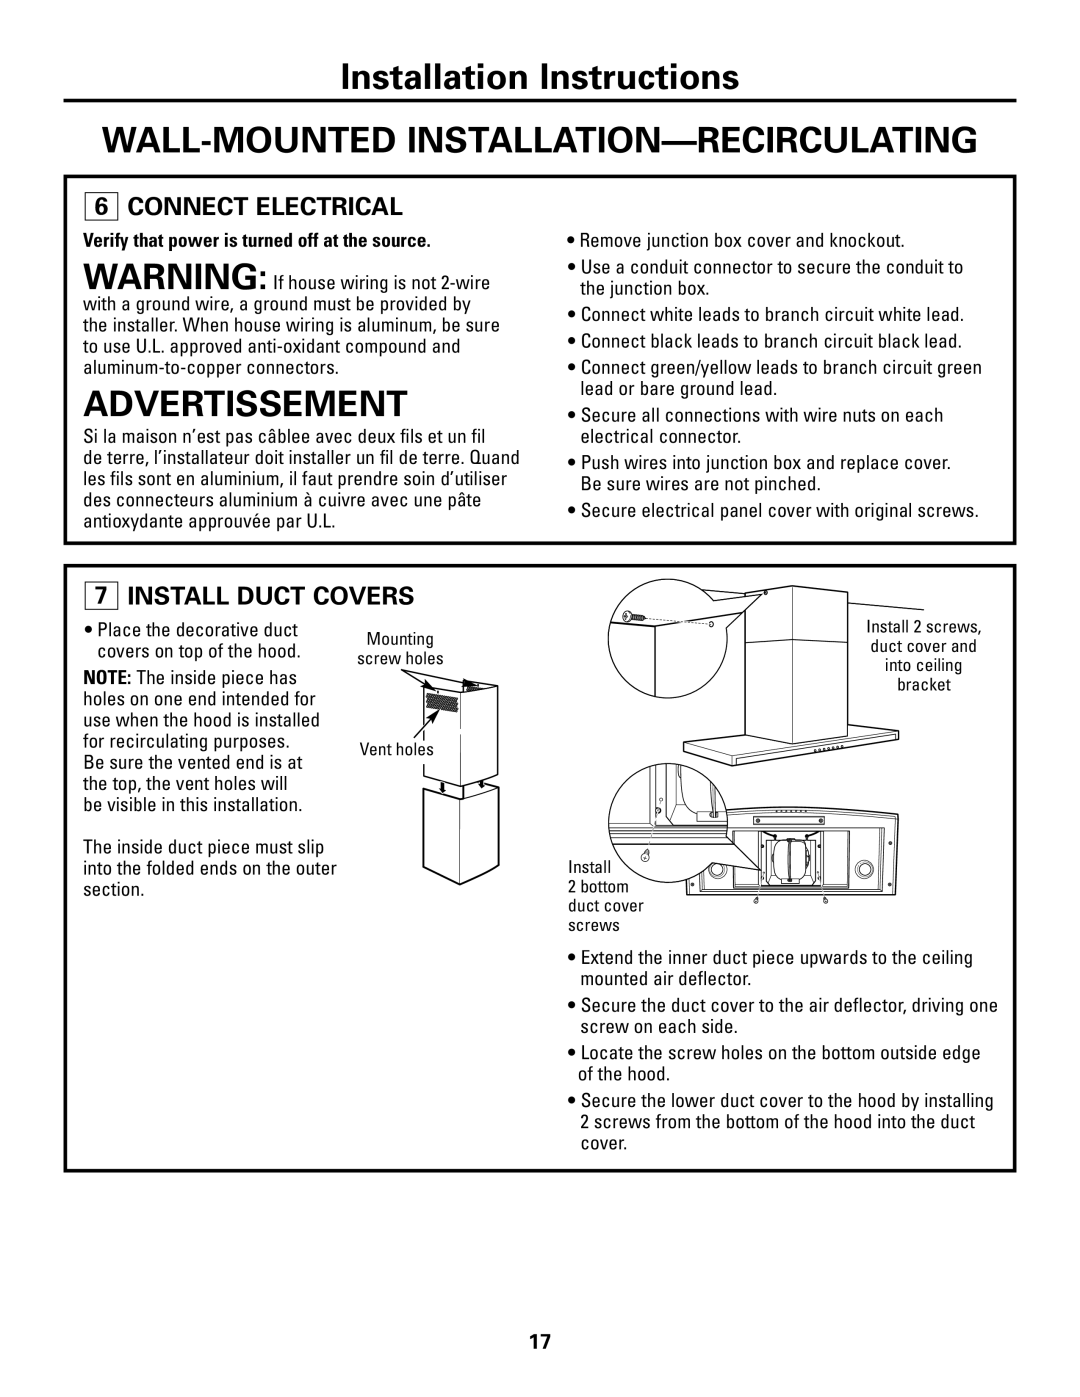
•Place the decorative duct covers on top of the hood.
NOTE: The inside piece has holes on one end intended for use when the hood is installed for recirculating purposes.
Be sure the vented end is at the top, the vent holes will be visible in this installation.
The inside duct piece must slip into the folded ends on the outer section.
Mounting
screw holes
Vent holes 
Install 2 screws, duct cover and into ceiling bracket
Install
2 bottom duct cover screws
•Extend the inner duct piece upwards to the ceiling mounted air deflector.
•Secure the duct cover to the air deflector, driving one screw on each side.
•Locate the screw holes on the bottom outside edge of the hood.
•Secure the lower duct cover to the hood by installing 2 screws from the bottom of the hood into the duct cover.
17
