3.Place the extension table assembly upright with the feet on the ground, align the slots in the extension table bracket with the rear rail mounting holes, then fasten the table to the rail with two
Flange Bolts
Bracket
Figure 20. Outfeed table fastened to rear rail.
4.Secure the lower shelf brackets to the sup- port legs and cabinet with four M6-1 x 12 hex bolts, four flat washers and two hex nuts.
5.Install the lower shelf on the brackets.
6.Place the 913/8" fence tube over the 913/8" front rail and secure with nine M8-1.25 x 12 flange bolts as shown in Figure 21.
Flange Bolt
Figure 21. Fence tube mounted to front fence
rail.
Saw Blade
The saw blade is extremely sharp. Use extra care when handling the blade or working near it. Serious injury is possible.
Review this section, even if your saw blade came
To install the blade:
1.DISCONNECT THE SAW FROM POWER!
2.Remove the table insert, blade guard, and
3.Use the arbor wrenches to loosen and remove the arbor nut, flange, and blade.
Note: The arbor nut has right hand threads; turn it counterclockwise to loosen.
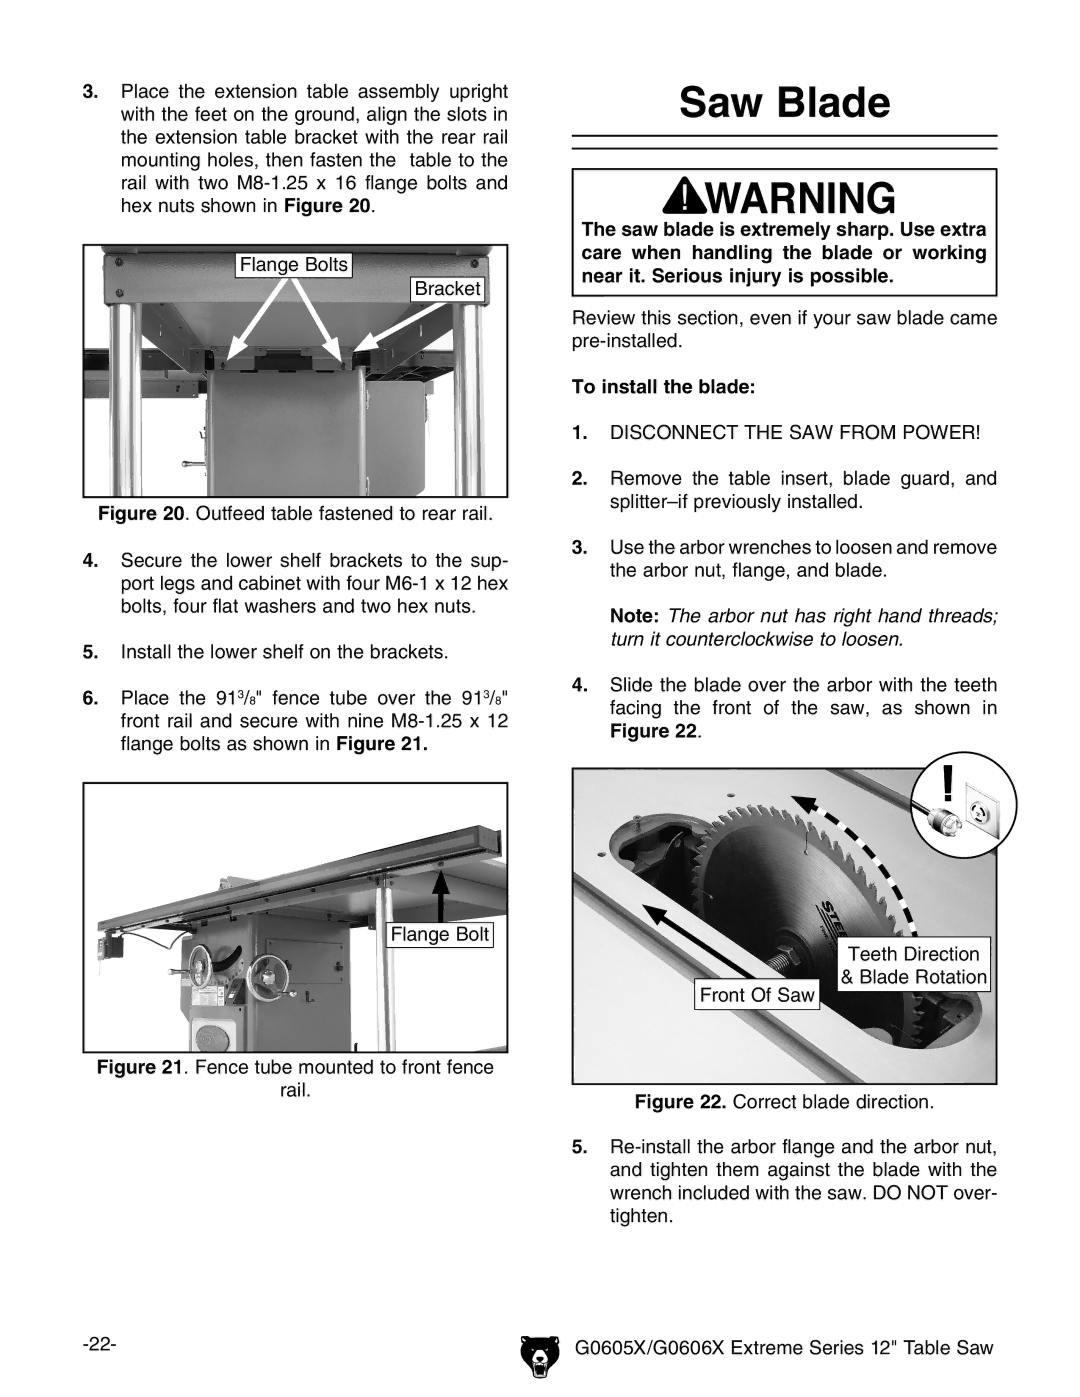
4.Slide the blade over the arbor with the teeth facing the front of the saw, as shown in Figure 22.
Teeth Direction |
& Blade Rotation |
Front Of Saw |
Figure 22. Correct blade direction.
5.Re-install the arbor flange and the arbor nut, and tighten them against the blade with the wrench included with the saw. DO NOT over- tighten.
G0605X/G0606X Extreme Series 12" Table Saw |