Place the fence alongside the miter slot | (Figure |
82) and check the fence to miter slot parallelism | |
and the clamping strength. |
|
|
|
|
|
Figure 82. Example of fence aligned parallel to
miter slot.
| ||
screws so the fence is parallel to the miter slot | ||
and the clamping pressure is sufficient. | ||
Optional: If you are cutting wet or green stock, | ||
offsetting the rear of the fence | 1 | /64" from the blade |
|
| |
using the set screws in Figure 81 can help pre- | ||
vent the workpiece from binding and burning. | ||
Miter Gauge | ||
|
|
|
|
|
|
Tools Needed |
| Qty |
Hex Wrench 2.5mm | 1 | |
Phillips Head Screwdriver | 1 | |
Machinist Square | 1 | |
Adjustable Square | 1 | |
Wrench 8mm | 1 | |
To adjust the miter gauge so it is perpendicu- lar to the saw blade:
1.Slide the miter gauge into the miter gauge slot to the left of the blade.
G0605X/G0606X Extreme Series 12" Table Saw
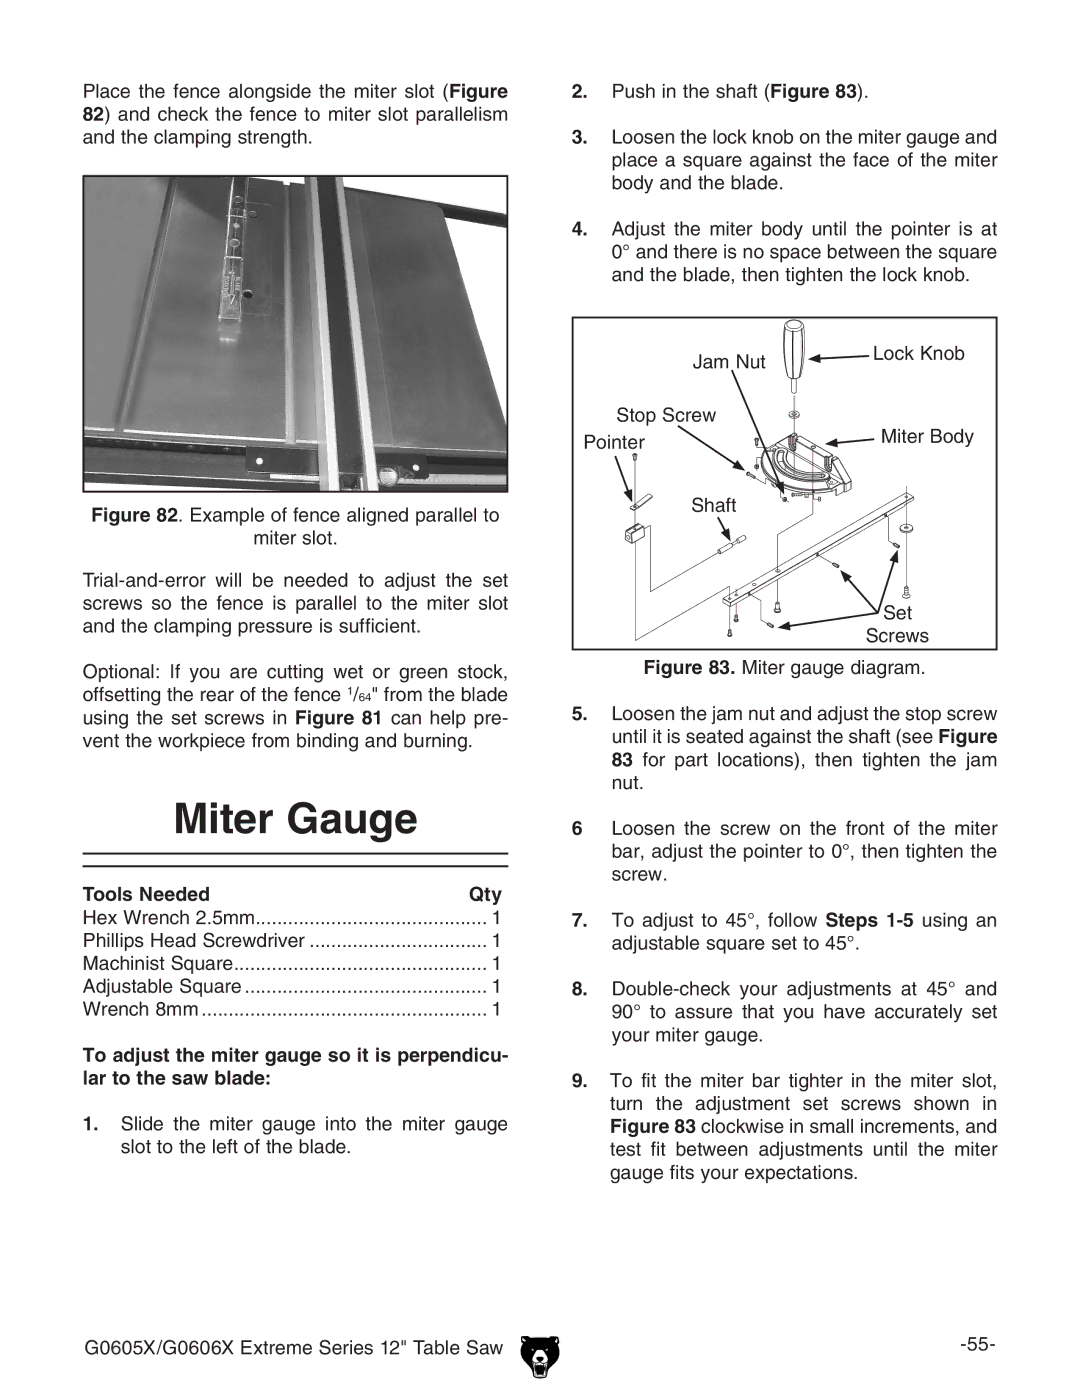
2.Push in the shaft (Figure 83).
3.Loosen the lock knob on the miter gauge and place a square against the face of the miter body and the blade.
4.Adjust the miter body until the pointer is at 0° and there is no space between the square and the blade, then tighten the lock knob.
Jam Nut | Lock Knob | |
| ||
Stop Screw | Miter Body | |
Pointer | ||
| ||
Shaft |
| |
| Set | |
| Screws |