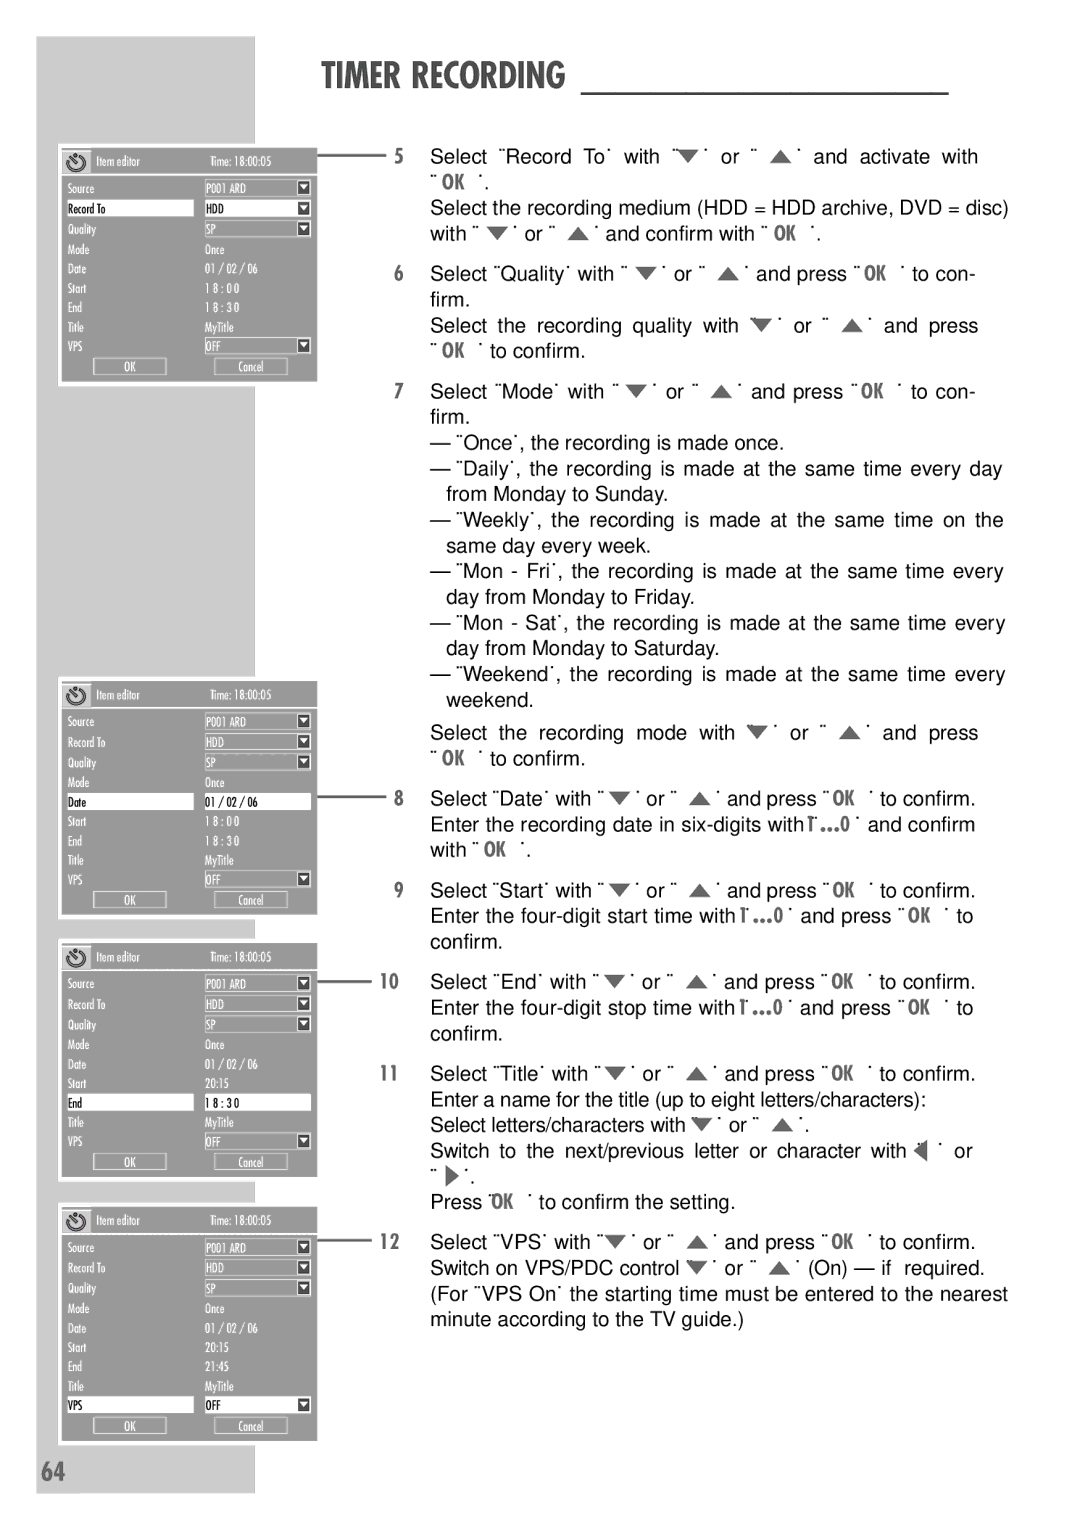
5550 HDD specifications
The Grundig 5550 HDD is a versatile and robust home entertainment system that combines advanced technology with user-friendly features, making it a popular choice among audiophiles and casual listeners alike. This model is designed to cater to a wide range of media formats, ensuring that users can enjoy high-quality audio and visual experiences in the comfort of their homes.One of the standout features of the Grundig 5550 HDD is its high-definition display, which provides crystal-clear images and vibrant colors. This makes it an excellent choice for viewing movies, playing video games, or enjoying photo slideshows. The device also supports a variety of multimedia formats, including MP3, WAV, and video files, which allows users to play their favorite songs and videos without the need for additional conversion software.
The Grundig 5550 HDD incorporates a built-in hard drive that offers substantial storage capacity, allowing users to store thousands of songs and hours of video without worrying about running out of space. The user-friendly interface makes it easy to navigate through the stored content, while the ability to create playlists adds a personalized touch to the listening experience.
Connectivity is another strong point of the Grundig 5550 HDD. It features multiple USB ports and HDMI outputs, enabling users to connect a variety of external devices, such as USB drives, cameras, and even gaming consoles. The inclusion of Bluetooth technology allows for seamless wireless streaming from compatible devices, freeing users from the constraints of physical cables.
In terms of sound quality, the Grundig 5550 HDD does not disappoint. It is equipped with high-quality speakers that deliver rich and balanced audio, enhancing the overall listening experience. The device also supports various audio enhancement technologies, such as surround sound options and customizable equalizer settings, ensuring that users can tailor the audio output to their preferences.
The compact design of the Grundig 5550 HDD ensures that it can fit into any home entertainment setup without occupying too much space. Moreover, the sleek and modern aesthetic complements contemporary home decor, making it a stylish addition to any living room or entertainment area.
In conclusion, the Grundig 5550 HDD is a feature-rich home entertainment system that provides users with an impressive array of functionality. From its high-definition display and ample storage capacity to its robust connectivity options and superior sound quality, this device is designed to elevate the home entertainment experience, catering to the needs of diverse users.

