2.Use the Rip Fence and/or the Miter Gauge to support and guide the workpiece. NOTE: Make sure to lock the Miter Gauge in place by tightening the Setscrew in the Guide Bar. (See Figure Q.)
3.Set the boring depth by adjusting the Depth Gauge on the Quill Feed.
(See page 16.)
TO SET UP THE SHAPER
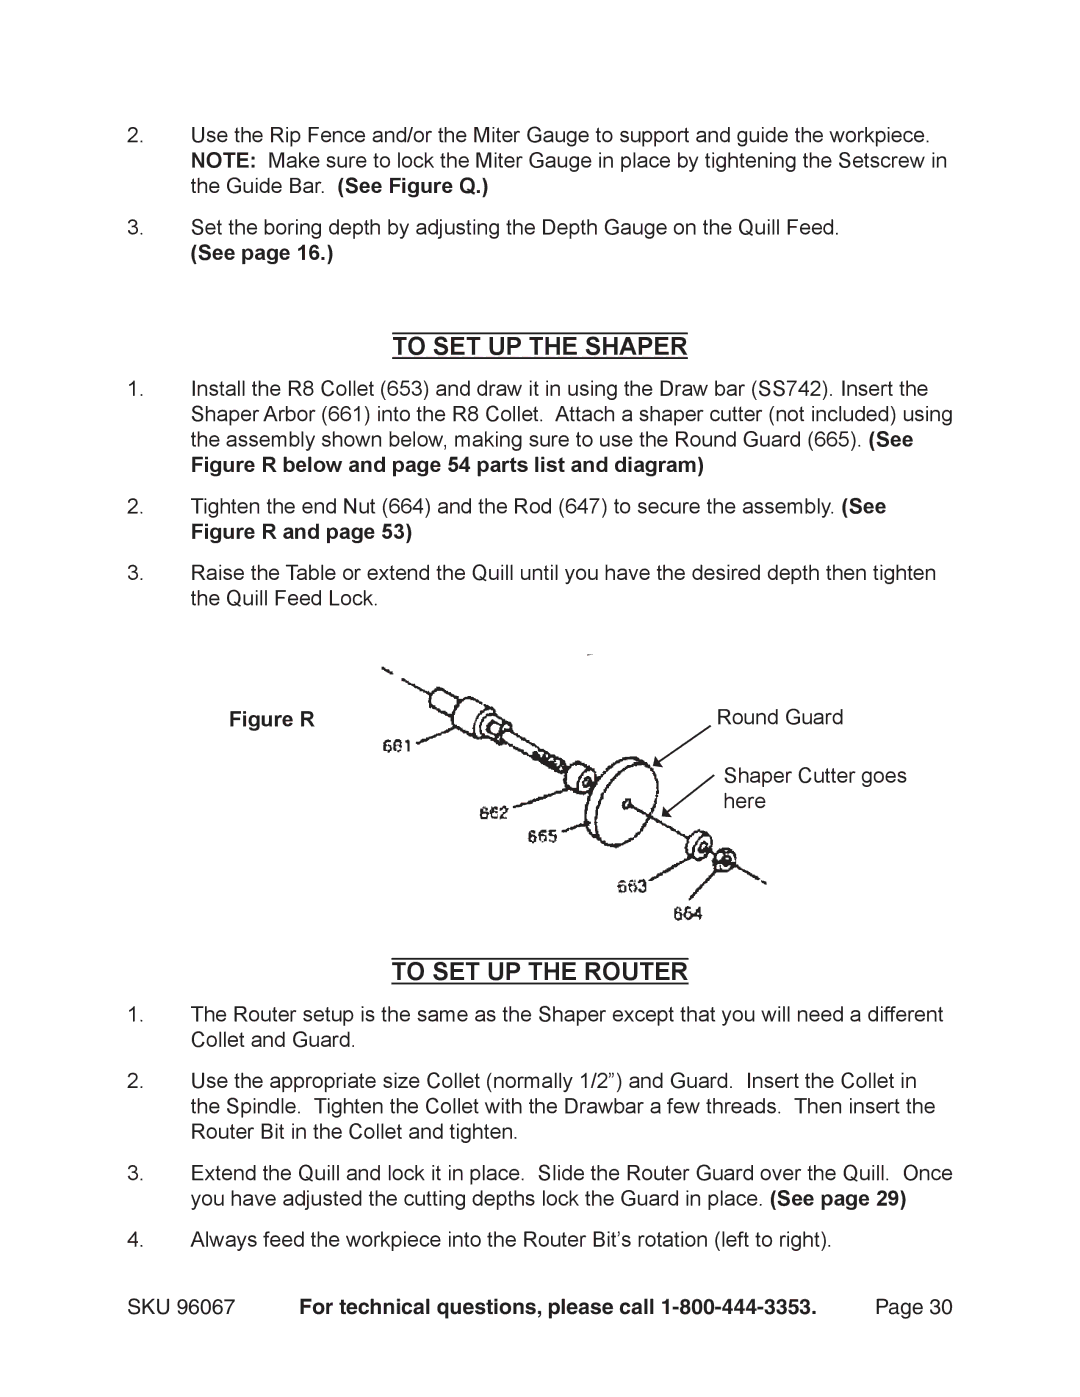
1.Install the R8 Collet (653) and draw it in using the Draw bar (SS742). Insert the Shaper Arbor (661) into the R8 Collet. Attach a shaper cutter (not included) using the assembly shown below, making sure to use the Round Guard (665). (See
Figure R below and page 54 parts list and diagram)
2.Tighten the end Nut (664) and the Rod (647) to secure the assembly. (See
Figure R and page 53)
3.Raise the Table or extend the Quill until you have the desired depth then tighten the Quill Feed Lock.
Figure R | Round Guard |
Shaper Cutter goes here
TO SET UP THE ROUTER
1.The Router setup is the same as the Shaper except that you will need a different Collet and Guard.
2.Use the appropriate size Collet (normally 1/2”) and Guard. Insert the Collet in the Spindle. Tighten the Collet with the Drawbar a few threads. Then insert the Router Bit in the Collet and tighten.
3.Extend the Quill and lock it in place. Slide the Router Guard over the Quill. Once you have adjusted the cutting depths lock the Guard in place. (See page 29)
4.Always feed the workpiece into the Router Bit’s rotation (left to right).
SKU 96067 | For technical questions, please call | Page 30 |
