23
| � |
4 | 5 |
| AF |
| ����Sel. |
![]() �
�
![]() �
�
�����
����
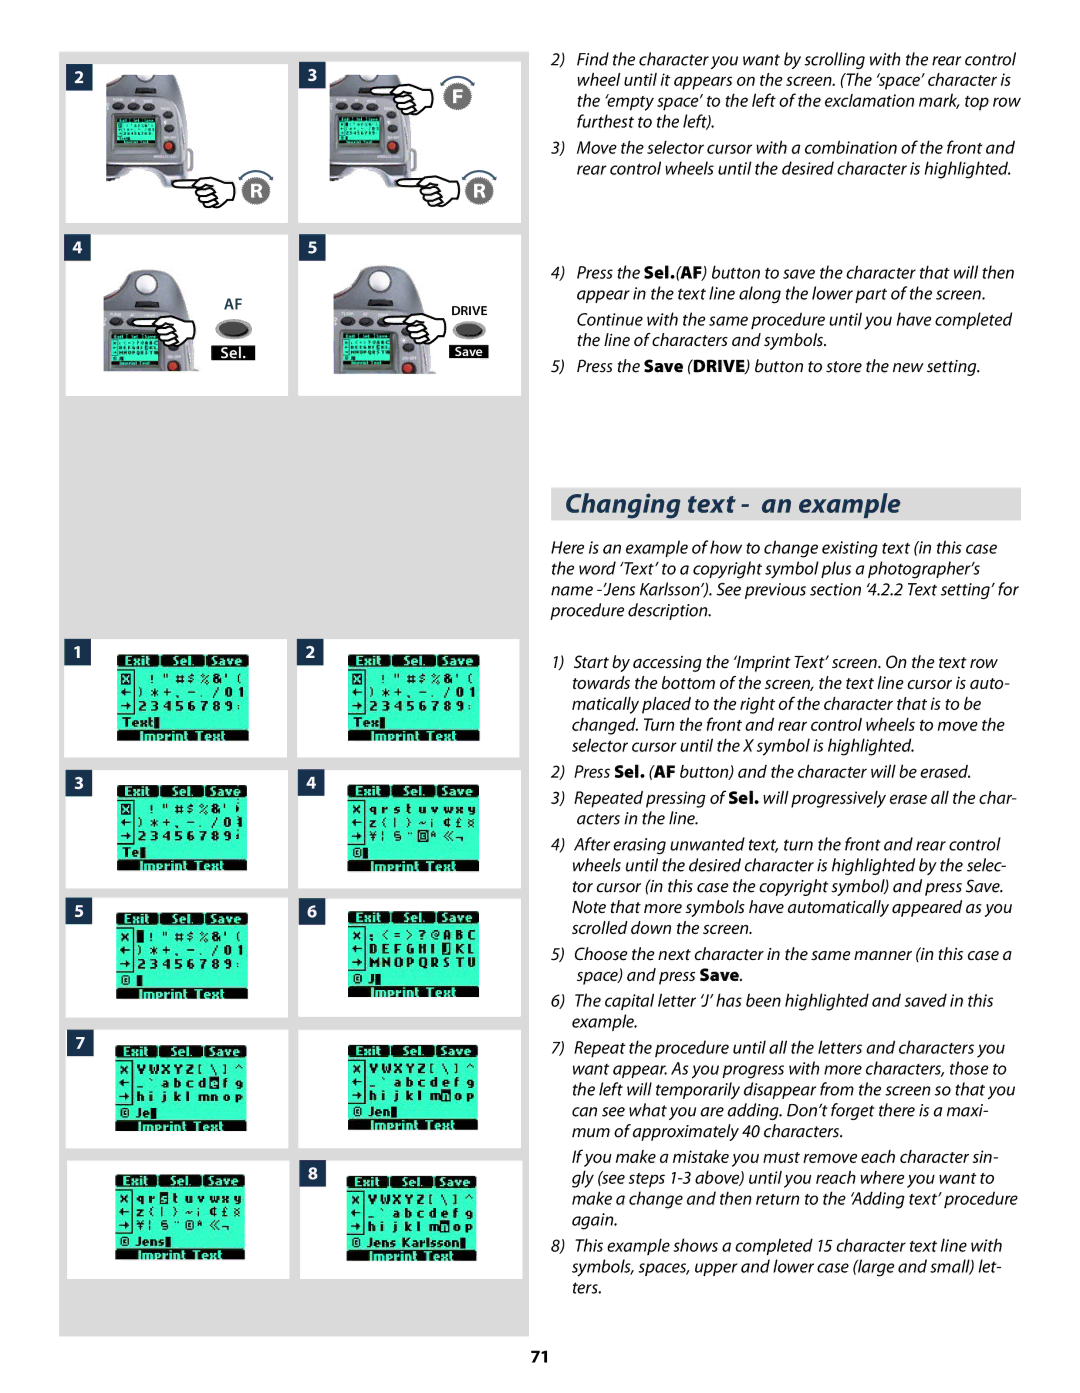
2)Find the character you want by scrolling with the rear control wheel until it appears on the screen. (The ‘space’ character is the ‘empty space’ to the left of the exclamation mark, top row furthest to the left).
3)Move the selector cursor with a combination of the front and rear control wheels until the desired character is highlighted.
4)Press the Sel.(AF) button to save the character that will then appear in the text line along the lower part of the screen.
Continue with the same procedure until you have completed the line of characters and symbols.
5)Press the Save (DRIVE) button to store the new setting.
|
|
| Changing text - an example | |
|
| Here is an example of how to change existing text (in this case | ||
|
| the word ‘Text’ to a copyright symbol plus a photographer’s | ||
|
| name | ||
|
| procedure description. | ||
1 | 2 | 1) | Start by accessing the ‘Imprint Text’ screen. On the text row | |
|
| |||
|
|
| towards the bottom of the screen, the text line cursor is auto- | |
|
|
| matically placed to the right of the character that is to be | |
|
|
| changed. Turn the front and rear control wheels to move the | |
|
|
| selector cursor until the X symbol is highlighted. | |
3 | 4 | 2) | Press Sel. (AF button) and the character will be erased. | |
3) | Repeated pressing of Sel. will progressively erase all the char- | |||
|
| |||
|
|
| acters in the line. | |
|
| 4) | After erasing unwanted text, turn the front and rear control | |
|
|
| wheels until the desired character is highlighted by the selec- | |
|
|
| tor cursor (in this case the copyright symbol) and press Save. | |
5 | 6 |
| Note that more symbols have automatically appeared as you | |
|
|
| scrolled down the screen. | |
|
| 5) | Choose the next character in the same manner (in this case a | |
|
|
| space) and press Save. | |
|
| 6) | The capital letter ‘J’ has been highlighted and saved in this | |
|
|
| example. | |
7 |
| 7) | Repeat the procedure until all the letters and characters you | |
|
|
| want appear. As you progress with more characters, those to | |
|
|
| the left will temporarily disappear from the screen so that you | |
|
|
| can see what you are adding. Don’t forget there is a maxi- | |
|
|
| mum of approximately 40 characters. | |
| 8 |
| If you make a mistake you must remove each character sin- | |
|
| gly (see steps | ||
|
|
| make a change and then return to the ‘Adding text’ procedure | |
|
|
| again. | |
|
| 8) | This example shows a completed 15 character text line with | |
|
|
| symbols, spaces, upper and lower case (large and small) let- | |
|
|
| ters. | |
71