Installation
5. Installation of Decoration Panel
The decoration panel has its installation direction.
Before installing the decoration panel, always remove the paper template.
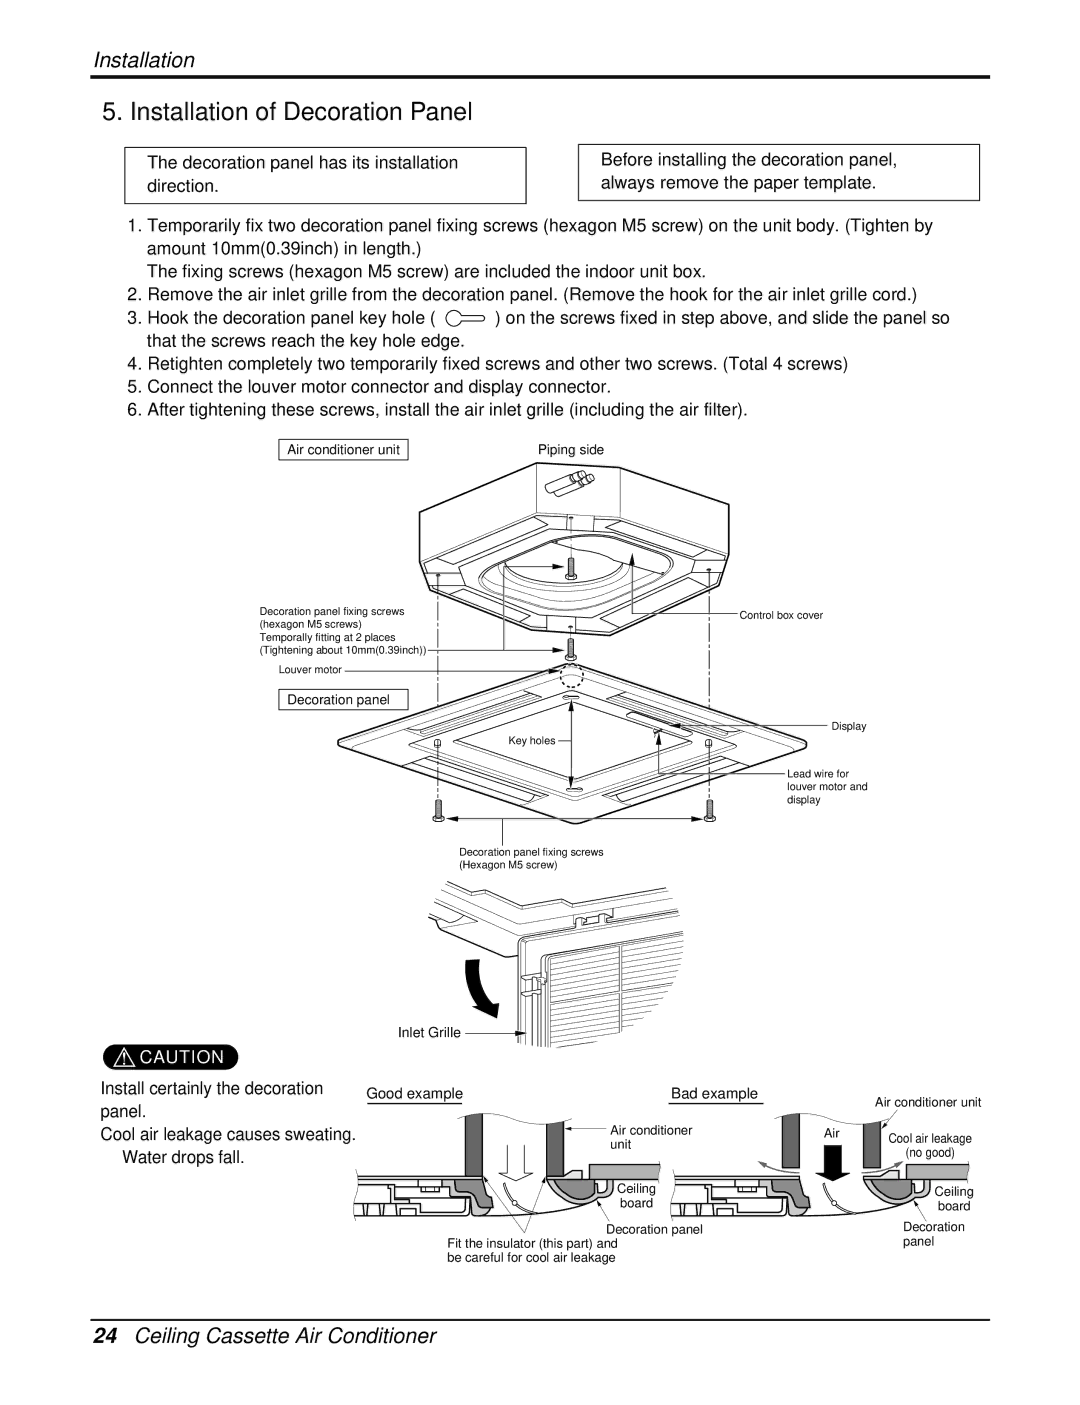
1.Temporarily fix two decoration panel fixing screws (hexagon M5 screw) on the unit body. (Tighten by amount 10mm(0.39inch) in length.)
The fixing screws (hexagon M5 screw) are included the indoor unit box.
2.Remove the air inlet grille from the decoration panel. (Remove the hook for the air inlet grille cord.)
3.Hook the decoration panel key hole ( ![]() ) on the screws fixed in step above, and slide the panel so that the screws reach the key hole edge.
) on the screws fixed in step above, and slide the panel so that the screws reach the key hole edge.
4.Retighten completely two temporarily fixed screws and other two screws. (Total 4 screws)
5.Connect the louver motor connector and display connector.
6.After tightening these screws, install the air inlet grille (including the air filter).
Air conditioner unit
Piping side
Decoration panel fixing screws (hexagon M5 screws) Temporally fitting at 2 places (Tightening about 10mm(0.39inch)) ![]()
InletLouverGrillemotor
Decoration panel
Key holes
Control box cover
Display
Lead wire for louver motor and display
Decoration panel fixing screws (Hexagon M5 screw)
| Inlet Grille |
|
CAUTION |
|
|
Install certainly the decoration | Good example | Bad example |
panel. |
|
|
Cool air leakage causes sweating. |
| Air conditioner |
Water drops fall. |
| unit |
|
| |
|
| Ceiling |
|
| board |
|
| Decoration panel |
| Fit the insulator (this part) and | |
| be careful for cool air leakage | |
Air
Air conditioner unit
Cool air leakage
(no good)
Ceiling
board
Decoration panel
24Ceiling Cassette Air Conditioner